SXTsq Embedded LTE4
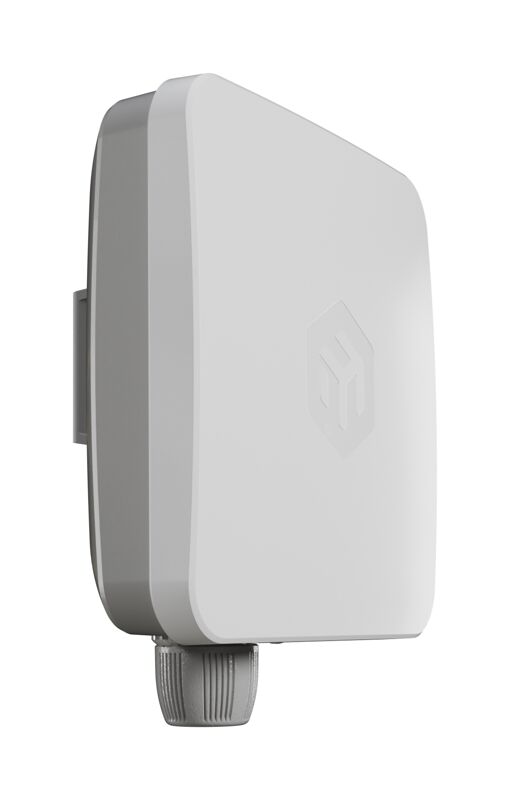
A cost-effective outdoor LTE device with an integrated 2×2 MIMO directional antenna, Cat4 LTE modem and RouterOS v7, designed for reliable remote connectivity. Available in EU (EC25-EU) and Global (EG25-G) versions with eSIM support, PoE-in (12–57 V), and a rugged IP-rated SXTsq outdoor enclosure, it delivers stable LTE connectivity with only 5 W max power consumption. This is the regular or EU version. See the SXTsq Embedded LTE4 product page for full specifications and brochures. See the SXTsq Embedded LTE4 product page for full specifications and brochures.
EC25-EU&SXTsq
A cost-effective outdoor LTE device with an integrated 2×2 MIMO directional antenna, Cat4 LTE modem and RouterOS v7, designed for reliable remote connectivity. Available in EU (EC25-EU) and Global (EG25-G) versions with eSIM support, PoE-in (12–57 V), and a rugged IP-rated SXTsq outdoor enclosure, it delivers stable LTE connectivity with only 5 W max power consumption. This is the regular or EU version.
Quickstart
- Insert the Nano SIM card into the slot according to the indications;
- Connect the device to the included power adapter;
- Connect the device to the computer using Ethernet cable;
- Configure your device using a web browser through WebFig or the WinBox tool at https://mt.lv/winbox. Multiple configuration methods are available to ensure accessibility;
- Access WebFig by opening https://192.168.88.1, and for WinBox, download the tool, navigate to the Neighbors tab, and click on the MAC address. The username is "admin" with no password (or, for some models, check user and wireless passwords on the sticker);
- Enter the PIN code, if required by your mobile network operator;
- Click the "Check for updates" button and update RouterOS to the latest version. A valid SIM card must be inserted or an eSIM must be set up, and an active Internet connection is required;
- For a manual update of the device, visit mikrotik.com, select your model, and locate the required packages in the "Downloads" section;
- Upload downloaded packages to the WebFig or WinBox "Files" menu and reboot the device;
- By upgrading your RouterOS software to the latest version, you can ensure optimal performance, stability, and security updates;
- Set up your router password.
MikroTik mobile app
Use the MikroTik smartphone app to configure your router in the field, or to apply the most basic initial settings for your MikroTik home access point.

- Scan QR code and choose your preferred OS.
- Install and open application.
- By default, the IP address and user name will be already entered.
- Click Connect to establish a connection to your device through a wireless network.
- Choose Quick setup and application will guide you through all basic configuration settings in a couple of easy steps.
- An advanced menu is available to fully configure all necessary settings.
Configuration
Configuration can be done using a web browser via WebFig, the WinBox tool https://mt.lv/winbox methods are available to ensure accessibility.
- To access WebFig, open https://192.168.188.1 in your browser.
- For WinBox, download the tool, go to the Neighbors tab, and click on the MAC address. The default username is "admin", please find the password on the device sticker. We recommend checking for updates frequently to ensure your RouterOS software remains up to date for the best performance and stability. Click the "Check for updates" button in WinBox or WebFig to update to the latest version.
A valid SIM card must be inserted or an eSIM set up, along with an active Internet connection, for updates to work.
RouterOS provides a wide range of configuration options beyond what's described in this document. We suggest visiting https://mt.lv/help explore these features.
For recovery purposes, it is possible to boot the device for reinstallation, see section .
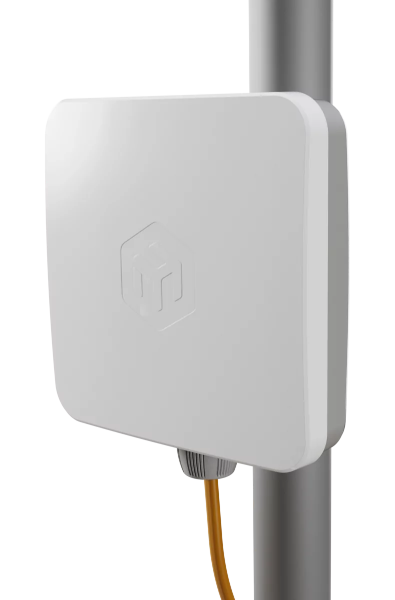
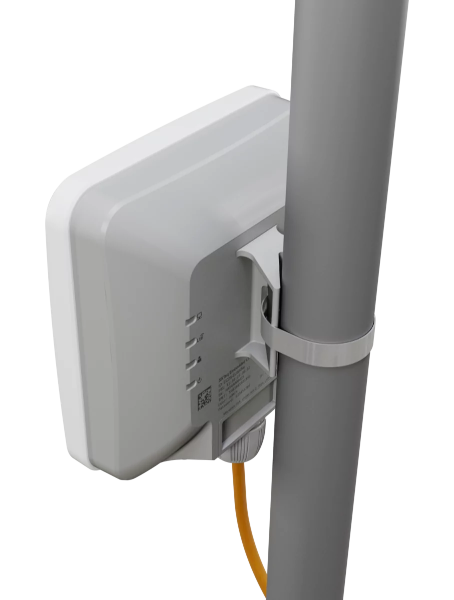
Mounting
The IP rating scale for this device is IP67. When mounting outdoors, please ensure that any cable openings are directed downwards. We recommend using POE injector and proper grounding. When using and installing this device please pay attention to Maximum Permissible Exposure (MPE) safety distance with a minimum of 20 cm between the radiator and your body.
The device comes bundled with a metal mounting ring, which can be used on the mounting slot on the backside of the device.
- Use a Phillips screwdriver to loosen the metal ring.
- Slide one end of it through the most convenient of the three mounting slots.
- Position the device on the pole where it will be mounted.
- Slide the loose end of the mounting ring back to its closing latch and use the screwdriver to tighten it.
- The included ring mount allows for mounting on 3-7 cm diameter poles. It's recommended to secure Ethernet cable to the pole using zip ties. With the distance from the device approximately 30 cm.
Specifications
| Parameters | Description |
|---|---|
| Product Code | EC25-EU&SXTsq |
| Architecture | ARM 32bit |
| CPU | Cortex A7 up to 1.2 GHz |
| CPU Core Count | 1 |
| CPU Nominal Frequency | 800 MHz |
| RAM | 256 MB |
| Storage | 512 MB NAND |
| Operating System | RouterOS v7 |
| RouterOS License | Level 3 |
| Operating Temperature | -40°C to +70°C |
| Max Power Consumption | 5 W |
| Power | PoE-IN (802.3af/at), 12–28 V |
| Ethernet | 1 × 10/100/1000 Mbps |
| SIM | 2 Modem: Nano SIM + eSIM |
| Mobile: 2G | Class 33 |
| 2G Bands | 3 (1800 MHz), 8 (900 MHz) |
| Mobile: 3G | Category R8 (DL 42.2 Mbps / UL 5.76 Mbps) |
| 3G Bands | 1 (2100 MHz), 8 (900 MHz) |
| Mobile: LTE | Category 4 (DL 150 Mbps / UL 50 Mbps) |
| MIMO | DL 2×2 |
| LTE FDD Bands | 1 (2100 MHz), 3 (1800 MHz), 7 (2600 MHz), 8 (900 MHz), 20 (800 MHz), 28A (700 MHz) |
| LTE TDD Bands | 38 (2600 MHz), 40 (2300 MHz), 41 (2500 MHz) |
| TAC | 86554604 |
| GNSS | Yes |
| Cooling | Passive |
| Monitoring | CPU temperature monitor |
| Certifications | CE, EAC, ROHS |
| IP Rating | IP67 |
| Dimensions | 129 x 129 x 34 mm |
Powering
The device accepts 12–28 V DC ⎓ via PoE 802.3af/at. A power supply and PoE injector are included.
To connect power:
- Connect the Ethernet cable from the device to the PoE+DATA port of the PoE injector.
- Connect your LAN cable to the injector.
- Connect the power supply and plug it into an outlet.
eSIM settings
By default the device is configured to use the SIM slot. To use the on-board eSIM, switch the slot by using the following command: /interface/lte/settings/set sim-slot=esim
A single eSIM chip can store multiple eSIM profiles, the maximum profile count depends on the eSIM chip used.
See the LTE eSIM page for details.
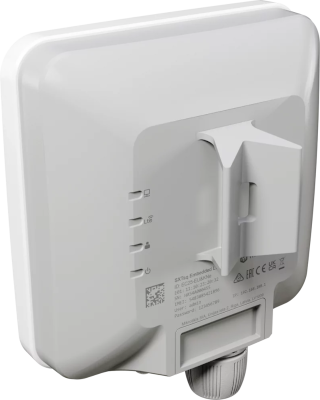
Reset button
The reset button has three functions:
- Hold this button during boot time until the green LED light starts flashing, release the button to reset RouterOS configuration (total 5 seconds).
- Keep holding for 5 more seconds, LED turns solid, release now to turn on CAP mode. The device will now look for a CAPsMAN server (total of 10 seconds).
- Reinstall RouterOS using Netinstall. To reinstall RouterOS using the Netinstall utility, enter the device into BOOTP mode. There are two types of booters available: the regular booter and the backup booter.Regular booter - Power on the device, wait 1-2 seconds, then press and hold the Reset button. Wait until the "USR" LED is blinking, then turns solid "On". When the "USR" LED turns "Off", release the Reset button - the device will enter BOOTP mode.
- Backup booter – Power off the device, press and hold the Reset button, then power it on. Wait until the "USR" LED is blinking, then turns solid "On". When the "USR" LED turns "Off", release the Reset button - the device will enter BOOTP mode using the backup booter. Regardless of the above option used, the system will load the backup RouterBOOT loader if the button is pressed before power is applied to the device. Useful for RouterBOOT debugging and recovery.
NetinstallWhen performing Netinstall, make sure to use the latest v7 version of both ROS files and the Netinstall software.
Operating system support
The device supports RouterOS software version 7 and higher. The specific factory-installed version number is indicated in the RouterOS menu /system resource. Other operating systems have not been tested.
For important safety instructions and regulatory certifications, please refer to the Safety and Regulatory Information document available on https://mikrotik.com/products. Navigate to: Support & Downloads → Safety and Regulatory Information
Grounding
The device includes a grounding connection (marked ⏚) which you should connect to the grounding installation of the tower or building where the device will be used. This is to substantially reduce the risk of ESD and lightning damage.
Accessories
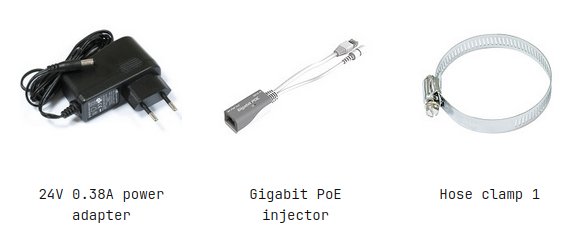
Package includes the following accessories that come with the device:
- EU/US Switching Power Supply 24V DC ⎓, 0.38 A, 9 W
- POE Injector with shielded connector/Gigabit POE injector.
- Hose Clamp SUS304 (Phillips type; clamping diameter range 30-70 mm).