LtAP LTE12 ax
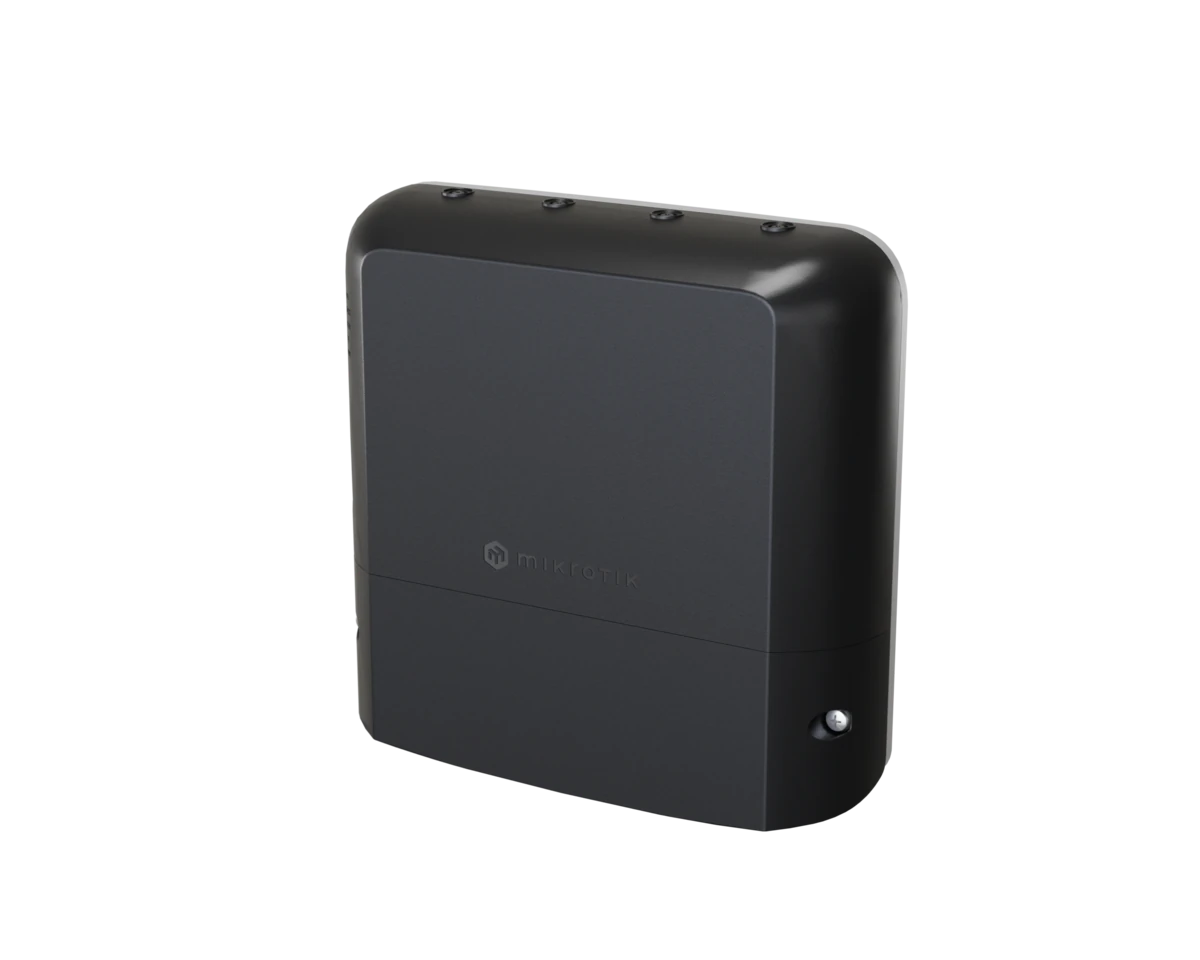
LtAP LTE12 ax (LtAP-5HaxT2HaxD&EG120K-EA)
The LtAP LTE12 ax is a rugged wireless access point with an LTE Category 12 modem, dual-band Wi-Fi 6, eSIM support, and built-in GPS.
Safety Warnings
- Before you work on any MikroTik equipment, be aware of the hazards involved with electrical circuitry, and be familiar with standard practices for preventing accidents. The installer should be familiar with network structures, terms, and concepts.
- Use only the power supply and accessories approved by the manufacturer, and which can be found in the original packaging of this product.
- This equipment is to be installed by trained and qualified personnel, as per these installation instructions. The installer is responsible for making sure that the installation of the equipment is compliant with local and national electrical codes.
- Do not attempt to disassemble, repair, or modify the device. If service is needed, contact MikroTik support.
- This product can be used both indoors and outdoors. Read the mounting instructions carefully before beginning installation. Failure to use the correct hardware and configuration or to follow correct procedures could result in a hazardous situation to people and damage to the system. To install outdoors, make sure to use an enclosure with at least IP54 rating.
- We cannot guarantee that no accidents or damage will occur due to the improper use of the device. Use this product with care and operate at your own risk.
- The socket-outlet shall be installed near the equipment and shall be easily accessible.
- In the case of device failure, disconnect it from power. The fastest way to do so is by unplugging the power adapter from the power outlet.
- This is a Class A product. In a domestic environment, this product might cause radio interference, in which case the user might be required to take adequate measures.
- To avoid contamination of the environment, separate the device from household waste and dispose of it in a safe manner, for example, in designated areas. Become familiar with procedures for properly transporting the equipment to designated collection points in your area.
Exposure to Radio Frequency Radiation: This MikroTik equipment complies with the European Union radiation exposure limits set forth for an uncontrolled environment. This MikroTik device should be installed and operated more than 20 cm away from your body, occupational user, or the general public.
Quickstart
- Open the bottom lid;
- Insert a SIM card into the slot as indicated on the device;
- Connect the device to the power source;
- Navigate to the network connections section on your computer and locate the wireless network named "MikroTik-...". Proceed to connect to it (check the wireless passwords on the sticker);
- Establish a connection using a mobile application. Alternatively, use WebFig in a web browser or the "WinBox" configuration tool at https://mt.lv/winbox. Multiple configuration methods are available to ensure accessibility;
- Download and open "WinBox", and choose the "Neighbors" tab to find the device;
- Click on the MAC address. The username is "admin" and there is no password (or, for some models, check user and wireless passwords on the sticker);
- For a manual update of the device, visit mikrotik.com, select your model, and locate the required packages in the "Downloads" section;
- Upload downloaded packages to the WebFig or WinBox "Files" menu and reboot the device;
- By upgrading your RouterOS software to the latest version, you can ensure optimal performance, stability, and security updates;
- In the "QuickSet" menu set up the following: Choose your country, to apply country regulation settings;
- Set up your wireless network password in the left field;
- Set up your router password in the bottom field.
Extension slots and ports
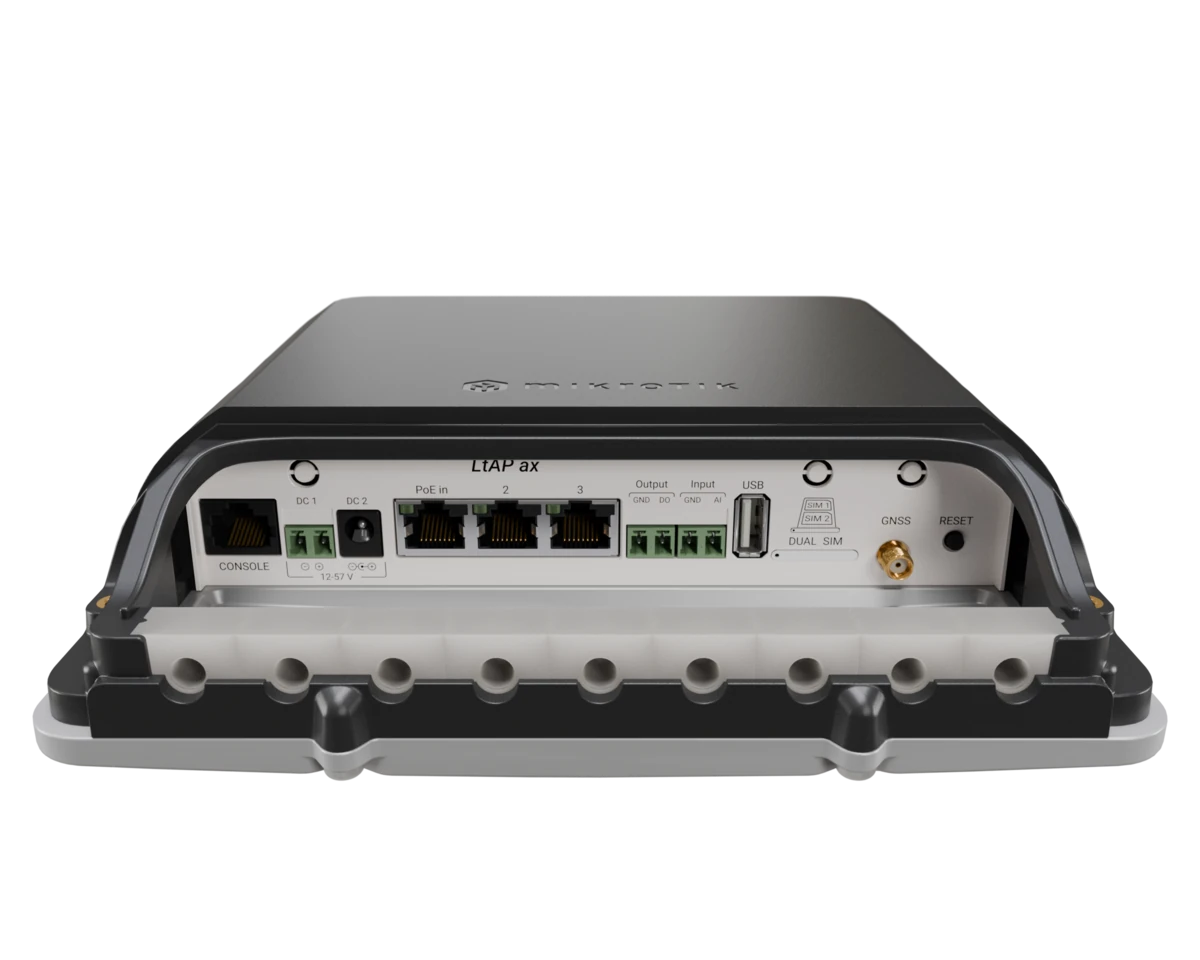
- Dual-band Wi-Fi 6 access point module: 2.4 GHz 802.11b/g/n/ax 2x2 and 5 GHz 802.11a/n/ac/ax 3x3; AP/station/bridge/p2p modes are supported. Onboard antennas are built in (6 dBi at 2.4 GHz, 7.5 dBi at 5 GHz); dedicated drilling spots allow adding SMA connectors for external antennas.
- One miniPCIe slot and two Nano SIM slots, with eSIM support.
- Built-in GNSS module.
- Three Gigabit Ethernet ports, supporting automatic cross/straight cable correction (Auto MDI/X). Either straight or crossover cable can be used for connecting to other network devices.
- RJ45 serial console port, configured as 115200 bit/s, 8 data bits, 1 stop bit, no parity.
- One USB type A port for storage devices or cellular modems.
Specifications
| Parameter | Value |
|---|---|
| Product name | LtAP-5HaxT2HaxD&EG120K-EA |
| CPU | Dual-Core EN7562CT 950 MHz |
| CPU architecture | ARM 32bit |
| RAM type | DDR3 |
| Size of RAM | 512 MB |
| Storage | NAND 128 MB |
| Number of 1G Ethernet ports | 3 |
| MiniPCIe slots | 1 |
| Number of USB slots | 1 USB type A |
| SIM slots | Dual Nano SIM, eSIM |
| Switch chip model | EN7562CT |
| Wireless interface model | MT7916AN (2.4 GHz), MT7976AN (5 GHz) |
| Wireless | 2.4 GHz 802.11b/g/n/ax, 5 GHz 802.11a/n/ac/ax, triple-chain 5 GHz radio |
| GNSS standard | GPS, GLONASS, Galileo, BeiDou, QZSS |
| GNSS interface model | AG3352Q |
| LTE modem | EG120K-EA |
| TAC | 86056104 |
| MIMO DL | 4x4 |
| MIMO UL | 1x1 |
| LTE category | 12 (600 Mbps downlink, 150 Mbps uplink) |
| 3G category | R8 (DL: 42.2 Mbps; UL: 5.76 Mbps) |
| LTE FDD bands | 1 (2100 MHz) / 3 (1800 MHz) / 5 (850 MHz) / 7 (2600 MHz) / 8 (900 MHz) / 20 (800 MHz) / 28 (700 MHz) / 32 (1500 MHz) |
| LTE TDD bands | 38 (2600 MHz) / 40 (2300 MHz) / 41 (2500 MHz) |
| 3G bands | 1 (2100 MHz) / 3 (1800 MHz) / 5 (850 MHz) / 8 (900 MHz) |
| Number of DC inputs | 3 (DC jack, PoE in, 2-pin terminal) |
| DC jack input voltage | 12–57 V |
| PoE in input voltage | 18–57 V |
| 2-pin terminal input voltage | 12–57 V |
| Power adapter nominal voltage | 24 V |
| Power adapter nominal current | 1.2 A |
| PoE in | 802.3af/at |
| Max power consumption (without attachments) | 15 W |
| Max power consumption | 21 W |
| Operating system | RouterOS v7, License level 4 |
| Operating temperature | -40 °C to +70 °C |
| Ingress protection | IP66 |
| Certifications | CE, EAC, RoHS |
For more information about this product, specifications, pictures, downloads, and test results visit our web page: https://mikrotik.com/product/ltap_lte12
Mounting
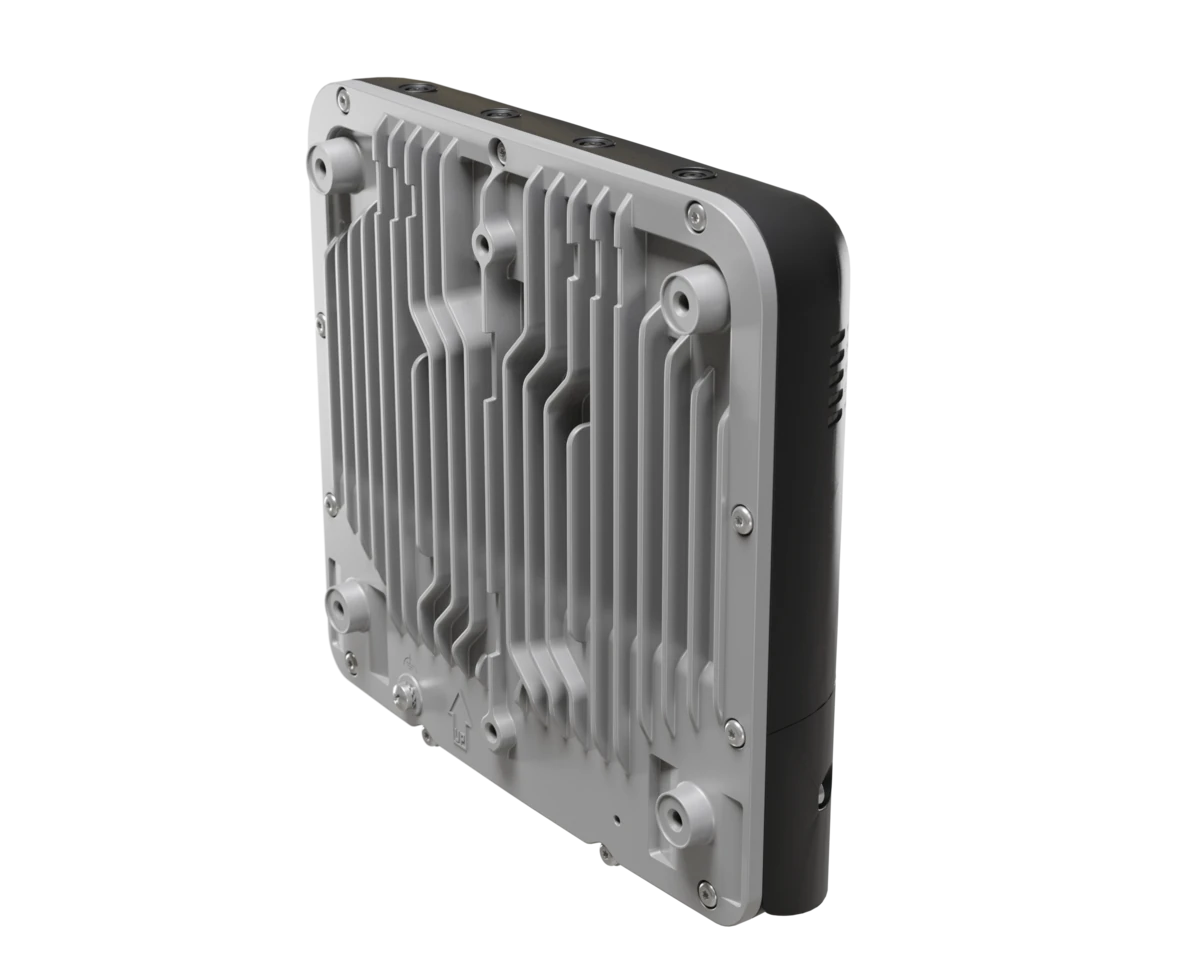
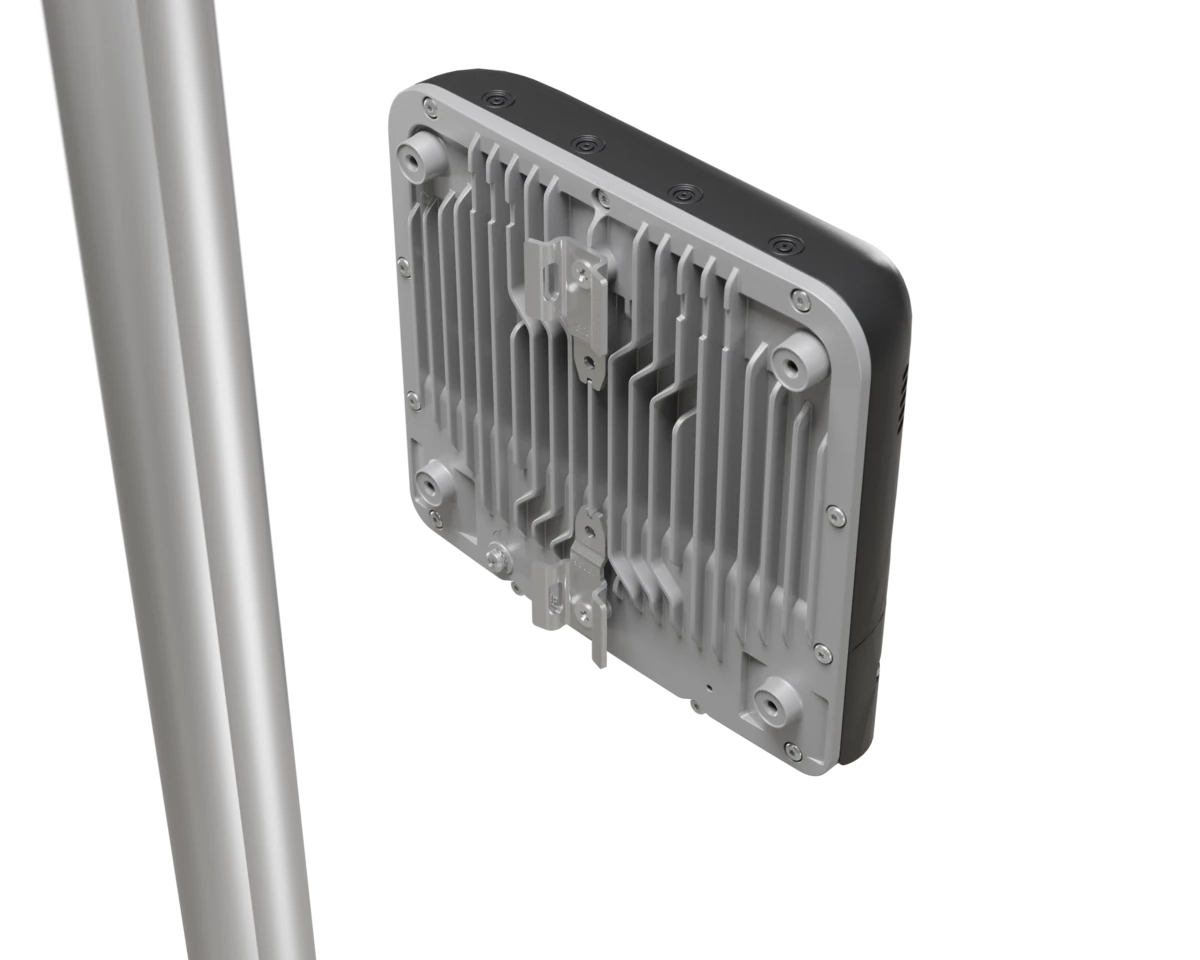
The device can be mounted on a wall or on a pole, either horizontally or vertically, using the included mounting hardware.
Wall mounting
- Position the device against the wall and mark the mounting points.
- Drill holes at the marked positions and insert wall anchors if necessary.
- Secure the device to the wall using the appropriate screws and the provided mounting hardware.
Vertical pole mounting
- Attach the mounting brackets to the designated mounting points on the back of the device using the provided screws.
- Insert the hose clamps through the openings in the mounting brackets.
- Position the device against the pole and wrap the hose clamps around it.
- Tighten the hose clamps to secure the device firmly in place.
Horizontal pole mounting
- Attach the mounting brackets to the designated mounting points on the back of the device using the provided screws.
- Insert the hose clamps through the openings in the mounting brackets.
- Position the device against the pole and wrap the hose clamps around it.
- Tighten the hose clamps to secure the device firmly in place.
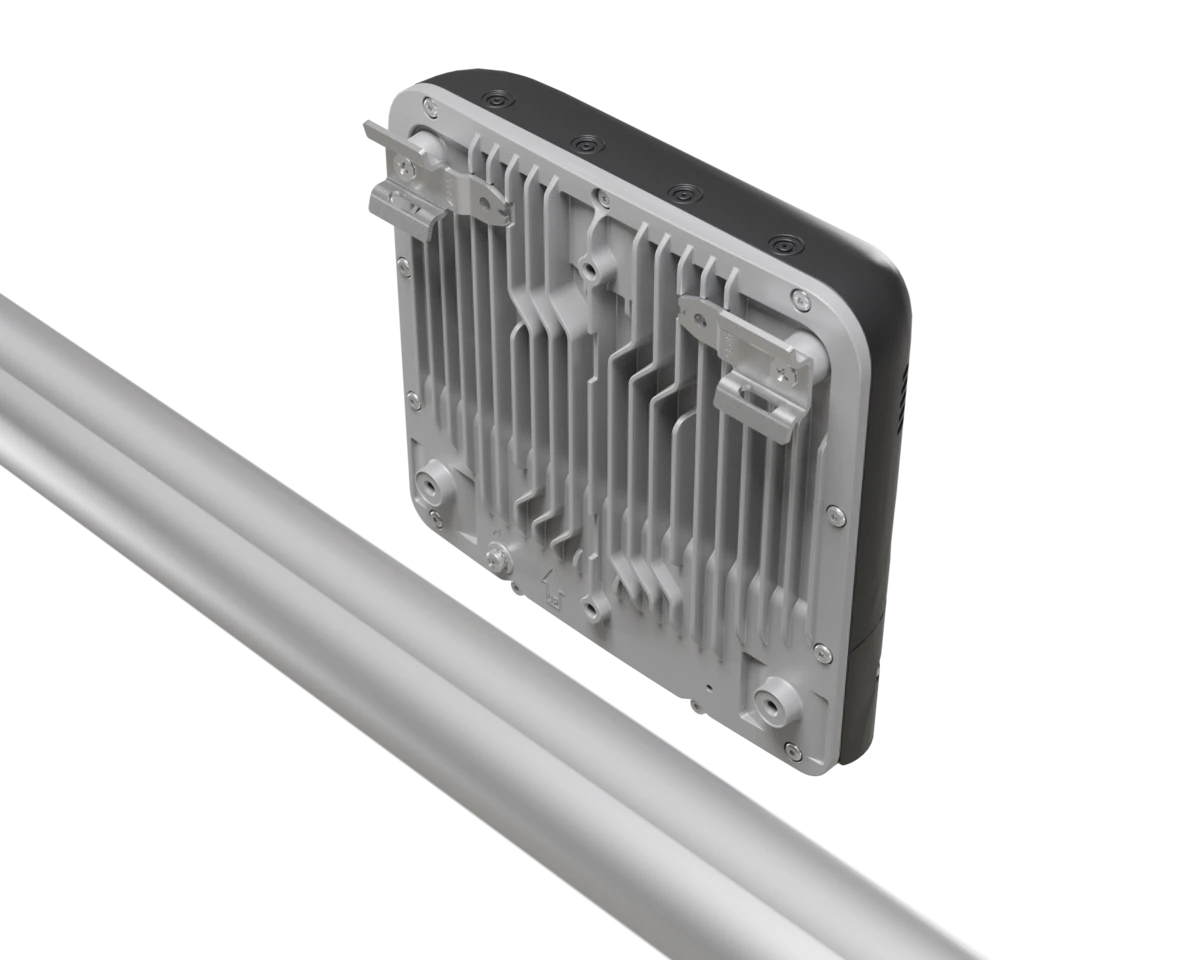
Mounting and configuration of this device should be done by a qualified person.
Configuration
Configuration can be done using a web browser via WebFig, the WinBox tool, or the MikroTik mobile app. Multiple methods are available to ensure accessibility.
- To access WebFig, open https://192.168.88.1 in your browser.
- For WinBox, download the tool, go to the Neighbors tab, and select the MAC address.
- For the mobile app, connect to the device's wireless network and select Connect. The default IP address and user name are already entered.
The default username is "admin". Find the password on the device sticker.
You should check for updates frequently to ensure your RouterOS software remains up to date for the best performance and stability. Select the "Check for updates" button in WinBox or WebFig to update to the latest version.
A valid SIM card must be inserted or an eSIM set up, along with an active Internet connection, for updates to work.
RouterOS provides a wide range of configuration options beyond what is described in this document. See the RouterOS documentation to explore these features.
For recovery purposes, it is possible to boot the device for reinstallation. See the Netinstall documentation.
MikroTik mobile app
Use the MikroTik smartphone app to configure your router in the field, or to apply the most basic initial settings for your MikroTik home access point.

- Scan QR code and choose your preferred OS.
- Install and open application.
- By default, the IP address and user name will be already entered.
- Select Connect to establish a connection to your device through a wireless network.
- Choose Quick setup and the application will guide you through all basic configuration settings in a couple of easy steps.
- An advanced menu is available to fully configure all necessary settings.
GPS
The built-in GNSS module (AG3352Q) supports GPS, GLONASS, Galileo, BeiDou, and QZSS. An external active GPS antenna is required; connect it to the SMA connector behind the port door.
Important: Connect and disconnect the active antenna only when the device is powered off.
The gps package must be installed. Check it with /system package print. If the package is missing, download the extra packages for your RouterOS version, upload the package with WinBox or WebFig, and reboot the device.
Enable and configure GPS:
/system gps set enabled=yes
/system gps set gps-antenna-select=external
/system gps print
For configuration examples, see the GPS manual.
Powering
The device supports three DC inputs:
- DC jack (5.5 mm outside and 2 mm inside, female, pin positive plug) accepts 12–57 V DC ⎓. The package includes a 24 V, 1.2 A power adapter.
- PoE input on the Ethernet port complies with 802.3af/at and accepts 18–57 V DC ⎓.
- 2-pin terminal accepts 12–57 V DC ⎓, for example for 12/24 V ⎓ vehicle connections.
The device also provides an analog input and a digital output for external sensors and relay control.
Maximum power consumption is 21 W, or 15 W without attachments. Attach the ground (earth) wire to the screw under the port door.
Connecting to a PoE adapter (not included)
- Connect the Ethernet cable from the device to the PoE out port of the PoE adapter.
- Connect an Ethernet cable from your LAN to the PoE adapter.
- Connect the power cord to the adapter, and then plug the power cord into a power outlet.
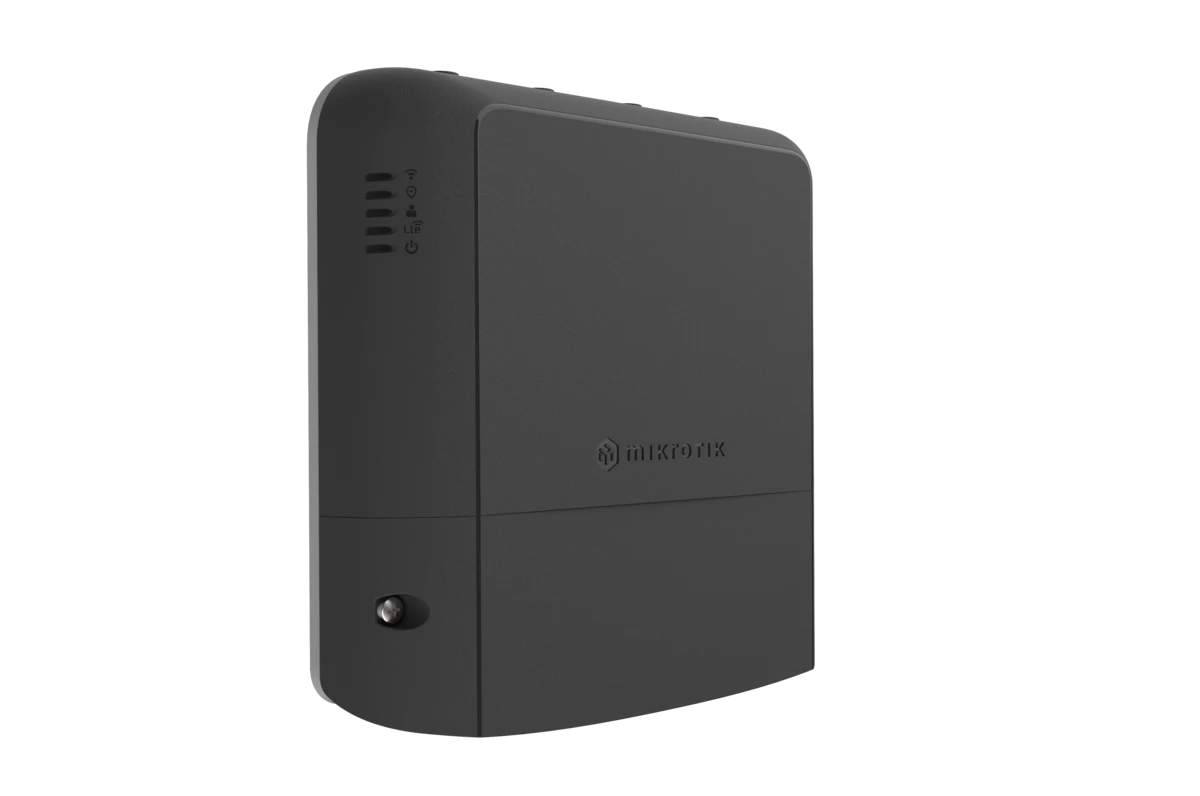
Front status LED behavior
- WIFI LED – shows the Wi-Fi interface status.
- GNSS LED – shows the GNSS module status.
- USER LED – user-defined LED, can be configured in system settings.
- LTE LED – shows the LTE interface status and activity.
- PWR LED – the device is powered on.
Reset button
The reset button has three functions:
- Hold this button during boot time until the green LED starts flashing, release the button to reset RouterOS configuration.
- Keep holding the reset button until the LED turns solid, then release it to enable CAP mode. The device then starts searching for a CAPsMAN server.
- To reinstall RouterOS using the Netinstall utility, enter the device into BOOTP mode. Two booter options are available: the Regular Booter and the Backup Booter. Verify both options in case one does not work.
- Regular Booter: to enter Etherboot mode, press the Reset button after powering on the device and wait 1–2 seconds.
- Backup Booter: power off the device. Press and hold the Reset button, then power on the device. Wait for the LED sequence (blinking, steady, off), then release the button. The device boots into BOOTP mode, ready for RouterOS reinstallation with Netinstall. Depending on the model, this may be indicated by the USR, USER, System, or ACT LED, or by the SFP port LED.
Regardless of the above option used, the system will load the backup RouterBOOT loader if the button is pressed before power is applied to the device. Useful for RouterBOOT debugging and recovery.
Accessories
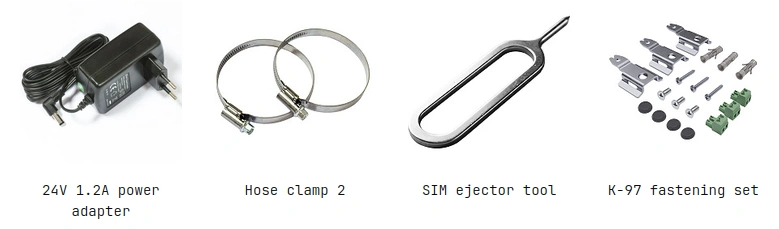
Package includes accessories that come with the device:
- 24 V, 1.2 A power adapter.
- Hose clamp.
- K-97 fastening set.
- SIM ejector tool.
Operating system support
The device supports RouterOS v7 and above. The specific factory-installed version is listed in /system resource. Other operating systems have not been tested.