ChirpStack
ChirpStack is an open-source LoRaWAN server, which you can install locally.
After the server is up and running, log into the ChirpStack management portal.
Gateway Registration
Registering gateway
Navigate to "Tenant>Gateways" section and "Add gateway":
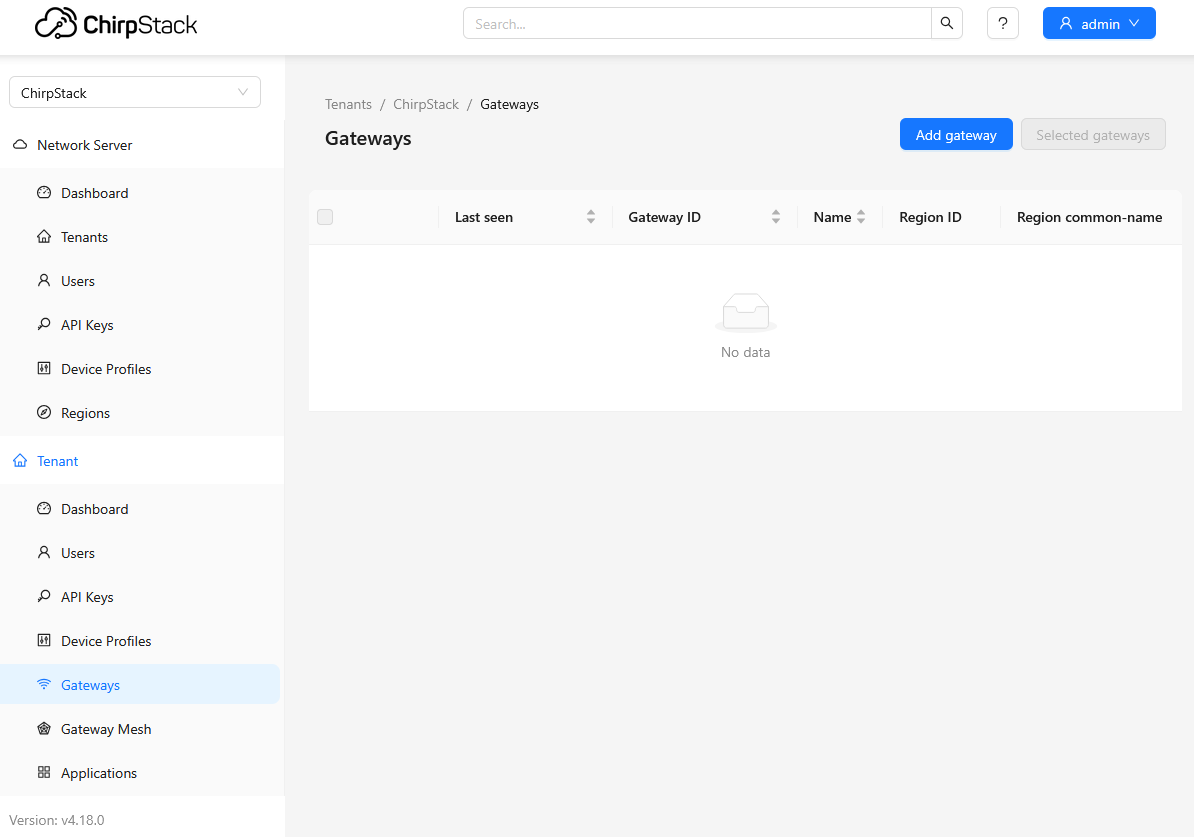
Name the device, and enter "Gateway ID":

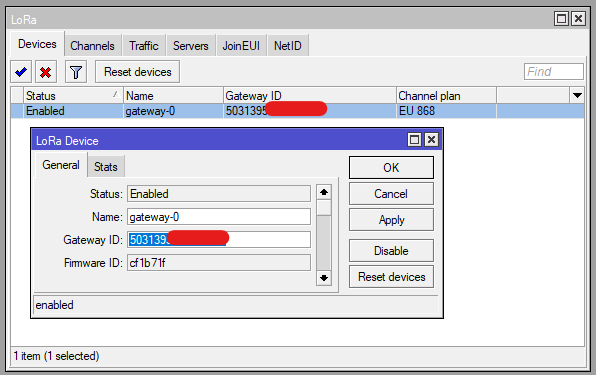
In RouterOS, the Gateway EUI value can be found under "IoT>LoRa>Devices>Gateway ID"):
Connecting gateway
The gateway can be connected via either UDP or LNS. See ChirpStack documentation for more details on how to configure both.
In RouterOS, add a new server, pointing at the ChripStack's IP/domain name. If using UDP:
/iot lora servers
add address=10.x.x.x name=Chirpstack protocol=UDP
If using LNS:
/iot lora servers
add address=10.x.x.x name=Chirpstack port=3001 protocol=LNS ssl=no
Port, address and SSL option can differ depending on how you setup ChirpStack itself.
Make sure that the interface is disabled (otherwise you will not be able to apply any changes):
/iot lora disable [find]
Attach the server to the interface:
/iot lora set servers=Chirpstack [find]
Enable the interface:
/iot lora enable [find]
Gateway registration verification
In RouterOS, you can confirm that the gateway connected using logs:
/log print where topics ~"lora"
You should see "forwarder is ready" message:
 2026-06-15 14:31:09 lora,info [FWD] gateway-0 forwarder started
 2026-06-15 14:31:22 lora,info [FWD] gateway-0 forwarder is ready
 2026-06-15 14:31:41 lora,debug [FWD] gateway-0, Rx, Freq 868.100, CRC Error
 2026-06-15 14:32:10 lora,debug [FWD] gateway-0, Rx, Freq 867.100, CRC Error
On the ChirpStack portal, check status under the "Gateway" dashboard ("Tenant>Gateway" section):

Node registration
Create device profile
Add a new "Device Profile":
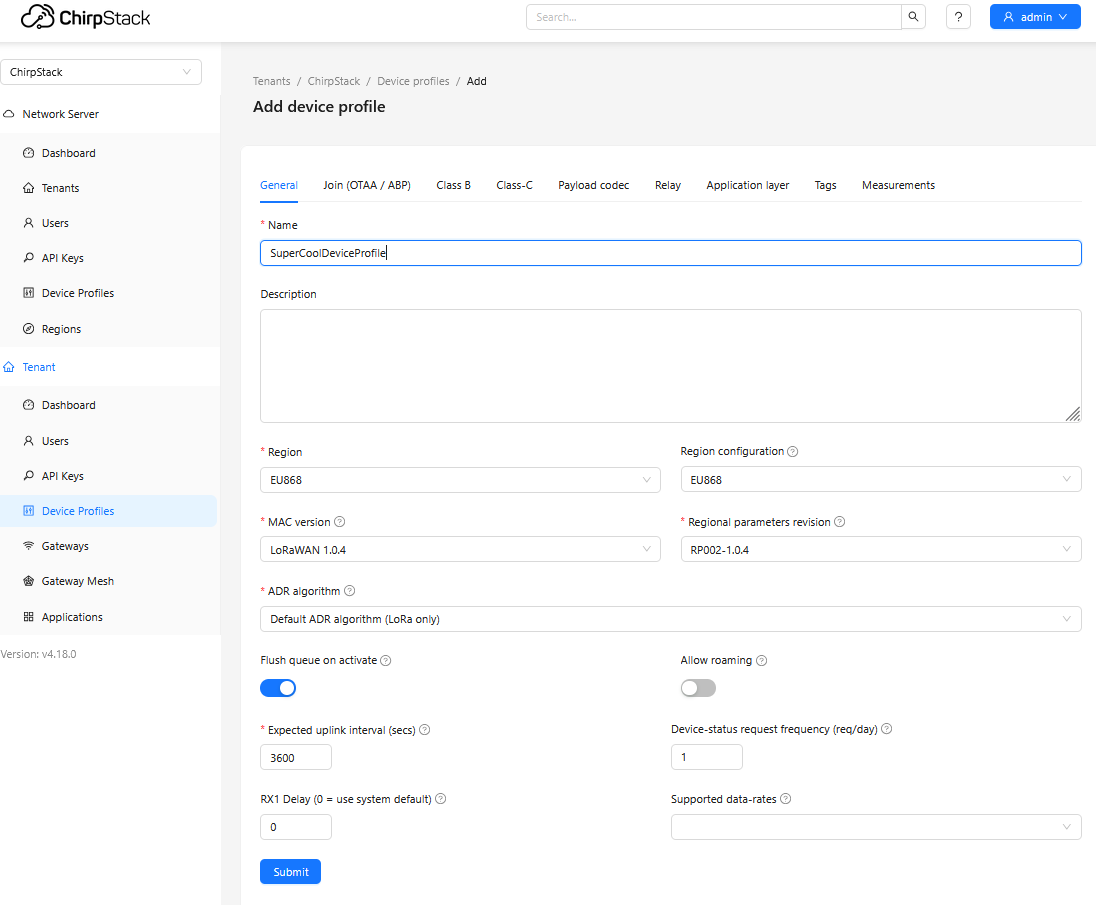
Configure "Region", "MAC version", "Regional parameters revision", "ADR algorithm" and other settings, depending on what your node/sensor supports. Optionally, you can enable different classes (like Class B).
MikroTik TG-LR tag's information can be found here.
Add "Payload codec":
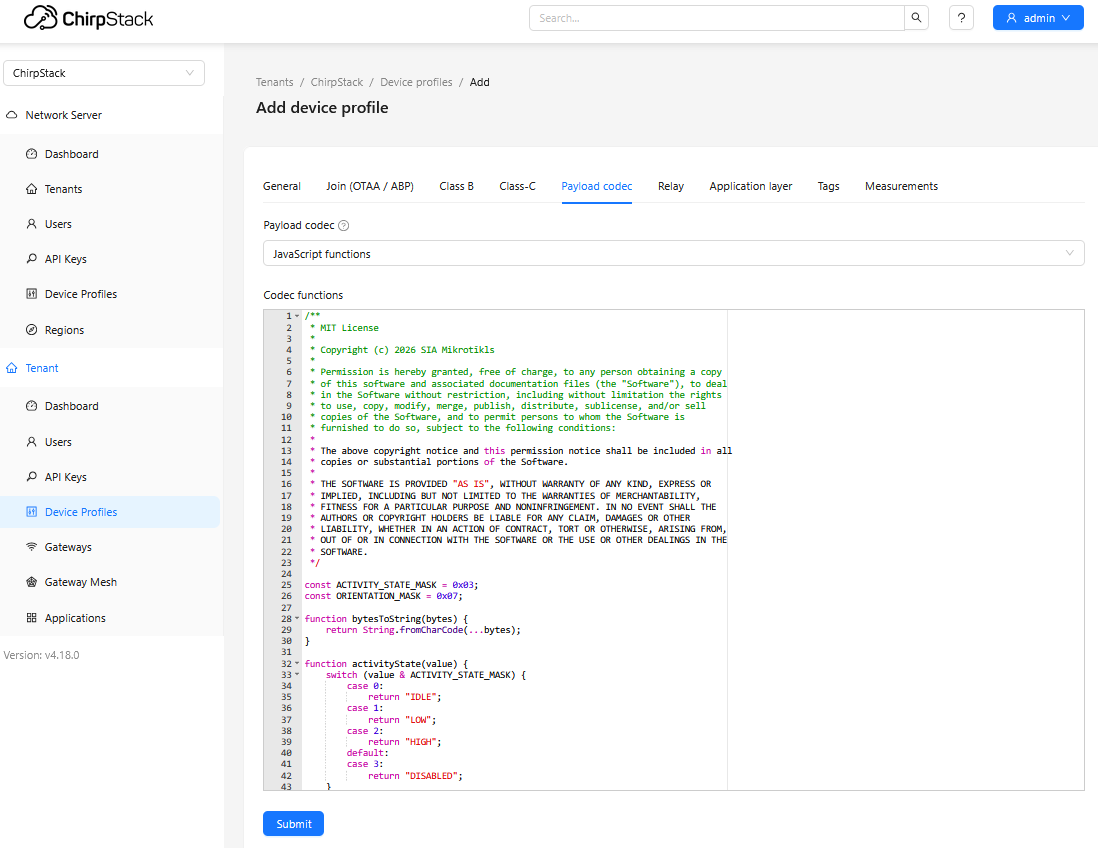
- Select "JavaScript functions";
- Copy/Paste the content of the provided script tg-lrx2-2.0-ul-dec.js into the "Codec functions" field and "Submit".
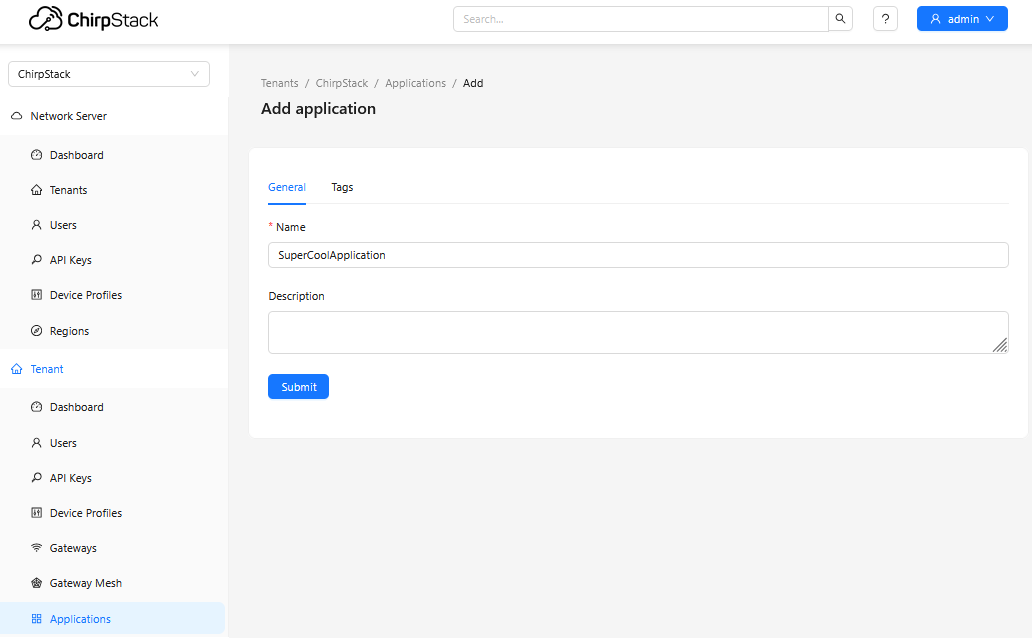
Create application
Add a new "Application":
Create device
If you are using TG-LR MikroTik tags, find "JoinEUI", "DevEUI" and "AppKey" printed on the label within the package. If you are using another vendor sensors, find out what they are through the manufacturer.
Add a new "Device" under previously created "Application":
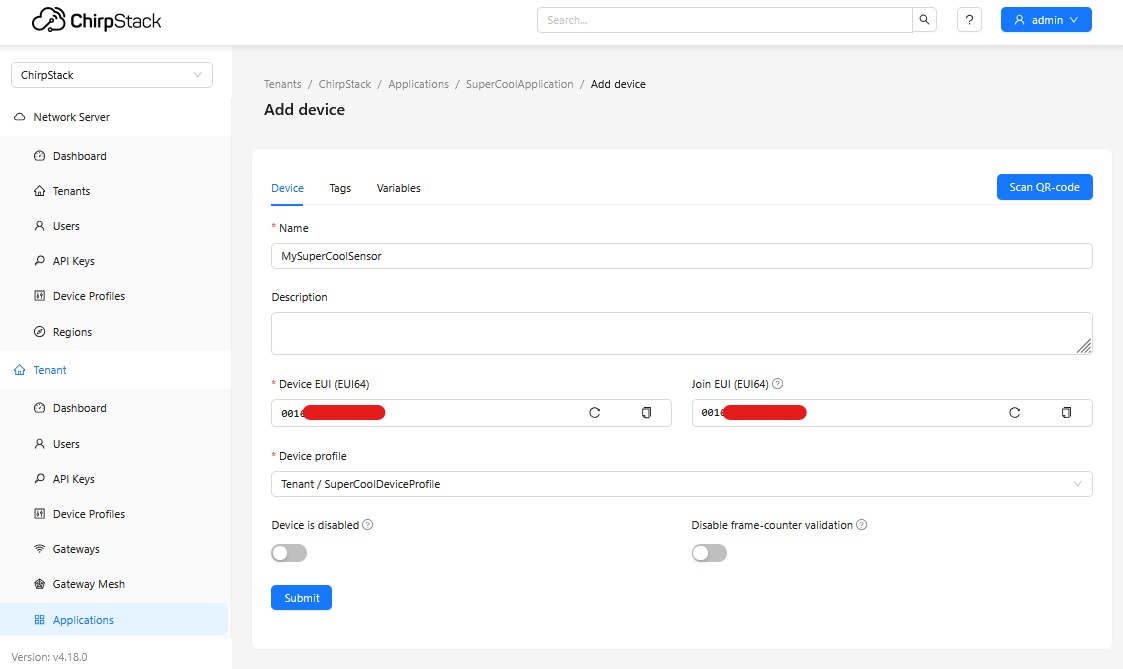
Input "Device EUI", "Join EUI", select previously created "Device profile" and "Submit".
Lastly:
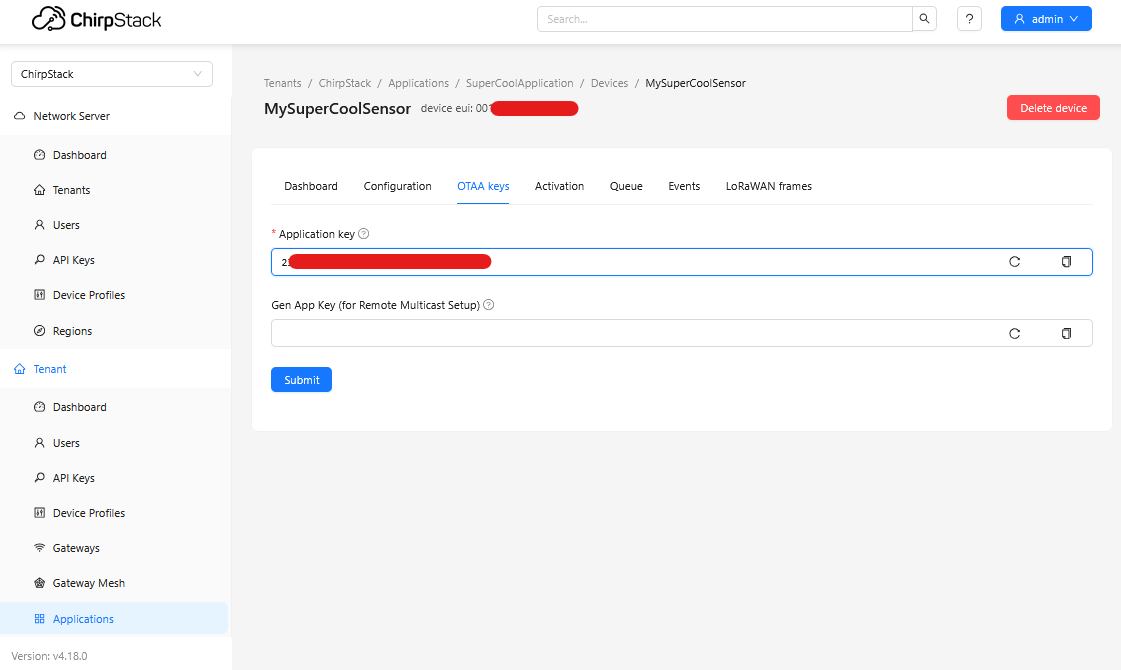
Input "Application key" and "Submit".
Power on the tag
Please check our full guide on the TG-LR options.
From the get-go, the tag will be in the "Shutdown" mode (sleeping).
To activate it, check our Quickstart Guide, and simply hold the magnet against the reed switch for about ~1.5 seconds until you see x2 LED blinks (after which remove the magnet).
When using another vendor sensor, find out how to activate it.
Node registration verification
As soon as the node gets powered on, it should start attempting to join the network.
End device will send "Join-request" packet and will expect "Join-accept" in return.
In RouterOS, you can see the exchange in the "IoT>LoRa>Traffic" tab:

On the portal, you should be able to confirm registration per the "LoRaWAN frames" tab:
