Manual Network Setup (No Default Configuration)
Most MikroTik routers ship with a default configuration that already provides a bridge, a LAN IP address, a DHCP server, and a basic firewall. If you keep the default configuration, you can skip this page.
Follow the steps below only if your device has no default configuration, or if you have reset it to a clean state.
Start from a clean configuration
- Connect the Internet cable to the router's ether1 port.
- Connect your computer to any other Ethernet port.
- Open WinBox and locate the router using Neighbor Discovery. For detailed instructions, see the WinBox article.
- Select the router's MAC address and click Connect.
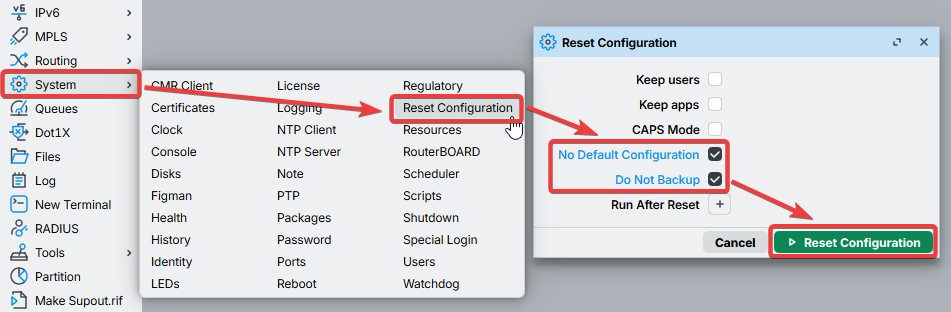
To start with a completely clean configuration, run the following command:
/system/reset-configuration no-defaults=yes skip-backup=yes
The router will reboot without any default settings, firewall rules, or services configured.
Or from WinBox:
Create a bridge and assign an IP address
Since a MAC connection can sometimes be unreliable, the first step is to enable IP connectivity. This involves three main tasks:
- Create a bridge interface and assign bridge ports
- Assign an IP address to the bridge interface
- Configure a DHCP server
- CLI
- WinBox / WebFig
Create a bridge interface, add the desired Ethernet port as a bridge port, and assign the IP address to the bridge:
/interface/bridge/add name=bridge1
/interface/bridge/port/add interface=ether2 bridge=bridge1
/ip/address/add address=192.168.88.1/24 interface=bridge1
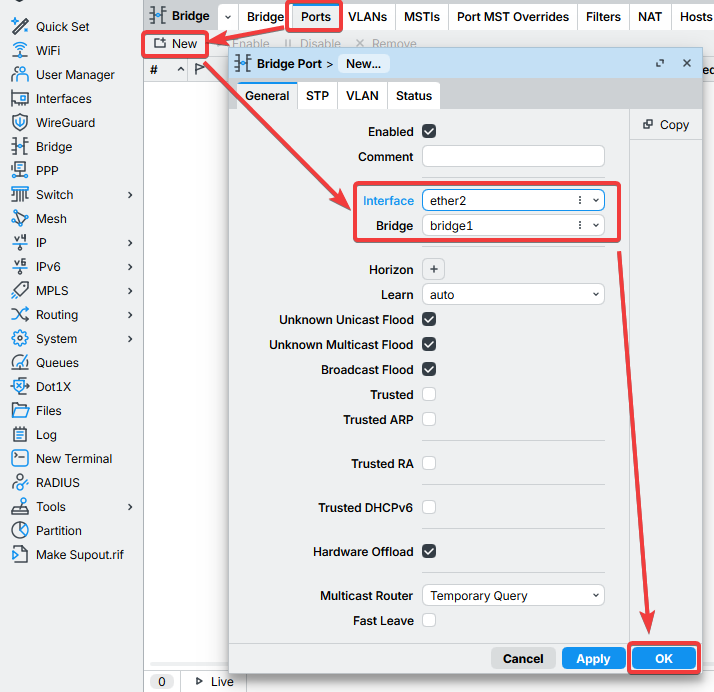
- Open the Bridge window, ensuring the Bridge tab is selected.
-
Click the New or + button to open a new dialog box. You can either enter a custom bridge name or retain the default bridge1, then click OK to proceed.

-
- Switch to the Ports tab and click the New or + button to open another dialog box.
-
Select ether2 as the interface and bridge1 as the bridge, then click OK. Repeat this step for each additional port that you want to add to the bridge.
-
You may close the bridge dialog.
-
- Access the IP menu and navigate to the Address dialog.
-
Click the New or + button to open a new dialog box.
-
Enter IP address
192.168.88.1/24and select interface bridge1 from the dropdown list.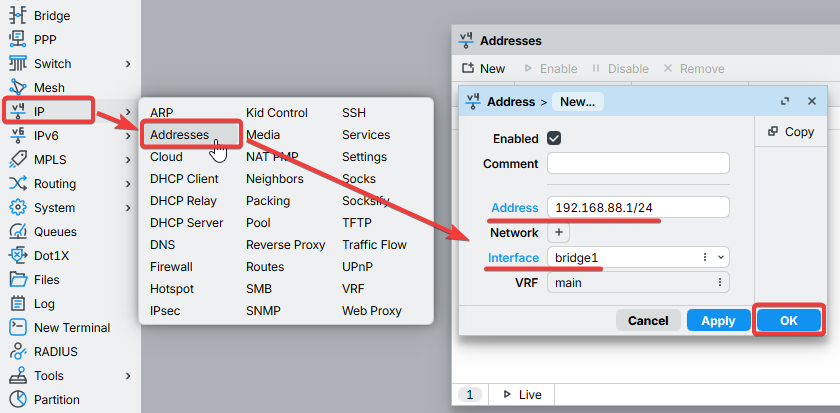
-
Click OK to confirm the settings.
-
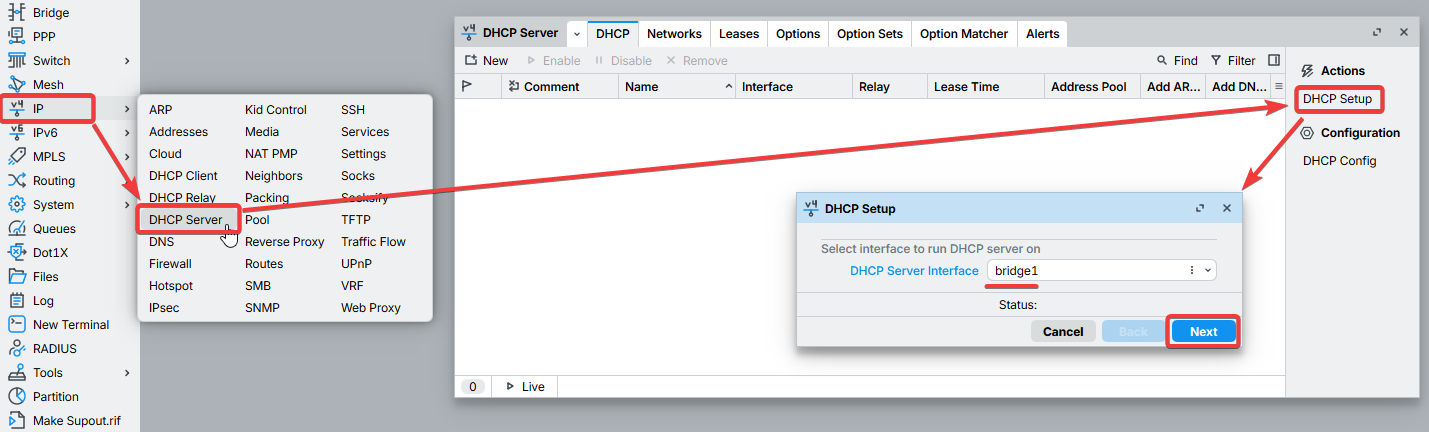
Set up a DHCP server
- CLI
- WinBox / WebFig
To simplify and expedite this process, run the setup command. Most of the configuration options are automatically determined, so you simply need to press Enter to accept each value:
[admin@MikroTik] > / setup [enter]
Select to run DHCP server on
dhcp server : bridge1 [enter]
Select for DHCP addresses
dhcp space: 192.168.88.0/24 [enter]
Select gateway for given
gateway for dhcp : 192.168.88.1 [enter]
Select pool of addresses given out by DHCP server
addresses to give out: 192.168.88.2-192.168.88.254 [enter]
Select DNS servers
servers: 192.168.88.1 [enter]
Select lease time
lease time: 1800 [enter]
Following these steps, the connected PC should obtain a dynamic IP address automatically. You can then close WinBox and reconnect to the router using the IP address 192.168.88.1.
When IP connectivity is working, continue with Configuring the internet connection and the rest of the first-time guide.