Upgrade
CLI reference:/system/package/system/package/update/system/routerboard/file/system/package/local-update/system/license
MikroTik devices are preinstalled with RouterOS, so installation is usually not needed, except in the case of installing RouterOS on a bare metal x86 PC or a virtual machine with CHR images. The upgrade procedure on already installed devices is straightforward.
Version numbering
RouterOS versions are numbered sequentially, where a period is used to separate sequences; it does not represent a decimal point, and the sequences do not have positional significance. An identifier of 2.5, for instance, is not "two and a half" or "halfway to version three"; it is the fifth second-level revision of the second first-level revision. Therefore v5.2 is older than v5.18, which is newer.
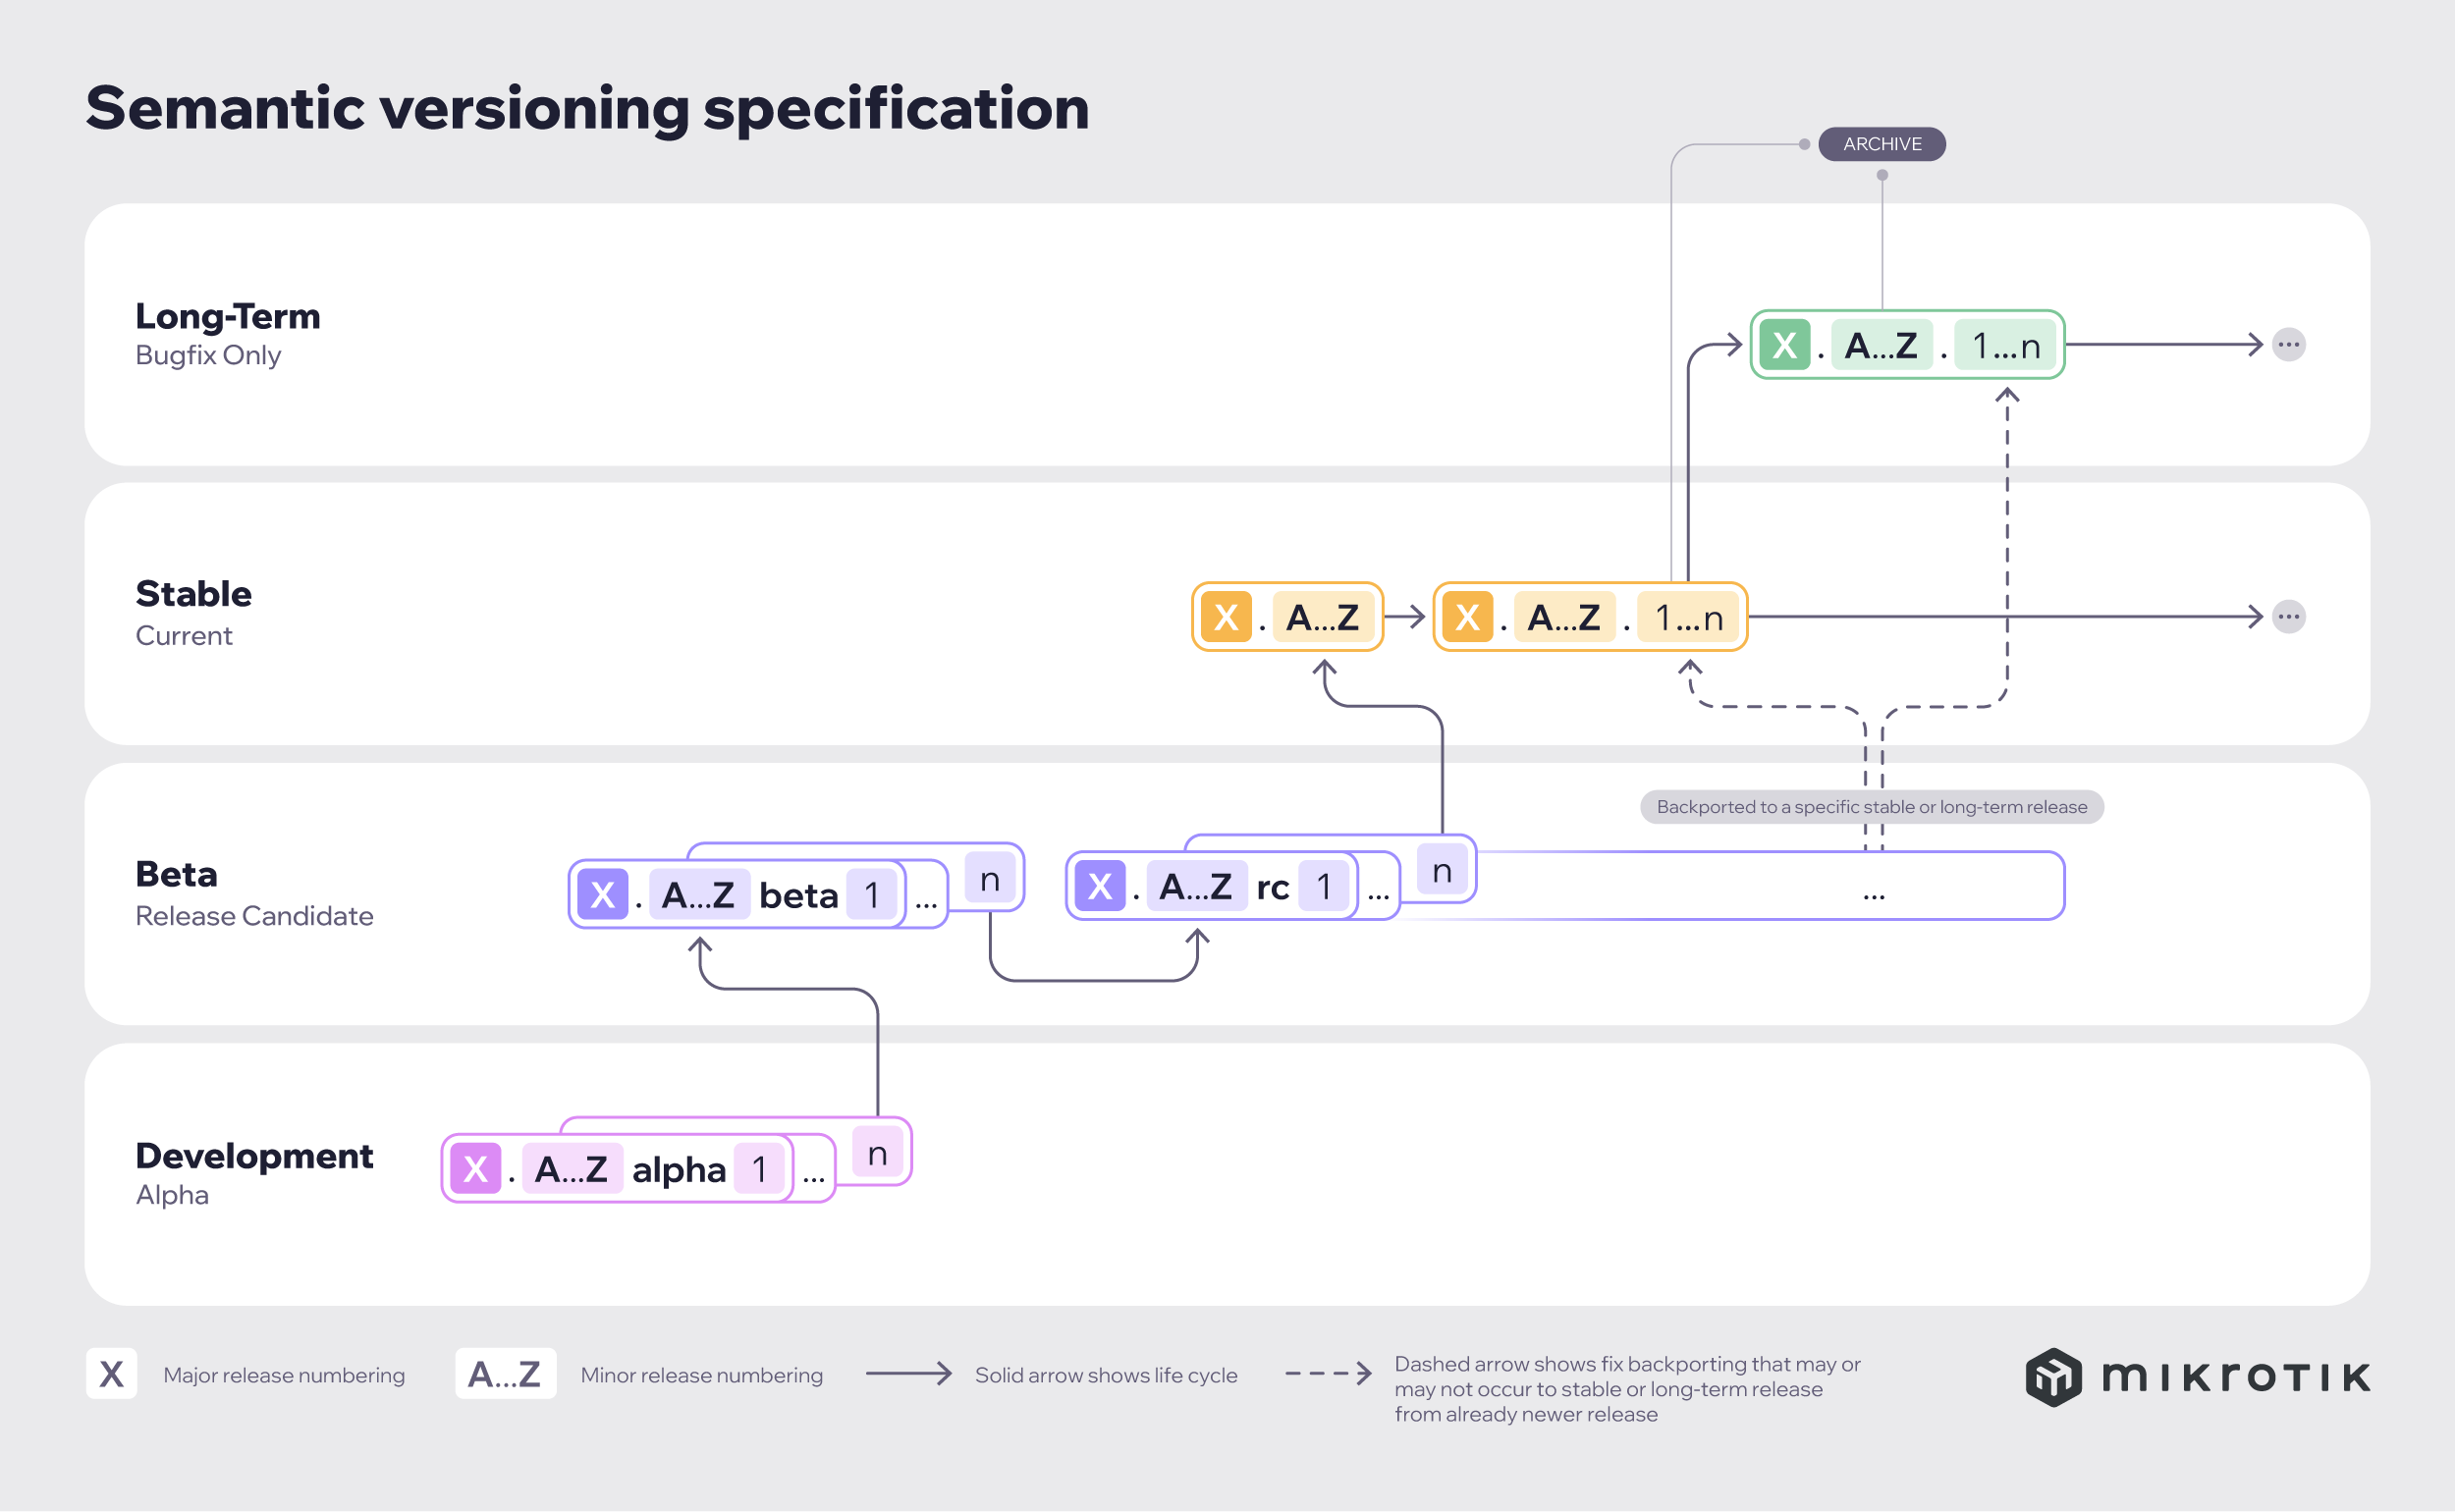
RouterOS versions are released in several "release chains": Long term, Stable, Testing, and Development. When upgrading RouterOS, you can choose a release chain from which to install the new packages:
- Long term: Released rarely, and includes only the most critical fixes. Upgrades within one number branch do not contain new features. When a Stable release has been out for a while and seems to be stable enough, it gets promoted into the long-term branch, replacing an older release, which is then moved to the archive. This consecutively adds new features.
- Stable: Released every few months, including all tested new features and fixes.
- Testing: Released every few weeks, undergoes only basic internal testing, and should not be used in production.
- Development: Released when necessary. Includes raw changes and is available for software enthusiasts for testing new features.
Standard upgrade
The package upgrade feature connects from the router to the MikroTik download server over HTTPS and checks if a newer RouterOS version is available in the selected release channel. This menu can also be used for downgrading by changing the channel to one that offers an older, but more stable release. The feature connects from the router, not your computer, so the router itself needs HTTPS connectivity to the MikroTik server.
After selecting the Check for Updates button in QuickSet or in the System → Packages menu, the Check for Updates window will open with the current changelog or the latest changelog (if a newer version exists). If a newer version is available, the Download and Download&Install buttons will appear. Selecting Download downloads the newest version (a manual device reboot is required), while selecting Download&Install starts the download and automatically reboots the device after a successful download.
The versions offered depend on the selected release channel. Not all versions may be available. It is not possible to upgrade from an older version to the latest version in one step with the check-for-updates approach. For example, if running RouterOS v6.x, even when selecting the major release upgrade channel called "Upgrade", you will only see v7.12.1 as the available version. You must first upgrade to that intermediate version, and only then will newer releases be available in the channels. This intermediate step can be done with check for updates as well; you will simply need to repeat check for updates after the first update to the intermediate version.
If custom packages are installed, the downloader takes this into account and downloads all necessary packages.
Check for Updates settings
The connection to the MikroTik download server can be fine-tuned in the System → Packages → Check for Updates window, or with the /system/package/update/set command:
- Channel: Upgrade channel to use when checking for new versions. The release chains are described in the Version numbering section.
- Mode: Protocol for connecting to the MikroTik download server. Use
httponly if your network blocks HTTPS. HTTPS is recommended. - IP version: IP version preference for connecting to the MikroTik download server.
- Check certificate: Whether and how to validate the server SSL certificate. Always use
yesto ensure a secure connection.yes-without-crlcan be used to skip CRL validation.
/system/package/update/set channel=stable mode=https ip-version=auto check-certificate=yes
It is strongly recommended to upgrade the bootloader after RouterOS update. To upgrade the bootloader, execute the /system/routerboard/upgrade command in CLI, followed by a reboot. Alternatively, navigate to the GUI System → RouterBOARD menu and select the "Upgrade" button, then reboot the device.
You can automate the upgrade process by running a script in the system scheduler. This script queries the MikroTik upgrade servers for new versions. If the response received says "New version is available", the script then issues the upgrade command below. This will not work if you are running it for the first time on an older release. It might not see the latest versions as available, if you are running v6.x, you would first have to manually select the "Upgrade" channel to do a major release upgrade to v7.12.1 intermediate version, and only afterwards newer v7 releases will be visible in the upgrade channels.
/system/package/update/check-for-updates
:delay 3s;
:if ( [/system/package/update get status] = "New version is available") do={ /system/package/update/install }
Troubleshooting
If the device does not detect an available upgrade, verify that it can resolve and reach the upgrade server.
:put [:resolve .mikrotik.com]
The result should be 159.148.147.251. If the address does not resolve or resolves to a different IP, review your DNS settings. See the DNS article for more information.
Once DNS resolution is confirmed, verify that the device can reach the server:
/tool/ping address=159.148.147.251
If the ping fails, check your firewall rules, routing, or upstream connectivity.
Once the IP connectivity is confirmed working, verify that 443 port is reachable:
[admin@MikroTik] > /system/telnet 159.148.147.251 port=443
Connecting to 159.148.147.251
Connected to 159.148.147.251
Manual upgrade
You can upgrade RouterOS in the following ways:
- WinBox – drag and drop files to the Files menu.
- WebFig - upload files from the Files menu.
- FTP - upload files to the root directory.
It is strongly recommended to upgrade the bootloader after upgrading RouterOS. To upgrade the bootloader, execute the /system/routerboard/upgrade command in CLI, followed by a reboot. Alternatively, navigate to the GUI System → RouterBOARD menu and select the "Upgrade" button, then reboot the device.
Warning: RouterOS cannot be upgraded through a serial cable. Only RouterBOOT is upgradeable with this method.
Manual upgrade process
- Visit www.mikrotik.com and navigate to the Software page, then choose the architecture of the system you have RouterOS installed on (system architecture can be found in the System → Resource section).
- Download the routeros (main) and extra packages that are installed on the device.
- Upload packages to the device with one of the methods listed above.
If you need to skip some specific package upgrade or a package file is no longer available, then use /system/package/update/install ignore-missing to skip missing packages.
Using WinBox
Choose your system type and download the upgrade package. Connect to your router with WinBox. Select the downloaded file with your mouse and drag it to the Files menu. If some files are already present, make sure to put the package in the root menu, not inside the hotspot folder! The upload will start.
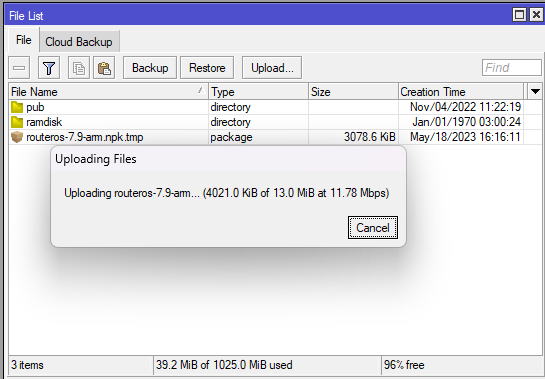
After it finishes, reboot the device. The new version number will be seen in the WinBox title and in the Packages menu.
Using S/FTP
- Open an S/FTP client, select the package, and upload it to your router.
- You can check if the file is successfully transferred onto the router (optional).
[admin@MikroTik] >/file/print
Columns: NAME, TYPE, SIZE, CREATION-TIME
# NAME TYPE SIZE CREATION-TIME
0 routeros-7.9-arm.npk 13.0MiB 2023-05-18 16:16:18
1 pub directory 2022-11-04 11:22:19
2 ramdisk directory 1970-01-01 03:00:24
- Reboot the device for the upgrade to begin.
[admin@MikroTik] >/system/reboot
Reboot, yes? [y/N]: y
- After the reboot, your router will be up to date, and you can check it in this menu:
/system/package/print
- If your router did not upgrade correctly, make sure you check the log
/log/print without-paging
RouterOS local upgrade
You can upgrade one or multiple MikroTik routers within your local network by using /system/package/local-update tool on one device which has all needed packages. Here is a simple example with 3 routers (the same method works on networks with any number of routers):
- Place needed packages under the Files menu, on your main router:
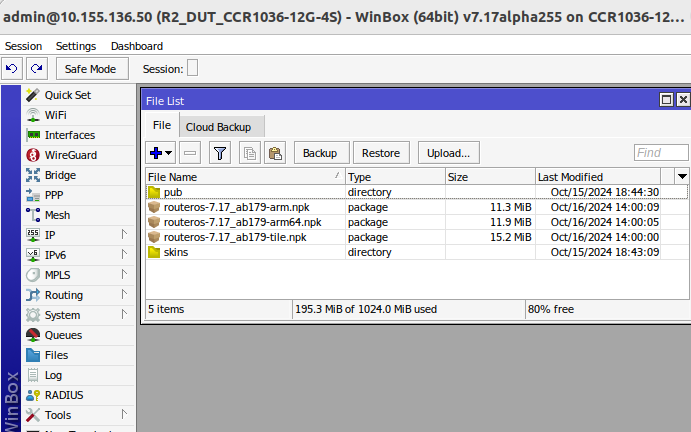
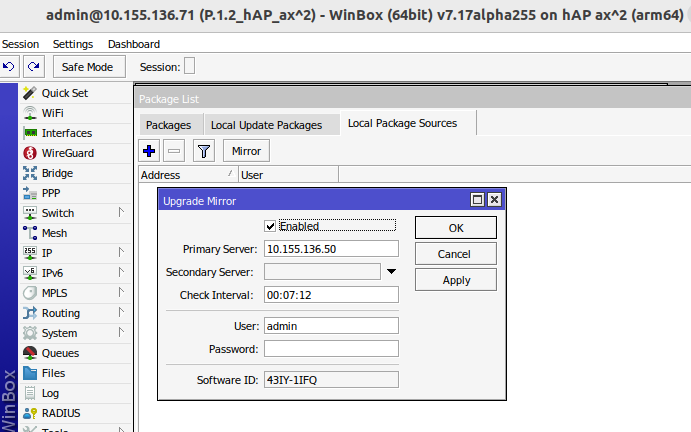
Optional: you can set a mirror device between the main ones. If not needed, skip this step:
- Choose Local Package Sources and enable Mirror device. Set Primary Server (10.155.136.50) where the packages are located. The Check Interval minimum setting can be set to 00:07:12, at which the device will connect by using WinBox to a main device and check for packages.
If new packages are available, it will begin to download. The download process is slow and may require some time when many files are used. In case of some failures, download will resume on next Check.
- A new
packsfolder is created, where the mirror device will store packages:
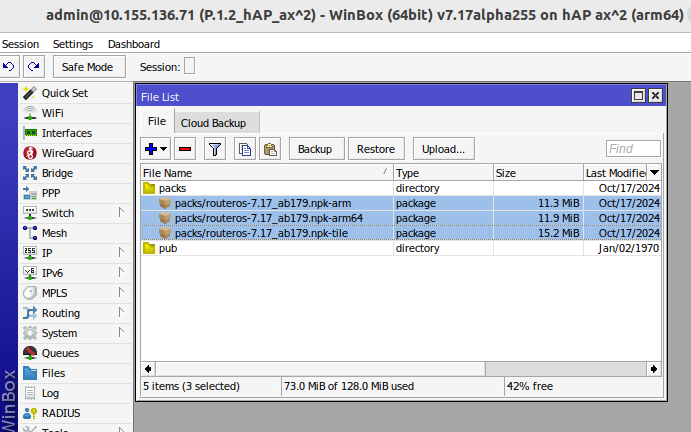
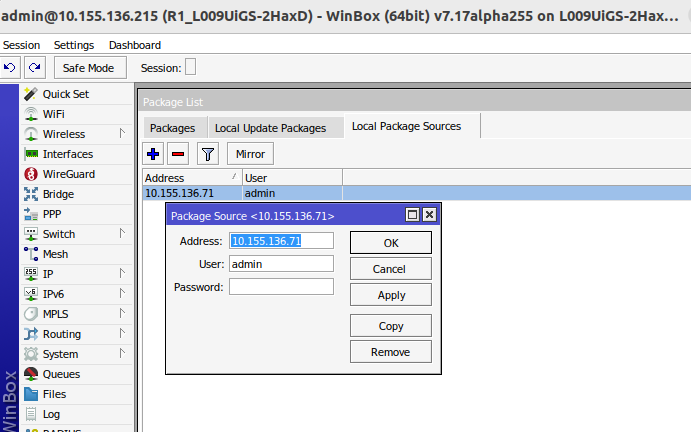
- Add a new package source on the device which will be updated, in this example we use mirror device 10.155.136.71:
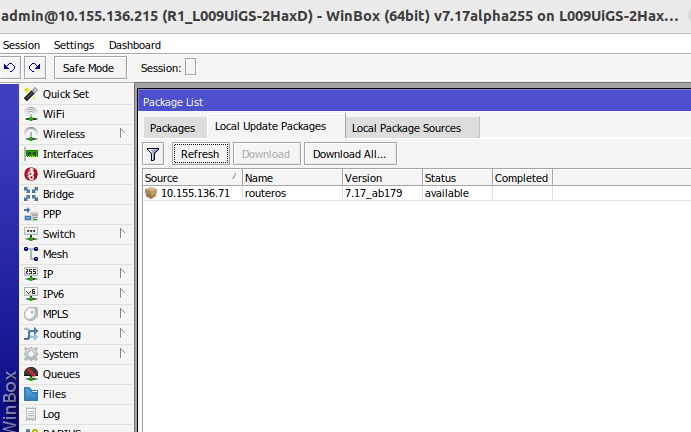
- When you select Refresh in the Local Update packages tab, the device in WinBox will connect to the source and check if there are new packages.
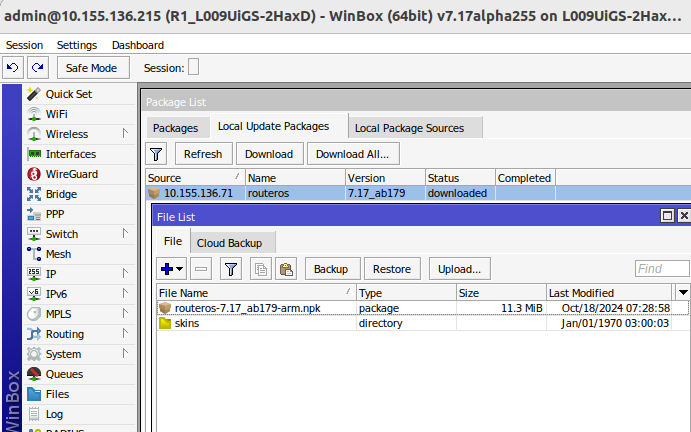
- Choose packages and select Download. After download completes, reboot the device.
- Use
/system/package/local-update/refreshto automate this in your scripts. The Fetch tool can be used to download packages from our web page, for example:
/tool/fetch url=https://download.mikrotik.com/routeros/7.16.1/routeros-7.16.1-arm.npk