RouterOS configuration reset
CLI reference:/system/reset-configuration/system/routerboard
How to Reset Configuration
To reset RouterOS to its factory defaults (including removing the current password), follow these steps:
- Disconnect the device from power.
- Press and hold the reset button.
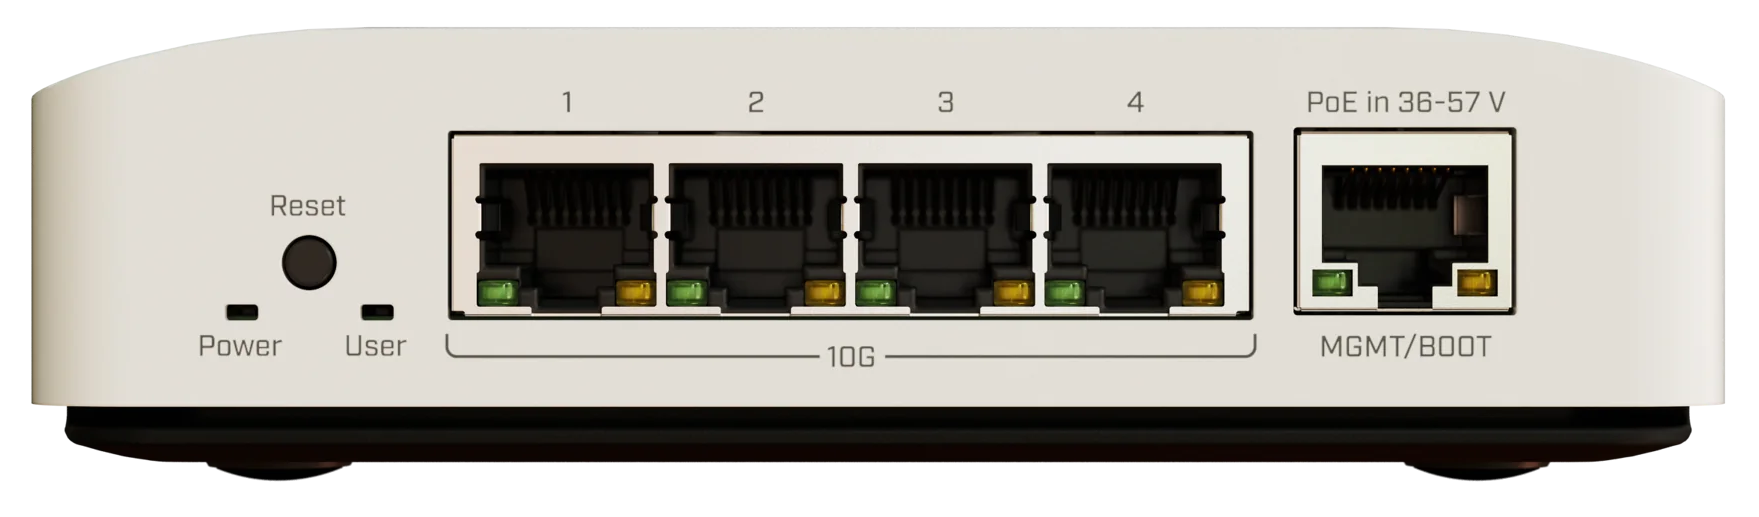
- While holding the button, reconnect power to the device.
- Watch the LEDs. One of the LEDs (typically the USR/User LED) will begin flashing.
- Release the reset button when the LED starts flashing.
The device will reboot with the default configuration.
Reset From RouterOS
If you still have access to the device, you can restore the default configuration directly from RouterOS:
-
Run the following command in the terminal:
/system/reset-configuration -
Or navigate to System → Reset Configuration in WinBox or WebFig.
Using the Reset Button
MikroTik devices include a reset button that can perform several functions depending on how long it is held during startup.
Watch the official MikroTips series: reset sequence.
Load the Backup RouterBOOT Loader
Press and hold the reset button before applying power, then release it after approximately 3 seconds. This loads the backup RouterBOOT loader.
This can be useful if the device is unable to boot because of a failed RouterBOOT upgrade. Once booted with the backup loader, you can either force the backup loader in RouterBOARD settings or reinstall RouterBOOT from an .fwf file.
Reset the RouterOS Configuration
Press and hold the reset button until the LED starts flashing, then release it. The device will reset its RouterOS configuration to the factory defaults.
Enable CAPs Mode
Continue holding the button for approximately 5 additional seconds after the LED begins flashing. When the LED becomes solid, release the button to enable CAPs mode.
CAPs mode can also be enabled from the command line: /system/reset-configuration caps-mode=yes
Start Netinstall Mode
Press and hold the reset button while powering on the device. Continue holding the button until the LED sequence completes (typically blinking → solid → off), then release it.
The device will enter Netinstall mode and start searching for a Netinstall server on the network.
Watch the official MikroTips series: Netinstall.
For detailed Netinstall instructions, see the Netinstall documentation.
Reset Jumper Method
Older RouterBOARD models are also fitted with a reset jumper hole. Some devices might need an opening of the enclosure. RB750/RB951/RB751 have the jumper hole under one of the rubber feet of the enclosure.
Short the reset jumper using a metal screwdriver and boot the board until the configuration is cleared:
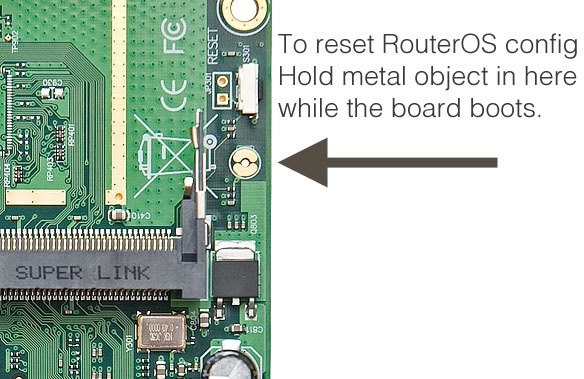
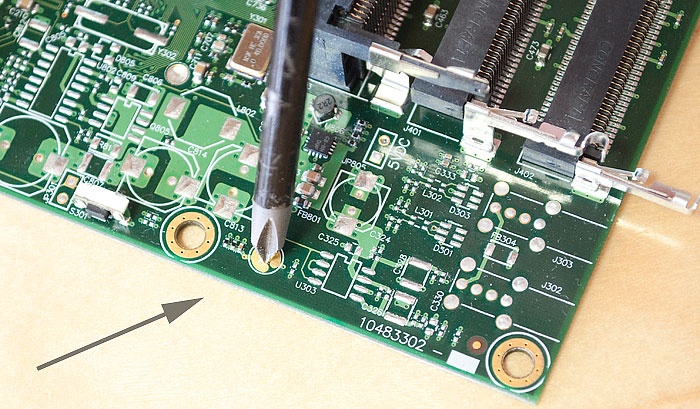
Jumper reset for older models
The image below shows the location of the Reset Jumper on older RouterBOARDs like RB133C:
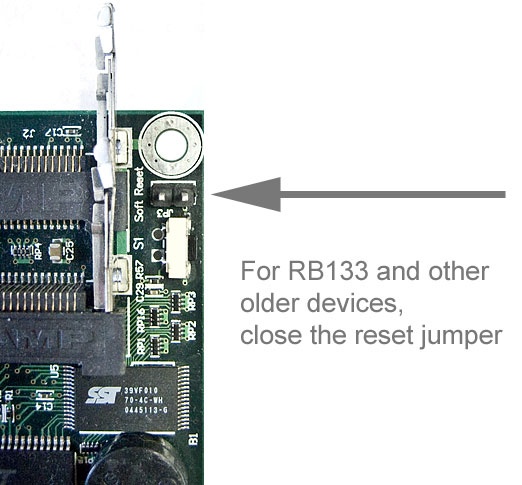
Don't forget to remove the jumper after the configuration has been reset, or it will be reset every time you reboot!
WPS
Some devices have a WPS button, or a reset button with WPS functionality that can be used to simplify wireless client connections without manually entering a password. Some models also support WPS synchronization between devices. For model-specific information about WPS and reset button functionality, refer to the User Manual for your device.