Fail-over PtP GUI example
Summary
This example shows how to configure an automatic fail-over (bonding) 5Ghz link in combination with 60Ghz devices in the GUI.
When a connection between 60Ghz wireless is lost, it will automatically use the bonded interface.
The example is done from empty configuration state with [WinBox] utility
Connect to the device
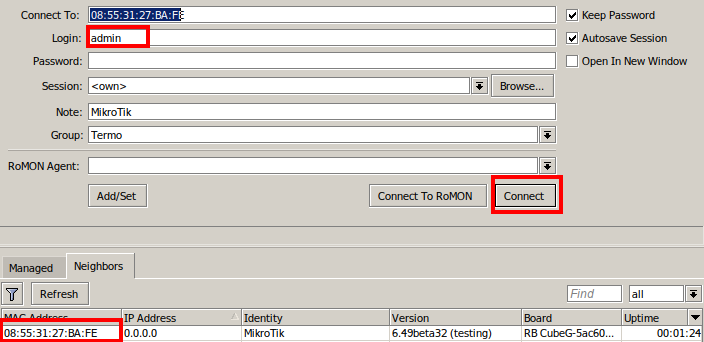
After configuration reset - only mac-telnet is possible. In the main WinBox screen press on Neighbours, choose your device's MAC address and press Connect:
- Select the correct device MAC Address.
- The default login is "admin" and no password is set.
- Press Connect.
Configure bridge
Add new bridge:
- Open the Bridge sub-menu;
- Press on "+" to add a new bridge;
- Apply your changes.
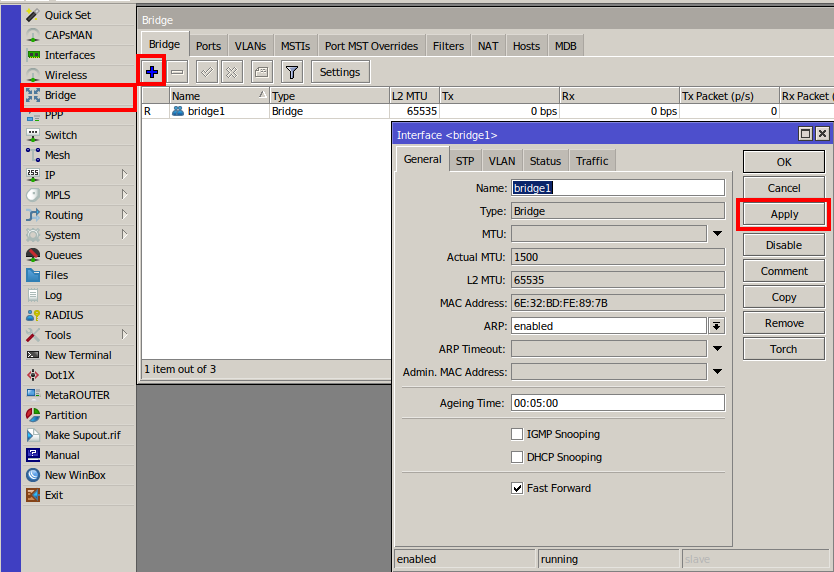
Later in the instructions it requires assigning bridge members to it. This will allow passing traffic from Ethernet to W60G interface without routing.
Set up 60Ghz wireless connection
All previously explained steps are identical to bridge and station devices. Different modes need to be used when configuring wireless interfaces.
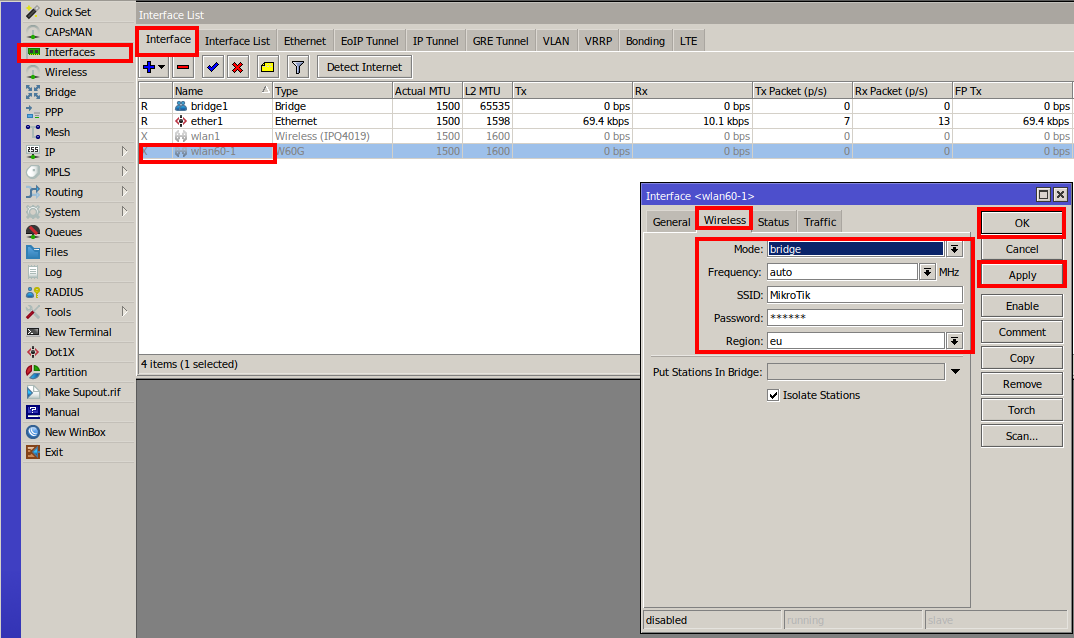
Configure bridge device as follows:
- Open the Interface menu;
- Double click on the wlan60-1 interface;
- Click the Wireless sub-menu and set mode to bridge (or ap-bridge for PtmP);
- Set the SSID and password and region;
- Select the previously created bridge under "Put Stations In Bridge";
- Apply your changes;
- Press Enable to start transmitting.
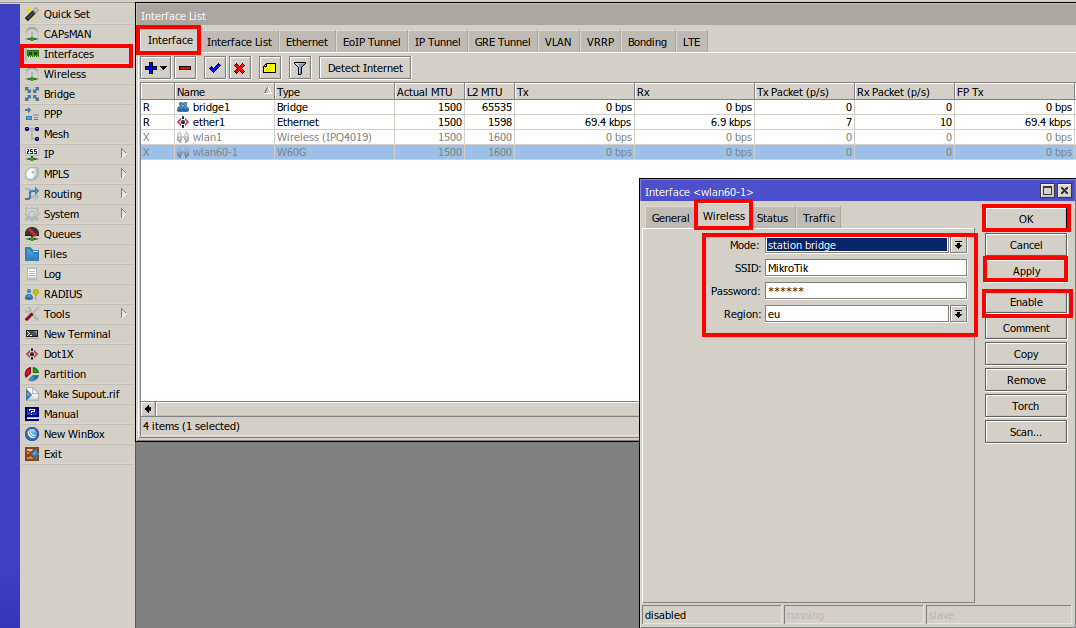
Configure station device as follows:
- Open Interface menu;
- Double click on wlan60-1 interface;
- Press on Wireless sub-menu and set mode to station bridge;
- Set SSID and password;
- Apply your changes;
- Press enable to start transmitting.
Set up 5Ghz wireless connection
Choose Security Profile for your devices
- Choose the Wireless menu;
- Choose the Security Profiles sub-menu;
- Add a new profile with the "+" sign;
- Choose a name, mode, authentication type and a secure password;
- Apply the configuration.
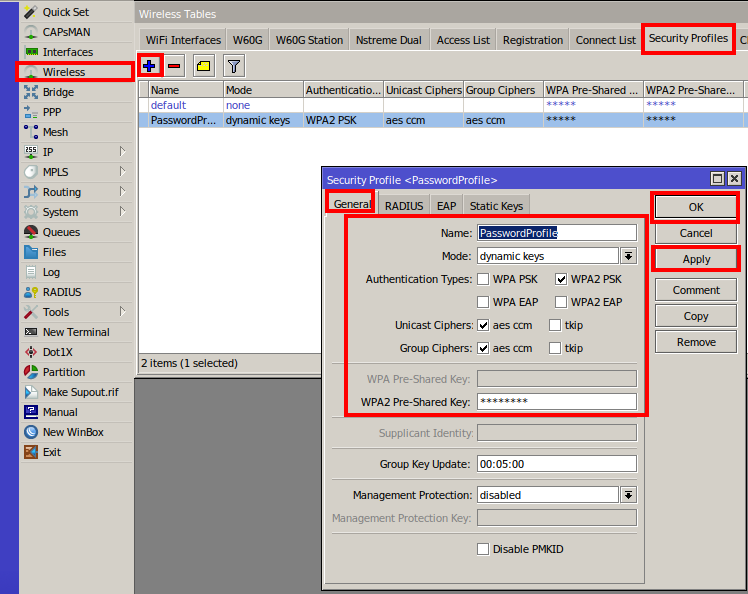
For bridge device
- Open the Interfaces menu;
- Double click on the wlan1 interface;
- Press on the Wireless sub-menu and set mode to bridge (or ap-bridge for PtmP);
- Set SSID, password and country;
- Press on the Advanced Mode;
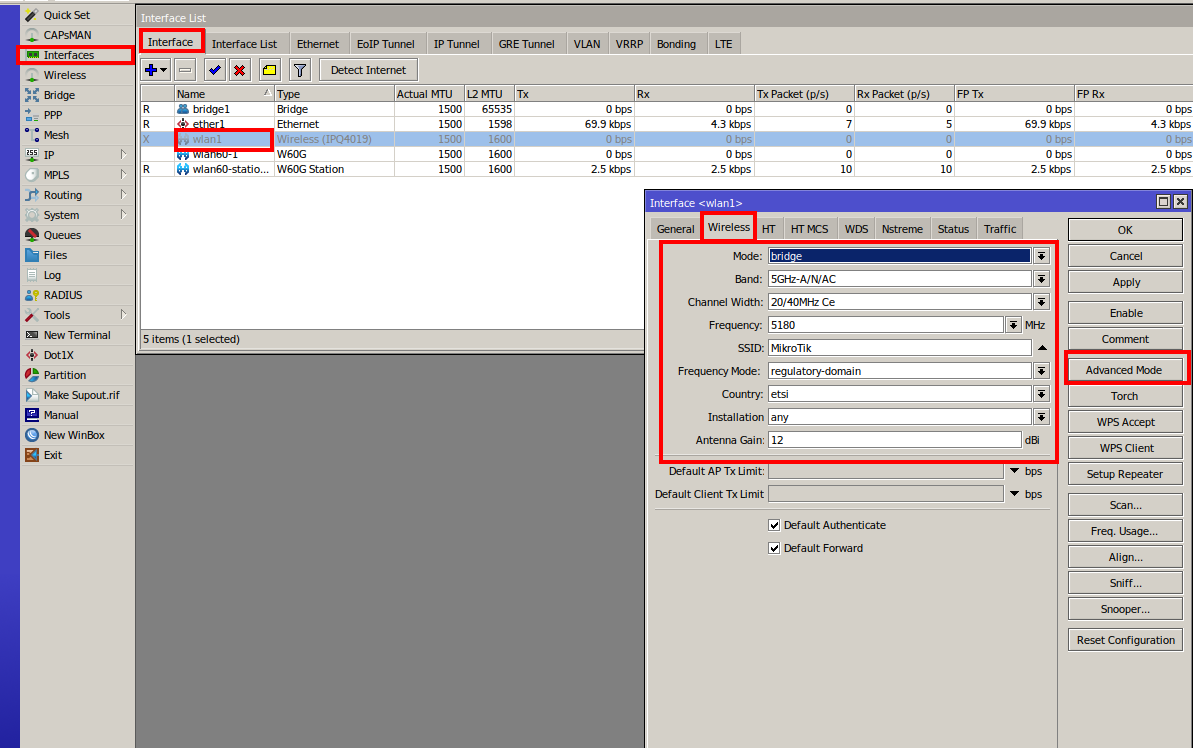
- Choose your Security Profile;
- Apply your changes;
- Press enable to start transmitting.
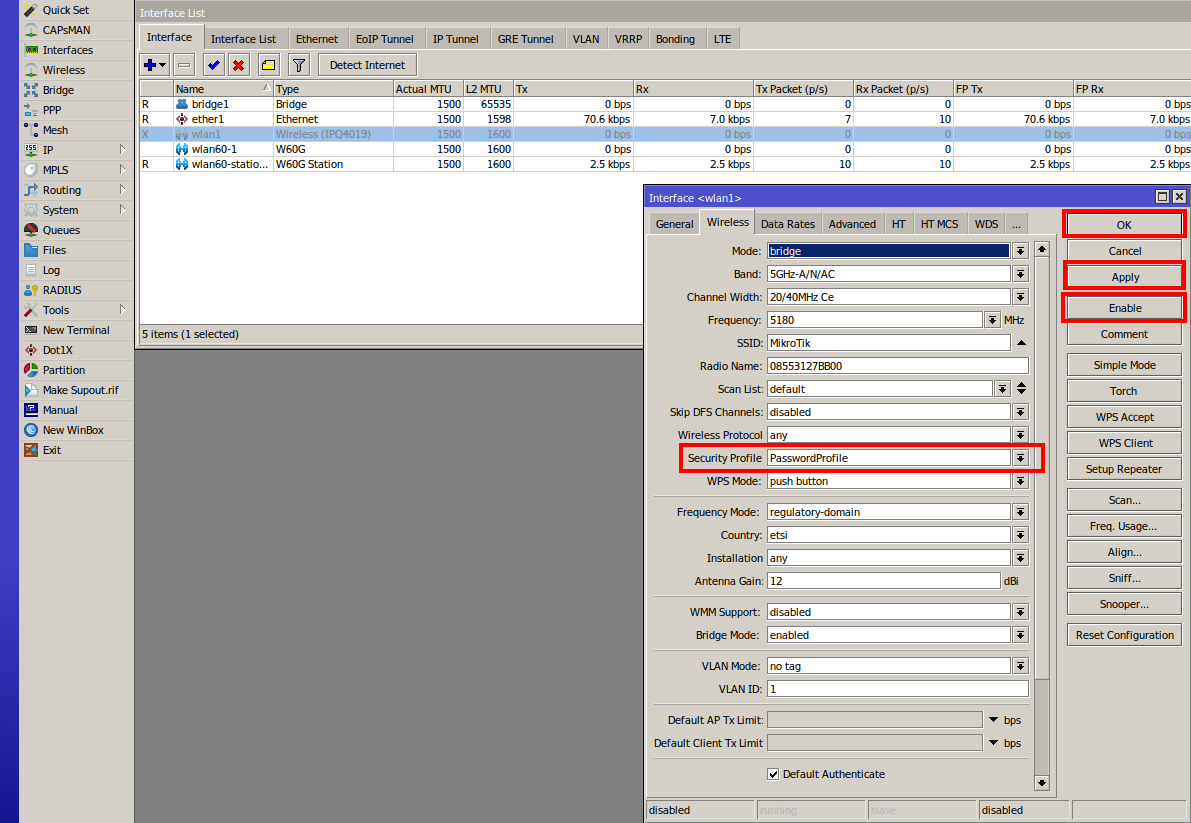
For station device
- Open the Interfaces menu;
- Double click on the wlan1 interface;
- Open the Wireless sub-menu and set mode to station-bridge;
- Set SSID, password and country;
- Open the advanced mode (similar to the bridge device*);
- Choose Security Profile;
- Apply your changes;
- Press enable to start transmitting.
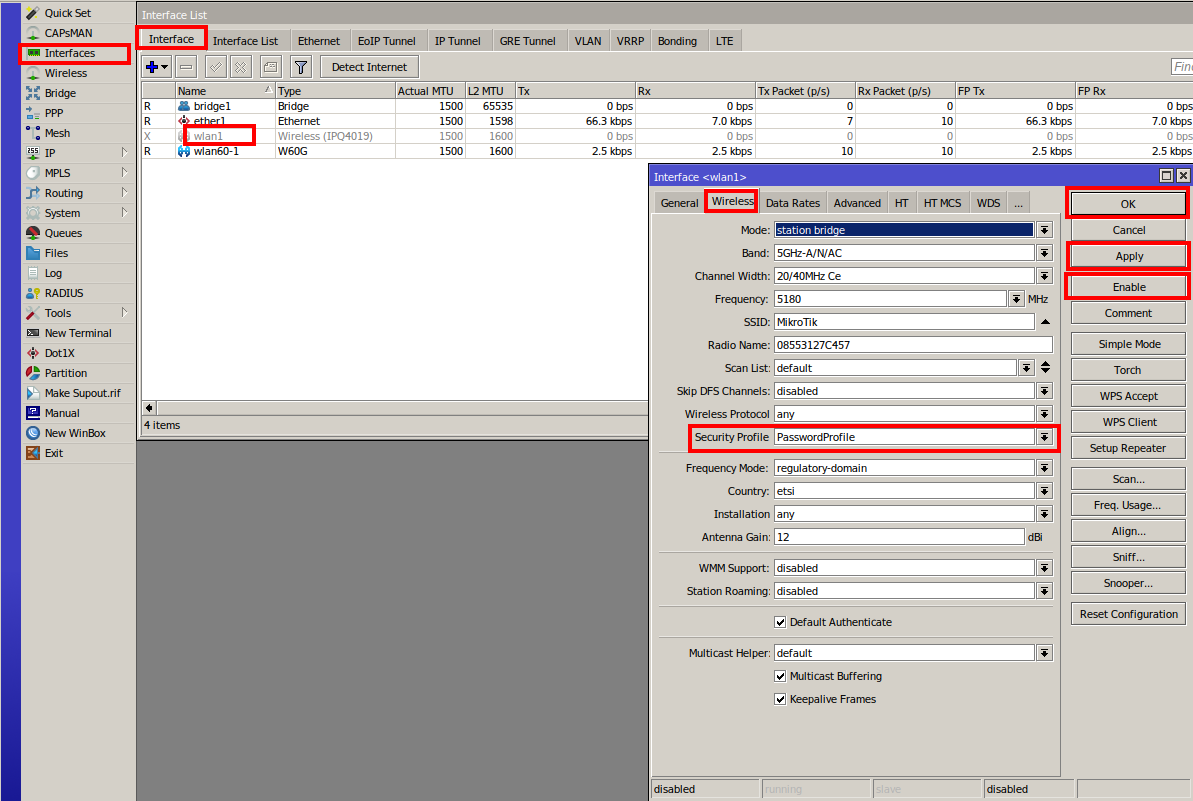
If everything is done correctly - running (R) flags should appear as shown in the screenshot:

Configure bonding
Configure bonding and assign slave interfaces in this setup it is selected as the built-in wlan1 interface, but it can also be an ether interface in other kinds of setups.
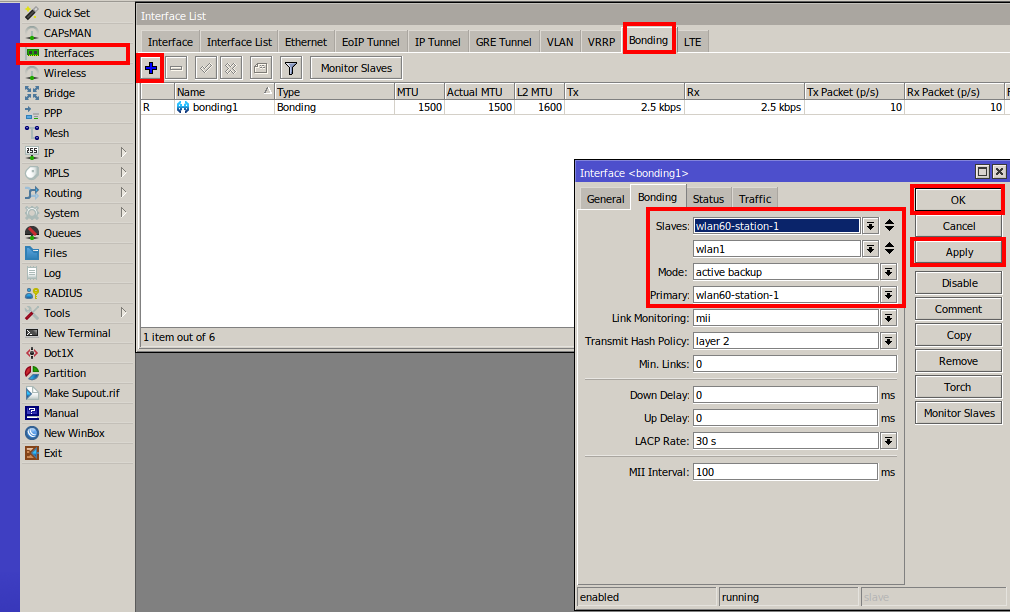
For bridge device
- Press the Bonding sub-menu;
- Add a new member with "+";
- Add interface members (wlan1 and wlan60-station-1) to the bonding interface as Slaves;
- Add interface member wlan60-station-1 as the Primary interface;
- Choose Mode as active backup;
- Apply the configuration.
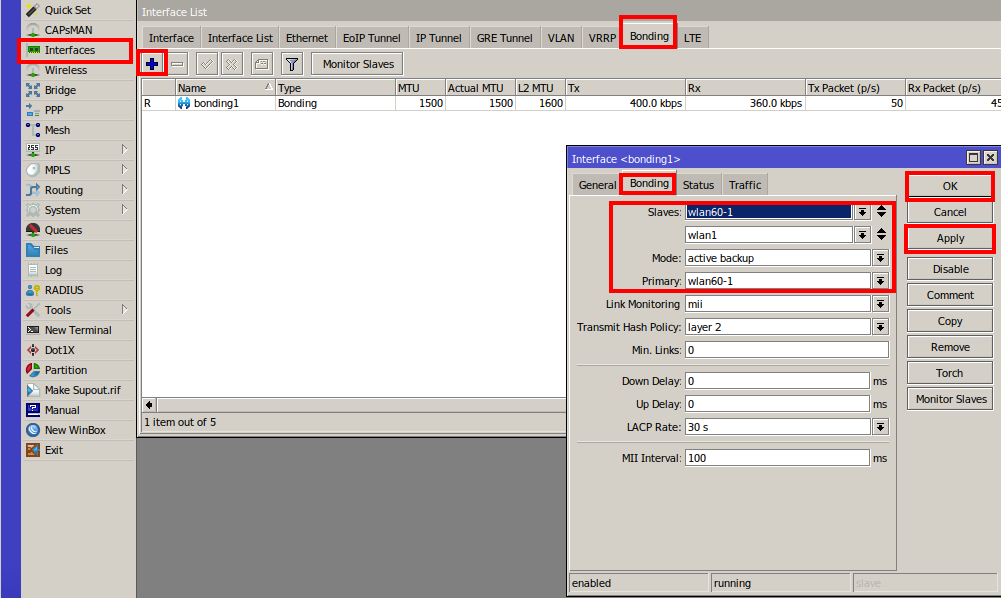
For station device
- Press on the Bonding sub-menu;
- Add a new member with "+";
- Add interface members (wlan1 and wlan60-1) to the bonding interface as Slaves;
- Add the interface member wlan60-1 as the Primary interface;
- Choose Mode as active backup;
- Apply the configuration.
Configure bridge
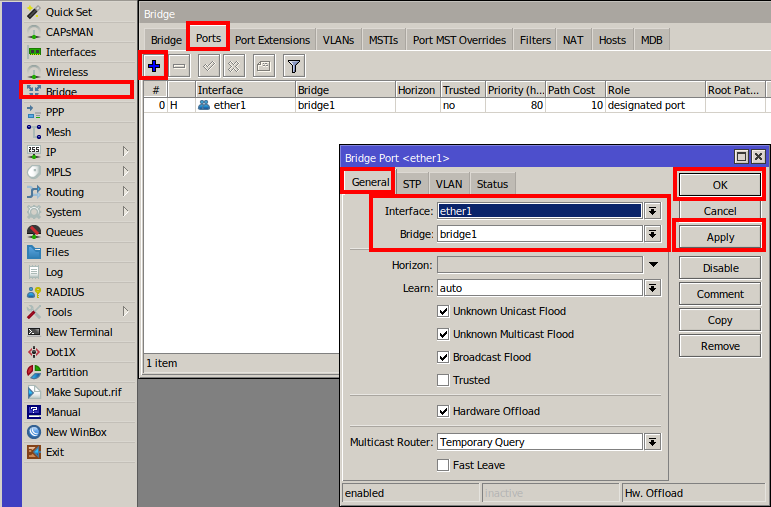
Configuring bridge settings including the bonding interface is mandatory for the active-backup to work on used devices (In this case bridge and station device settings are the same):
- Press on the Bridge sub-menu;
- Add a new member with "+";
- Add the interface member as ether1 and the Bridge member as bridge1;
- Apply the configuration;
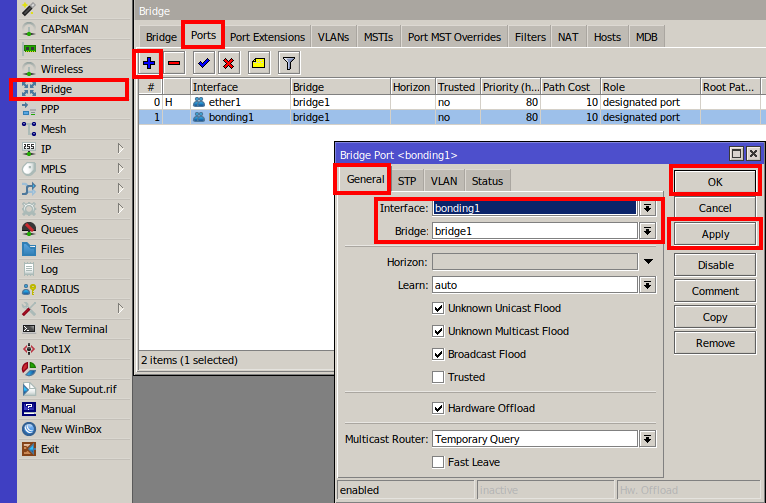
- Press on the Bridge sub-menu;
- Add a new member with "+";
- Add the interface member as bonding1 and the Bridge member as bridge1;
- Apply the configuration.
Additional configuration
Interfaces, when enabled from greyed out, will become active.
Link should be established after all previously explained steps are done. It's recommended to set up an administrator password on both devices.