FlashFig
Description
FlashFig is a Windows‑based utility designed for high‑volume configuration of MikroTik RouterBOARDs. It is intended for use by MikroTik distributors, Internet Service Providers, and other organizations that must deploy RouterOS configurations to multiple devices rapidly.
When a RouterBOARD is placed in flash‑boot mode and powered on within a Layer‑2 broadcast domain that hosts FlashFig, the application transmits the target RouterOS configuration file to the device in ~ three seconds. Consequently, a batch of routers can be provisioned concurrently by simply connecting each RouterBOARD to the same Layer‑2 network and supplying power to the FlashFig‑enabled units.
The FlashFig utility is downloadable from the MikroTik Downloads page.
FlashFig mode is enabled by default on all RouterBOARD units manufactured since March 2010. For older models, FlashFig can be activated by setting the boot-device to flash‑boot or flash‑boot‑once‑then‑nand via RouterBOARD settings or the RouterOS console command:/system/routerboard/settings/set boot-device=flash-boot-once-then-nand or /system/routerboard/settings/set boot-device=flash-boot.
Starting from RouterOS/RouterBOOT v7.16, flash boot mode will be enabled in the same way as from the factory, after every system reset initiated from the software. The same mode will be initiated when you reset the router with the reset button, (bootloader version v7.16 or higher is required). Please note that if you press and hold the reset button before powering on the router, then the backup booter is used. The backup booter firmware (installed in the factory) must also then be v7.16 or higher.
FlashFig mode on a brand new RouterBOARD is disabled on further boots only after the first successful user login or successful FlashFig attempt to avoid unwanted reconfiguration at a later time. To use FlashFig a second time on the same router, you need to enable flash-boot in RouterBOARD settings (this setting will revert to NAND after a successful configuration change OR once any user logs into the board).
If the RouterOS reset-configuration command is used later (or configuration reset using the Reset button), FlashFig configuration is loaded. To permanently overwrite, use the Netinstall process and check Apply default configuration or use the -r flag in the Linux-based command line.
Starting from RouterOS/FlashFig 7.22, it is possible to configure device‑mode and protected‑routerboot and other settings using Mode script. Mode script executes before any custom or default configuration scripts. Upon completion, the script is automatically removed from the device. If the script modifies the device-mode, the device will be rebooted immediately after execution.
You view the FlashFig video tutorial on the MikroTik YouTube channel.
FlashFig Example
This is a step-by-step example of how to use the FlashFig process to apply a chosen MikroTik RouterOS configuration to a 'factory fresh' RouterBOARD.
Requirements
The Windows computer must be equipped with the following ports and contain the following files:
- A working Ethernet port.
- Valid Config and/or Mode script file with MikroTik RouterOS configuration similar to an export/import file. In addition to valid MikroTik RouterOS CLI commands, it is also possible to re-apply the factory passwords by using the read-only variables $defconfPassword and $defconfWifiPassword;
- Always use the latest FlashFig program available from the downloads page.
- The RouterBOARD has to be in flash-boot mode. If this is the very first boot, nothing needs to be done.
Be aware of the text editor's treatment of CR/LF characters and test that the config has no errors when normally applied onto an identical version of RouterOS before applying via FlashFig, as run-time errors will not be visible!
Pre-Configuration
Windows Computer
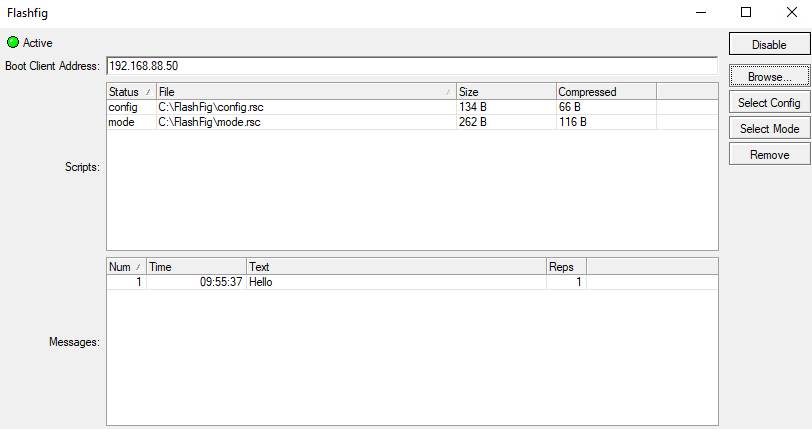
- Run FlashFig.
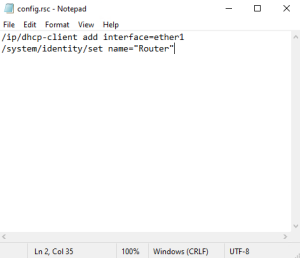
- Prepare Config and/or Mode script .rsc file/s. Config and/or Mode script file is a regular/import file, it accepts valid MikroTik RouterOS CLI commands. You can create a .rsc file with any text editor program (Notepad, Notepad++, Text Editor, TextEdit, Microsoft Word, OpenOffice Writer).
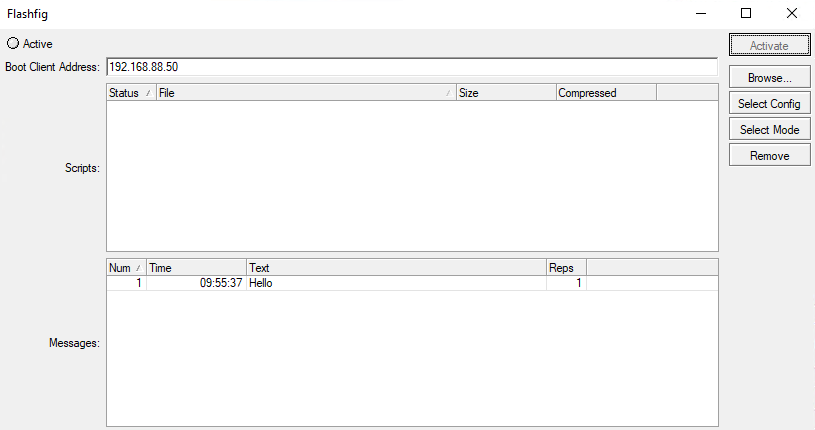
- Assign Boot Client Address, which should be an address within the same subnet as that configured on the computer's Ethernet interface.
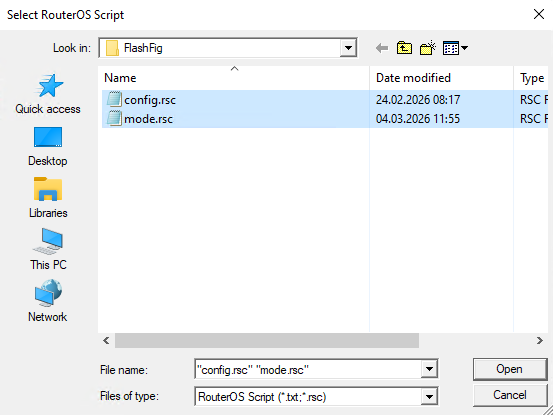
- Browse for Config and/or Mode script .rsc files
- Highlight Config script file and Select Config, highlight Mode script file and Select Mode.
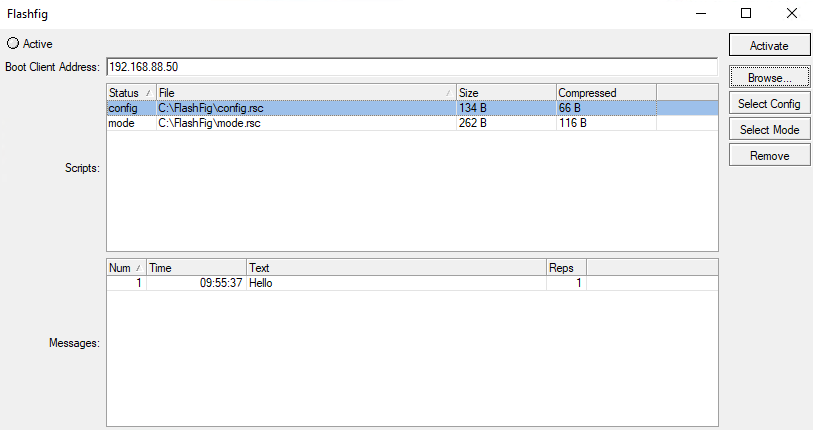
- Activate FlashFig server. Now it is ready to FlashFig. Note: any RouterBOARD will be FlashFig'ed within the network when it is powered on with boot-device configured to flash-boot or flash-boot-once-then-nand.
RouterBOARD
-
FlashFig mode is enabled on every RouterBOARD from the factory by default, which means no configuration is required on the RouterBOARD.
-
If FlashFig is not enabled on your router, access the RouterBOARD with WinBox/Console and change the boot-device to flash-boot or flash-boot-once-then-nand:
/system/routerboard/settings/set boot-device=flash-boot
Or use a more preferable option, for a single boot flash-boot:
/system/routerboard/settings/set boot-device=flash-boot-once-then-nand
Your router is now ready for FlashFig.
Connect
Connect the Boot port of RouterBOARD and the FlashFig computer to the same Local Area Network.
Run FlashFig
- Plug in power for RouterBOARD.
- Check the status on the FlashFig program.
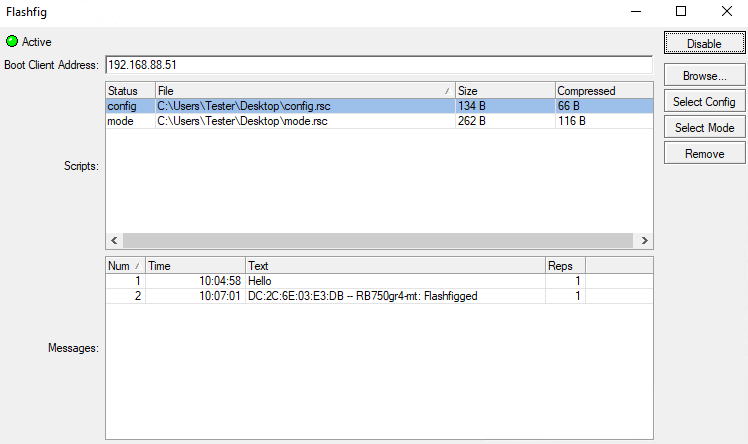
Messages log shows "Flashfigged" and RouterBOARD should repeatedly make the morse code sound for the character "/" ("_.._." and flash the LED) - it is now safe to unplug / power down the router:
- FlashFig configuration was applied to the RouterBOARD and it is ready to be used in production with this new config.
Troubleshoot
FlashFig can not find a router
If between a PC and a router there is another device (a router/switch), ensure that for this device:
- DHCP server is disabled.
- If used ports are in a bridge, set bridge protocol-mode to none.
- HW-offload for used ports is disabled.
FlashFig finds a router, flashing is not done (no TFTP request)
Ensure that the computer on which FlashFig is running has only one network interface active.
FlashFig is done, but a configuration is not applied
If all procedures went successfully, but RouterOS configuration from the .rsc file is not applied, add startup delay to the *.rsc configuration file. The reason might be that the configuration script is executed before all interfaces boot up.
Not enough flash space, ignoring
FlashFig configuration maximum file size is up to 4000 bytes, otherwise the program will return an error as above.