WinBox
Summary
WinBox is a utility that allows the administration of MikroTik RouterOS using a fast and simple GUI. WinBox v4 is a native application available for Windows, Linux, and macOS — no Wine or emulation required. All WinBox interface functions mirror the console functions as closely as possible, which is why there are no separate WinBox sections in the manual.
The following security features are used:
- WinBox is signed with an Extended Validation certificate issued by SIA Mikrotīkls (MikroTik).
- WinBox uses ECSRP for key exchange and authentication.
- Both sides verify that the other side knows the password (no man-in-the-middle attack is possible).
- WinBox uses AES128-CBC-SHA as an encryption algorithm.
WinBox v4 replaces the legacy Windows-based WinBox v3. If you are still using the older version, see the WinBox v3 (Legacy) page.
Download and Installation
Download WinBox from the MikroTik download page.
Windows
- Download the ZIP archive containing
WinBox.exe. - Extract the archive to a folder of your choice.
- Run
WinBox.exe— no installation required.
Linux
- Download the ZIP archive containing the Linux binary.
- Extract the archive to a folder of your choice.
- Run the binary from the terminal or file manager.
macOS
- Download the DMG package.
- Open the
.dmgfile and drag WinBox to the Applications folder. - Launch WinBox from the Applications folder.
Extract the ZIP archive contents into a self-contained subfolder that contains no other files. This is required for the self-update feature to work correctly and applies to the Windows and Linux versions of WinBox.
Login interface
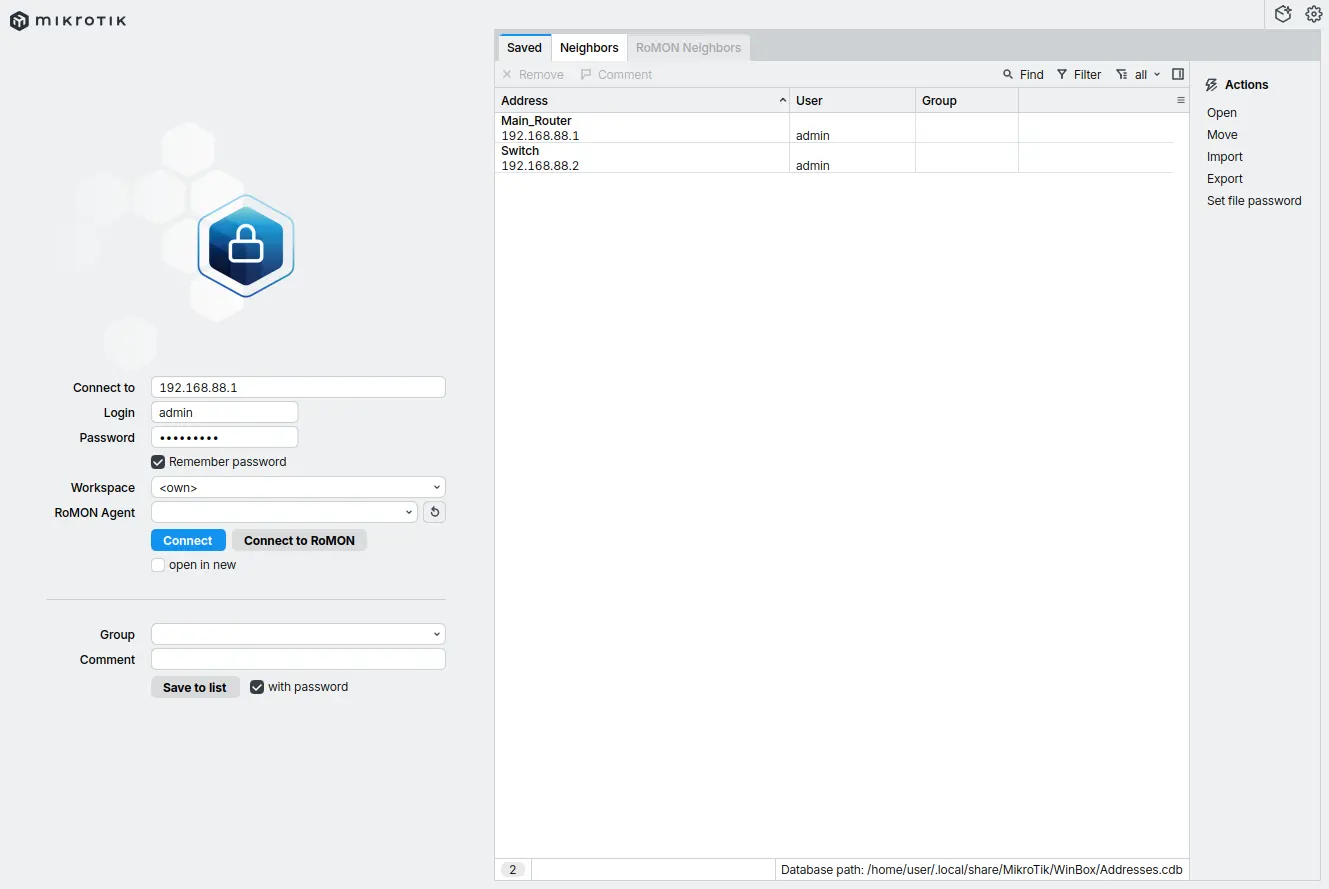
This section covers the login interface. It is the first thing you will see when launching the WinBox application. From here you can connect to the RouterOS device manually using the login section, or use saved credentials from the Saved tab. For more convenient discovery of devices in the L2 network connected to the PC running WinBox, the Neighbors tab can be used. The Login interface (see Figure 1) can be divided into two sections:
- Login section - the part on the left, used for connecting to the RouterOS.
- Device list section - the part on the right, contains saved or discovered devices, and can be further divided into three tabs.
- Saved - user saved devices.
- Neighbors - discovered devices.
- RoMON - RoMON discovered devices.
Elements that are not covered by the above sections can be found in Table 3.
Figure 1 - Login interface
Login section
Login section (see Figure 2) is used for entering device credentials and connecting to the devices. A detailed description of each Login section element can be found in Table 1.
Figure 2 - Login section
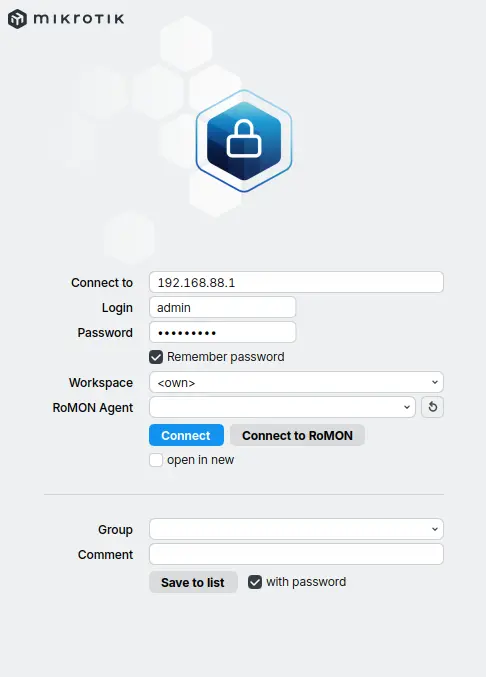
Table 1 - Login section elements
| Element | Description |
|---|---|
 | Connect to - Address field. Supported address formats are: MAC, IPv4, [IPv6], domain name. (IPv6 should specifically be used in square brackets) You can also enter a custom port after the IP address, separated by a colon (e.g., 192.168.88.1:9999). The port can be changed in the RouterOS Services menu. |
 | Login - Username field. |
 | Password - Password field. The Remember password check mark can be used to save passwords between sessions. |
 | Workspace - Workspace selection dropdown menu. (see Workspaces section) |
 | RoMON Agent - RoMON Agent selection dropdown menu. Allows to connect to the device using MAC address through RoMON "proxy". For more information see RoMON documentation. |
 | Connect - connect button cluster: - Connect - initiates connection to the router - Connect to RoMON - initiates connection to the RoMON "proxy". For more information see RoMON documentation. - Open in new - when enabled, opens the router's configuration interface in a new window. (works only with the Connect button, not with Connect to RoMON button) |
 | Save to list - Allows to save router credentials to the Saved list. Additional parameters: - Group - the group the entry will belong to, which allows for easier sorting of saved entries - Comment - allows to add device description or other useful information - with password - when enabled, the password is saved along with other credentials. If disabled, the password must be entered manually each time a saved entry is used. |
To connect to the device, use an IP address whenever possible. A MAC session uses network broadcasts and is not 100% reliable.
Device list section
Device list section is used for navigating lists of saved and discovered devices.
Figure 3 - Saved device list
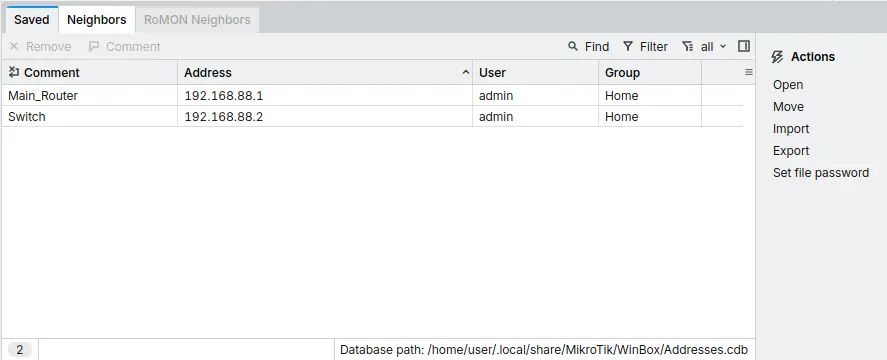
Save frequently accessed routers in the Saved tab. Each entry can include:
- Address - Address field. Supported address formats are: MAC, IPv4, [IPv6], domain name. (IPv6 should specifically be used in square brackets) You can also enter a custom port after the IP address, separated by a colon (e.g.,
192.168.88.1:9999). The port can be changed in the RouterOS Services menu. - User - username for authentication.
- Password - password for authentication. (not shown in the table for security reasons)
- Group - group the entry belongs to.
- Comment - device description or other useful information.
Database path shows (in the bottom right corner of Figure 3) the location on your PC where the currently opened device list's .cdb file is stored. All Actions in this list are used for this database management.
Actions available for this list:
- Open - opens saved device list from exported .cdb file of your choice
- Move - moves current .cdb file to different directory of your choice
- Import - overrides current .cdb file with saved device list from exported .cdb file of your choice
- Export - exports saved device list from current .cdb file, so it can be used with Import or Open
- Set file password - encrypts current .cdb file with a password
Figure 4 - Neighbors device list
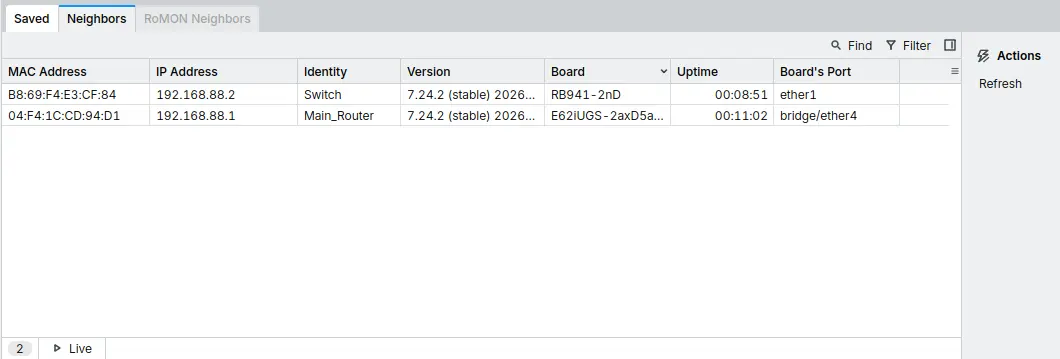
Use the Neighbors tab to discover available routers on the network. From the list, select a router and then select Connect. Click the IP or MAC address column to choose which address to use for the connection.
Actions available for this list:
- Refresh - refreshes list of discovered devices
Neighbor discovery also shows devices that are not compatible with WinBox, such as Cisco routers using CDP (Cisco Discovery Protocol). Connecting to a SwOS device opens a web browser instead.
Figure 5 - RoMON Neighbor device list

Use the RoMON Neighbors tab to discover routers reachable through the RoMON overlay network. From the list, select a router and then select Connect to open a RoMON session through the selected agent via MAC address. For agent selection, see table 1 RoMON Agent field description. For more information see dedicated RoMON documentation.
Configuration interface
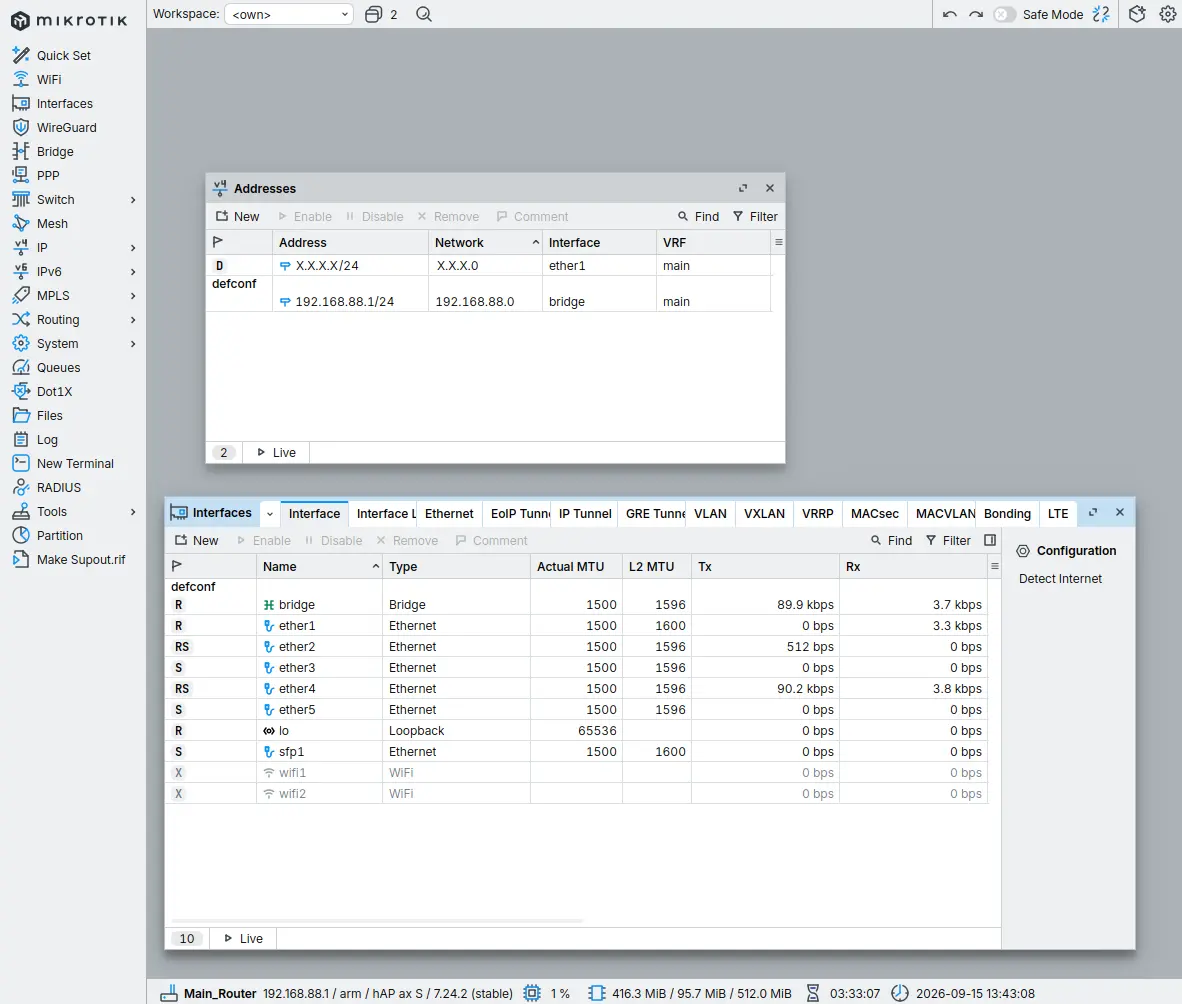
After entering router credentials or using saved ones and connecting through the Login interface you will be prompted to the Configuration interface that can be seen in Figure 6. The WinBox v4 Configuration interface consists of:
- Toolbar section at the top - contains general WinBox navigation buttons.
- Sidebar section on the left - lists all available menus and sub-menus. The list changes depending on installed packages (for example, enabling the container package adds the Container and App menus).
- Work area section in the middle - area where all internal windows are opened.
- Resources section at the bottom - contains general device information.
Figure 6 - Configuration interface
Toolbar section
Figure 7 - Toolbar section

Table 2 - Toolbar section elements
| Element | Description |
|---|---|
 | Workspace - Workspace selection dropdown menu. (see Workspaces section) |
 | Opened windows list - list of all currently opened internal WinBox windows. This list allows to easily select the necessary window or close the unnecessary ones. Sub-menu:  |
 | Menu search - Allows to search for the menu using its name. For search to work you need to enter at least three symbols. Sub-menu:  |
 | Undo and Redo - Undo (left button) reverts the last change, Redo (right button) adds this change back. Maximum possible amount of the commands that can be undone is 100. For more information you can see Configuration Management documentation. |
 | Safe Mode toggle - allows to enable Safe Mode to prevent accidental session disconnects. For more information please see Safe Mode documentation. |
 | Disconnect - end current session and return to Login interface. |
Sidebar section
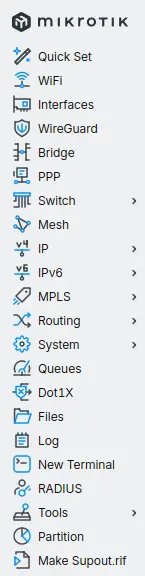
Sidebar (see Figure 8) contains a list of all available menus and sub-menus. This list changes depending on what packages are installed.
Figure 8 - Sidebar section
Work area section
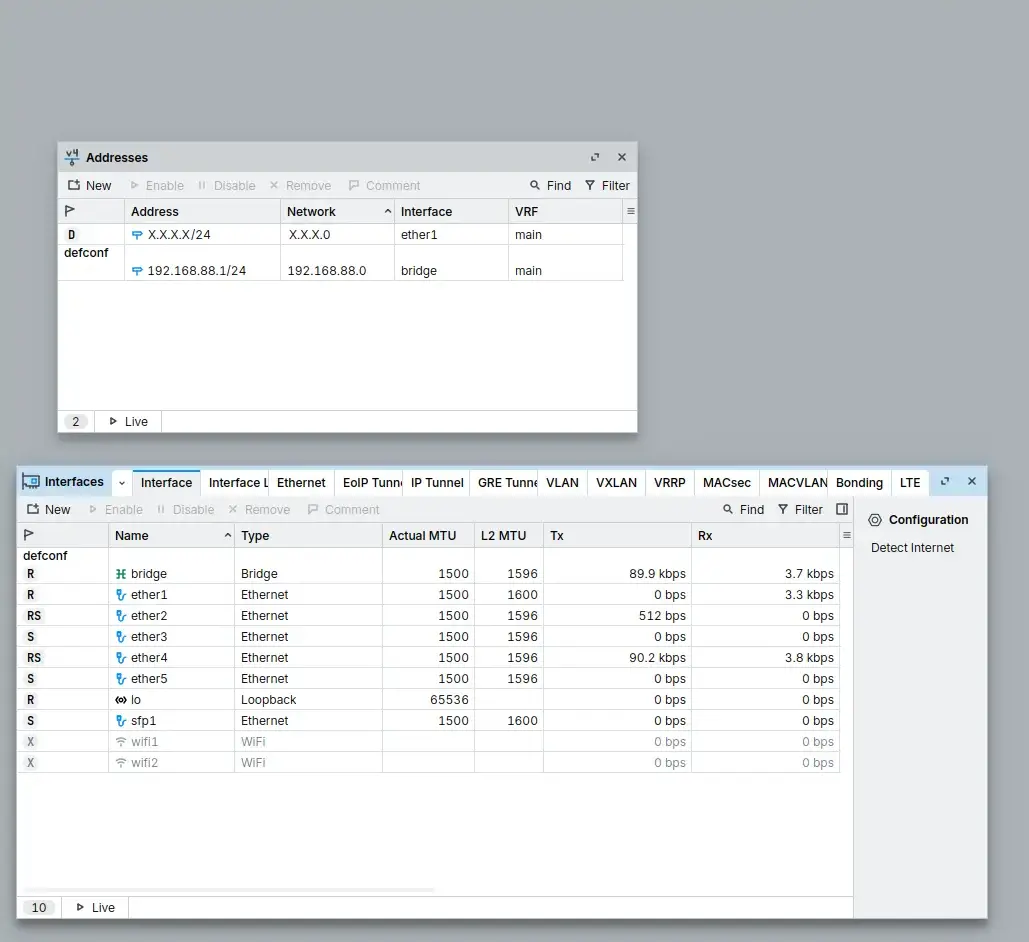
The Work area is the central part of the WinBox window where all internal (child) windows are displayed.
Figure 9 - Work area section
Working with Child Windows
WinBox has an MDI interface meaning that all menu configuration (child) windows are attached to the main (parent) WinBox window and are shown in the work area.
Tab Toolbar
Each tab has a toolbar with common actions:
- New - add a new item to the list.
- Remove - remove the selected item from the list.
- Enable - enable the selected item.
- Disable - disable the selected item.
- Comment - add or edit a comment.
- Sort - sort and filter displayed items.
Almost all tabs have a quick search field on the right side of the toolbar. Entering text searches through all items and highlights matches.
Sorting and Filtering
Select the Sort button to show filter options:
- Choose a column from the first drop-down box.
- Choose a comparison operator from the second drop-down box (e.g., is, in, is not, contains).
- Enter the value to compare against.
- Select Filter to apply.
WinBox supports stacking multiple filters. Select [+] to add another filter and [-] to remove one.
Column Customization
To customize displayed columns:
- Select the arrow button on the right side of column titles, or right-click the item list.
- Go to Show Columns and pick the desired column.
Changes are saved and persist between sessions.
Resources section
Show routerss general information and resources.
Figure 10 - Resources section

From left to right fields as follows:
- Router Identity
- Router IP address
- Router Architecture
- Router Model
- RouterOS version installed on the router
- Router CPU utilization in percents
- Router RAM free/used/total
- Router Uptime
- Router Clock
General WinBox settings and more
This section covers WinBox GUI settings and miscellaneous elements (see Table 3) that are not covered in other paragraphs.
Table 3 - Miscellaneous elements
| Element | Description |
|---|---|
 | Create new session - Located on the top right. This button opens new WinBox window. |
 | Settings/App information - Located on the top right. Opens dropdown menu with the following elements: - Settings - GUI Settings menu - Shortcuts - information about available shortcut combinations (see Keyboard Shortcuts) - About - application information such as version, useful links, licenses information - Quit - close WinBox application |
 | WinBox update notification - Located on the top right. Appears only when WinBox update is available, allows to download latest version of WinBox without accessing MikroTik website. |
 | RouterOS update notification - Located on the top right. Appears only in configuration interface when RouterOS update is available, allows to download latest version of RouterOS without accessing package menu or manually uploading packages. |
GUI Settings menu
WinBox v4 features an advanced GUI customization menu (see Figure 11) that allows to change multiple attributes of how WinBox displays information. A detailed description of each setting can be found in Table 4.
Figure 11 - GUI Settings menu
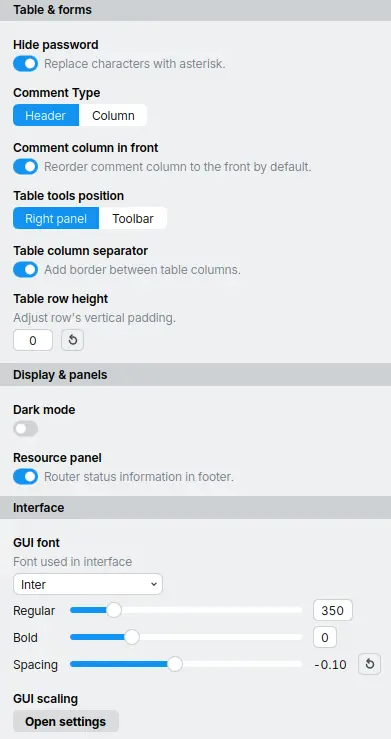
Table 4 - GUI Settings elements
| Element | Description |
|---|---|
 | Hide password - replaces contents of RouterOS sensitive fields with asterisks. (list of sensitive parameters) |
 | Comment Type - selects whether comments are displayed as a header for the entry or as a separate column. |
 | Comment column in front - when column Comment type is selected ensures that comment is placed before all other columns. |
 | Table tools position - selects whether tools for the specific table are displayed on the right side of the internal WinBox window or as a single button with dropdown menu in the toolbar of the internal WinBox window. |
 | Table column separator - selects if vertical lines separating columns should be displayed or not. |
 | Table row height - value from 0 to 20, changes row's vertical padding, higher values provide more padding improving distinction between rows. |
 | Dark mode - enables darker color scheme for the application. |
 | Resource panel - selects whether to display router resource/identity information at the bottom of the WinBox window in the configuration interface. |
 | GUI font - allows to select which font will be used all across the WinBox application. Additional parameters: - Regular - value from 300 to 600, allows to change thickness of regular text all across the WinBox application - Bold - value from -100 to 300, allows to change thickness of bold text all across the WinBox application - Spacing - value from -1 to 1, allows to change spacing between characters. |
 | GUI scaling - values from 67% to 250%, allows to change size of the UI. Opens sub-menu in the bottom right corner. Sub-menu:  - Global zoom - Changes both UI size and Spacing - UI size - changes size of the UI elements - Spacing - changes spacing between UI elements |
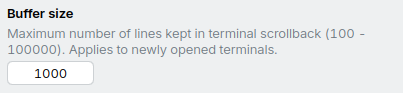 | Buffer size - maximum number of lines kept in terminal scrollback (100 to 100000). Applies to newly opened terminals. |
Workspaces
WinBox v4 introduces workspaces, replacing the session system from WinBox v3. Workspaces allow you to organize connections into separate environments. Each workspace maintains its own set of open connections and windows.
Keyboard Shortcuts
This section covers keyboard shortcuts for different versions of WinBox depending on the operating system.
Linux/Windows Shortcuts
| Shortcut | Description |
|---|---|
| Application | |
| Ctrl + + / Ctrl + = / Ctrl + Scroll up | Zoom in |
| Ctrl + - / Ctrl + Scroll down | Zoom out |
| Ctrl + 0 | Zoom reset |
| F11 | Toggle fullscreen |
| Workspace | |
| Alt + F | Menu search |
| Alt + W / Ctrl + F4 / Esc | Close active window |
| Alt + S | Switch active window |
| Alt + A | Switch active window backwards |
| Alt + T | Open new terminal window |
| Ctrl + Tab | Next tab in active window |
| Ctrl + Shift + Tab | Previous tab in active window |
| Table | |
| Ctrl + F | Find text |
| Ctrl + A | Select all rows |
| Insert / Ctrl + N | Add new item |
| Delete | Remove selected rows |
| Ctrl + E | Enable selected rows |
| Ctrl + Shift + E | Disable selected rows |
| Ctrl + M | Comment selected rows |
| Enter | Open current row |
| F5 | Reload |
| End | Move cursor to bottom |
| Home | Move cursor to top |
| Page Down | Move cursor page down |
| Page Up | Move cursor page up |
| Shift + Click | Multi column sort |
| Form | |
| Shift + Click | Multi tab expand |
macOS Shortcuts
| Shortcut | Description |
|---|---|
| Application | |
| ⌘ + + / ⌘ + = / ⌘ + Scroll up | Zoom in |
| ⌘ + - / ⌘ + Scroll down | Zoom out |
| ⌘ + 0 | Zoom reset |
| F11 | Toggle fullscreen |
| ⌘ + M | Minimize app |
| Workspace | |
| ⌥ + ⌘ + F | Menu search |
| ⌘ + W / ⌘ + F4 / Esc | Close active window |
| ⌘ + S | Switch active window |
| ⌘ + Shift + S | Switch active window backwards |
| ⌘ + T | Open new terminal window |
| Ctrl + Tab | Next tab in active window |
| Ctrl + Shift + Tab | Previous tab in active window |
| Table | |
| ⌘ + F | Find text |
| ⌘ + A | Select all rows |
| Insert / ⌘ + N | Add new item |
| Fn + Backspace | Remove selected rows |
| ⌘ + E | Enable selected rows |
| ⌘ + Shift + E | Disable selected rows |
| ⌘ + Shift + M | Comment selected rows |
| Enter | Open current row |
| F5 | Reload |
| End | Move cursor to bottom |
| Home | Move cursor to top |
| Page Down | Move cursor page down |
| Page Up | Move cursor page up |
| Shift + Click | Multi column sort |
| Form | |
| Shift + Click | Multi tab expand |
Troubleshooting
WinBox cannot connect to the router's IP address, devices do not show up in the Neighbors list
Make sure the firewall is set to allow WinBox connections through Private and/or Public network interfaces. On Windows, this can be configured in Control Panel\System and Security\Windows Defender Firewall\Allowed applications.
MAC connection fails with error "(port 20561) timed out"
Windows does not allow MAC connection if file and print sharing is disabled.
MAC connection fails with "ERROR could not connect to XX-XX-XX-XX-XX-XX"
Most network drivers require an IP configuration before enabling the IP stack. Set an IPv4 configuration on the host device.
WinBox MAC address connection requires an MTU value set to 1500, unfragmented. Other values may cause poor performance or connectivity loss.