The Things Stack
The Things Stack is a new version of The Things network.
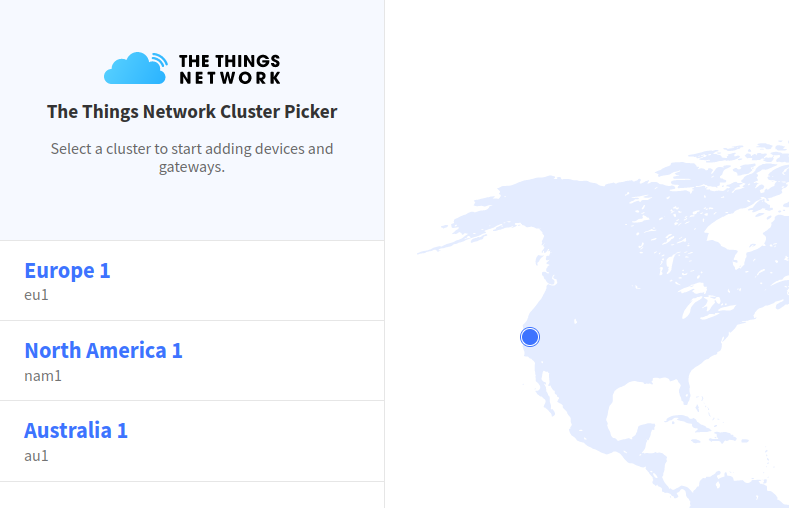
Choose your region and log in with The Things network account or other credentials.
Registering gateway
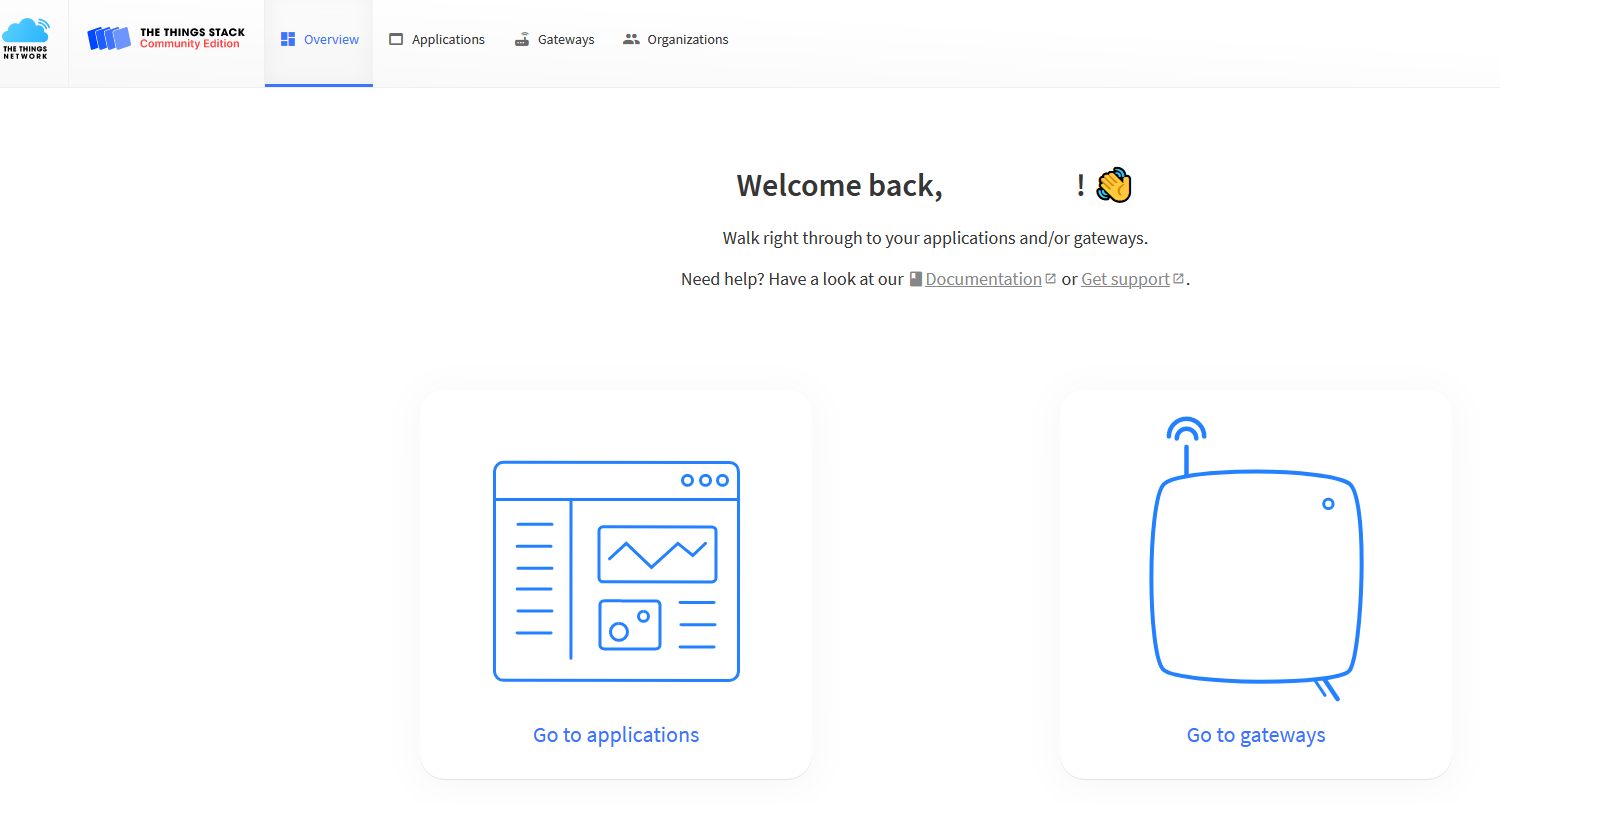
Once logged in, navigate to "Go to gateways":
Register a gateway by clicking on the "+ Register gateway" button:

From here, there are two ways a gateway can connect to the server:
-
using UDP protocol;
-
using LNS/CUPS protocol.
UDP scenario
LNS/CUPS is much more secure and we advise using it instead!
UDP is a legacy method of the communication between the server and the gateway.
UDP protocol gateway registration
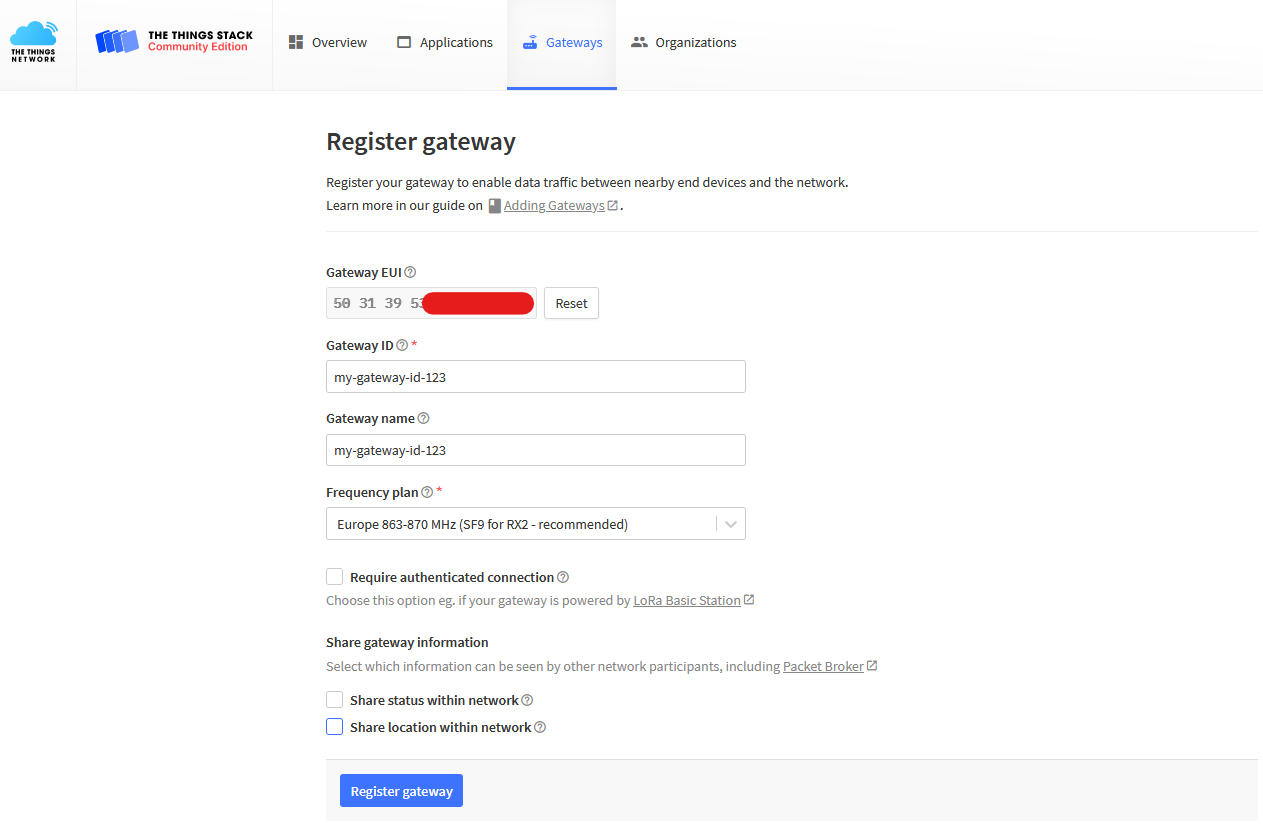
Fill in the blank spaces. Input Gateway EUI. Make sure to select a correct frequency plan. Do not enable the "Require authenticated connection" option (it is used for LNS and CUPS)!
In RouterOS, the Gateway EUI value can be found under "IoT>LoRa>Devices>Gateway ID":

For additional information check their documentation page.
UDP protocol RouterOS configuration
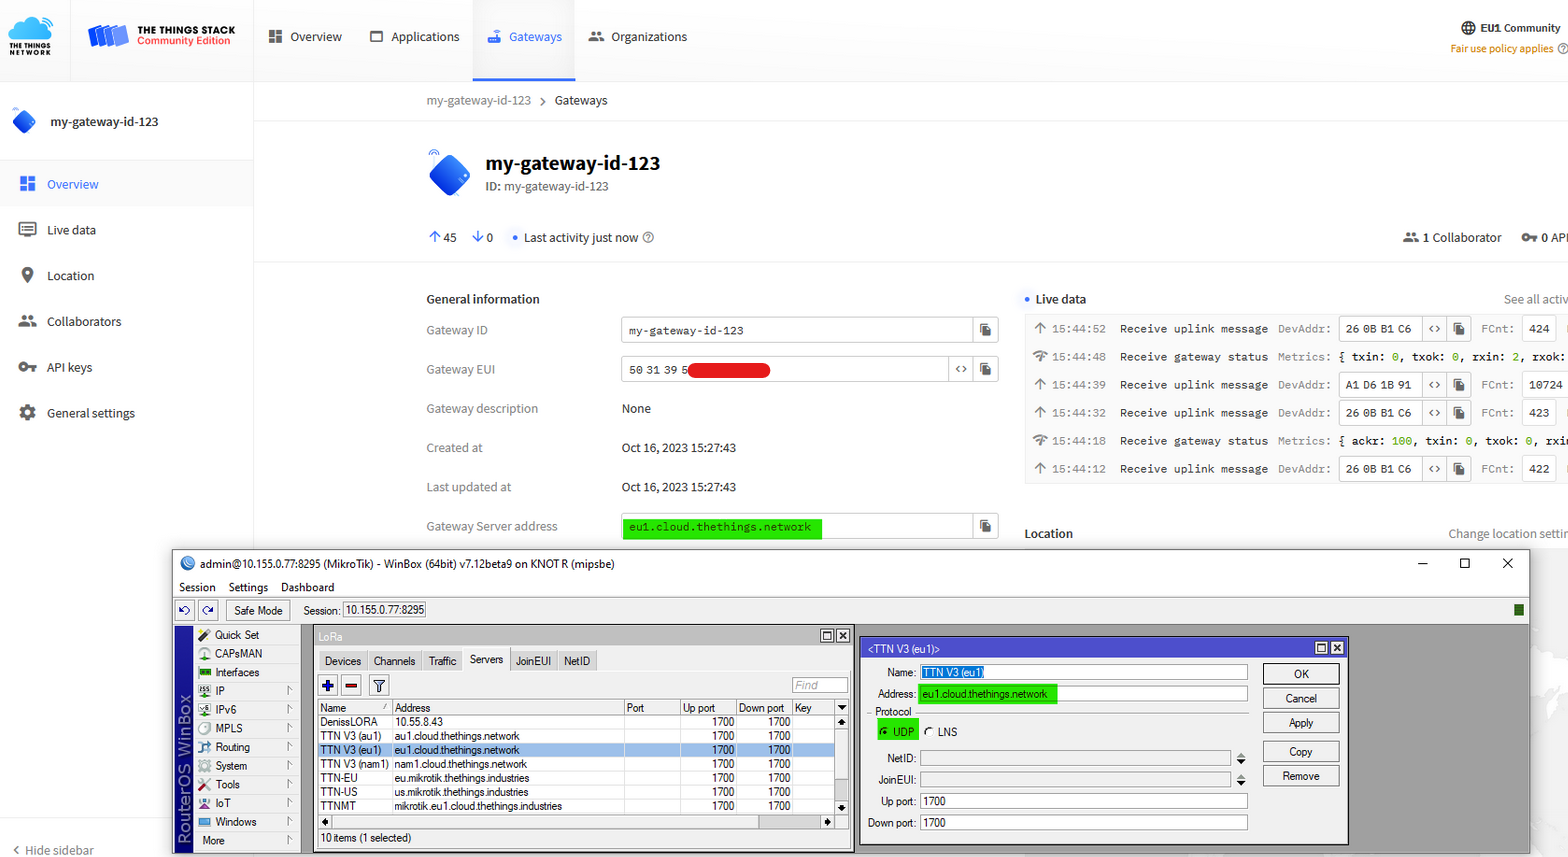
Double-check that the correct TTN server is selected by the LoRa device (in RouterOS) and that the server setting uses "UDP" protocol:
LNS and CUPS scenario
LNS/CUPS are modern protocols. They provide more security, by using TCP (TLS), where every packet gets encrypted, and they introduce gateway authentication using certificates (among other new features).
LNS and CUPS protocol gateway registration
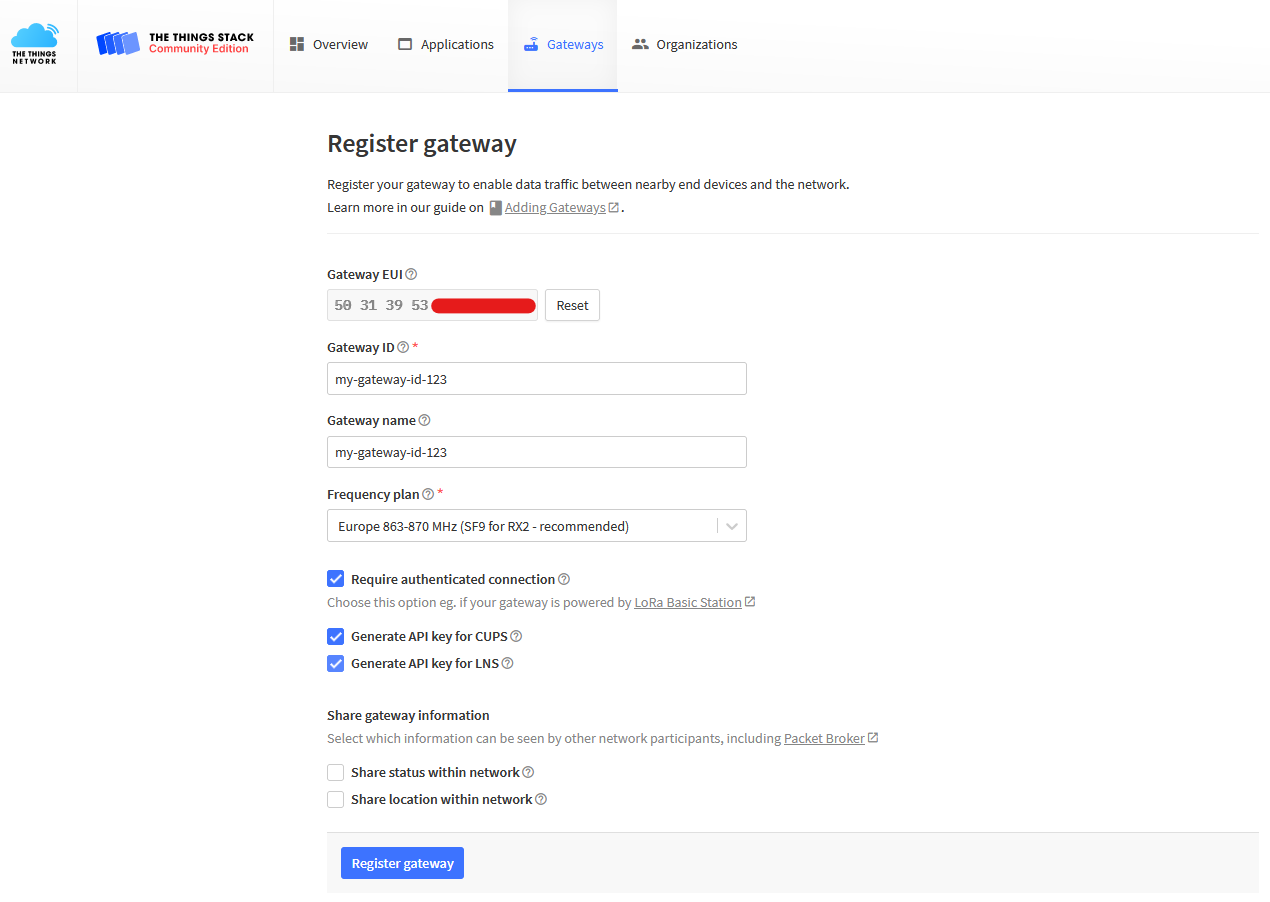
Fill in the blank spaces. Input Gateway EUI. Make sure to select a correct frequency plan. Enable "Require authenticated connection" and the follow-up (for LNS) "Generate API key for LNS" and (for CUPS) "Generate API key for CUPS" options:
In RouterOS, the Gateway EUI value can be found under "IoT>LoRa>Devices>Gateway ID":
After clicking on the "Register gateway" button, you should be prompted to download the keys. Download them.
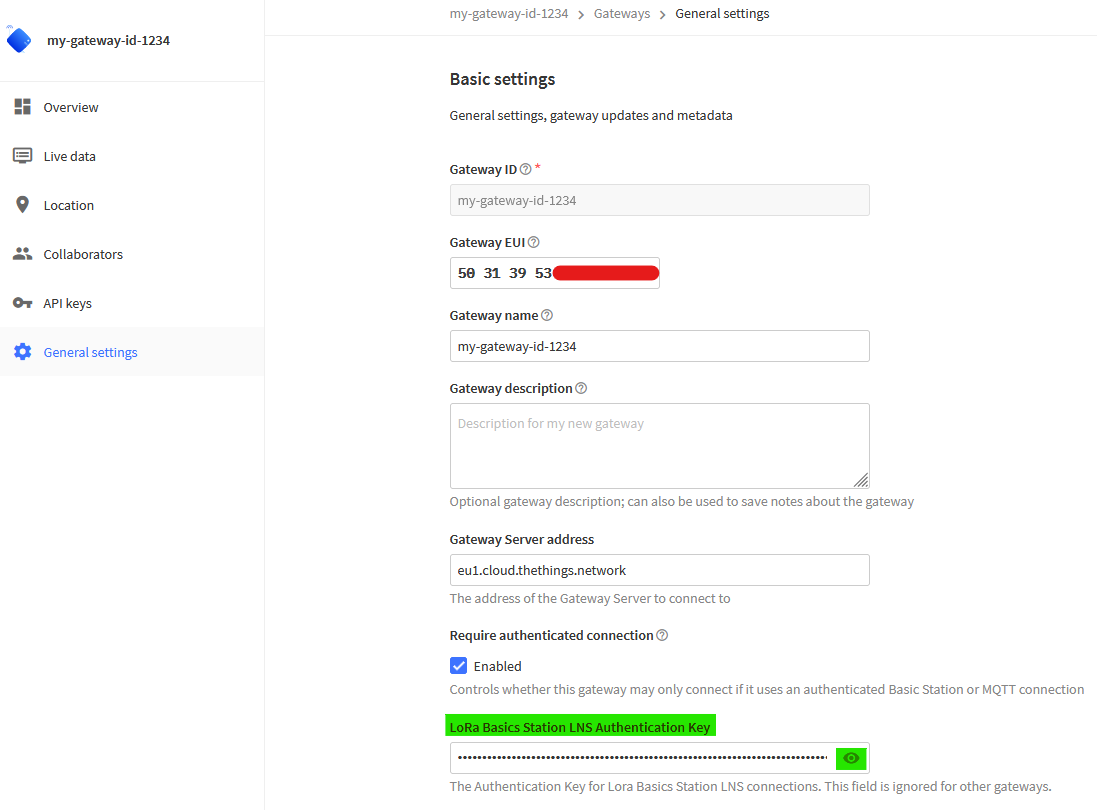
To view LNS and CUPS keys, inspect download files. LNS key should also be visible under the "LoRa Basics Station LNS authentication Key" field:
For additional information check their documentation page.
LNS protocol RouterOS settings
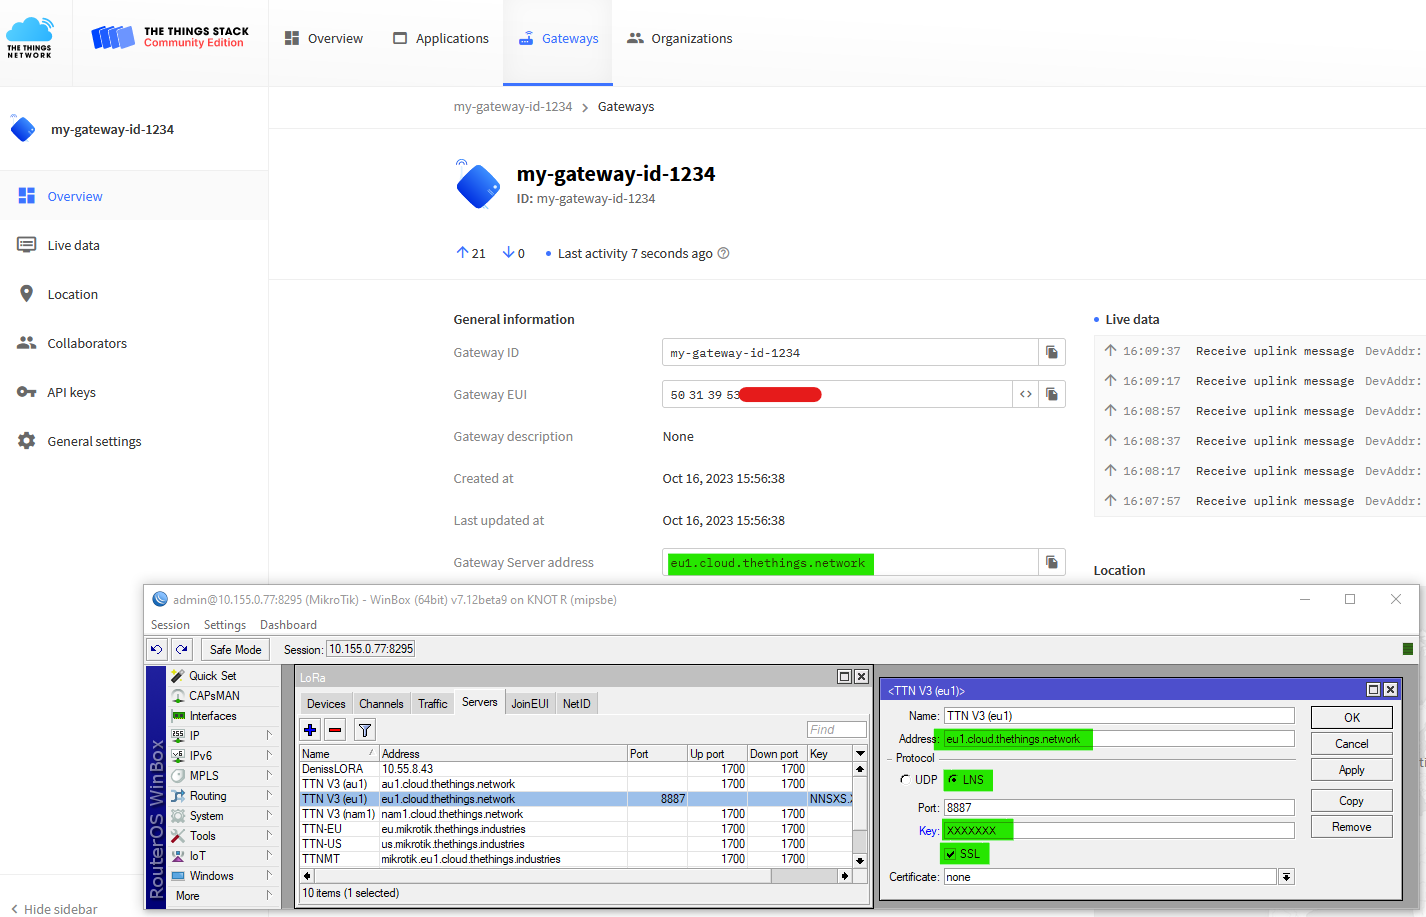
Make sure that the correct TTN server is selected, that the correct port is configured (TTN expects LNS over 8887), that LNS protocol is chosen, that the LNS key (from the "LoRa Basics Station LNS authentication Key" field) is input and that "SSL" checkbox is enabled:
In case you are using default settings, gateway's internal builtin-trust-store should be enabled for the lora service and should already have required Root CA pre-installed. You can skip to the next step.
Optionally, if you have disabled builtin-trust-store and if you want to upload certificates manually, download and import Root Certificates.
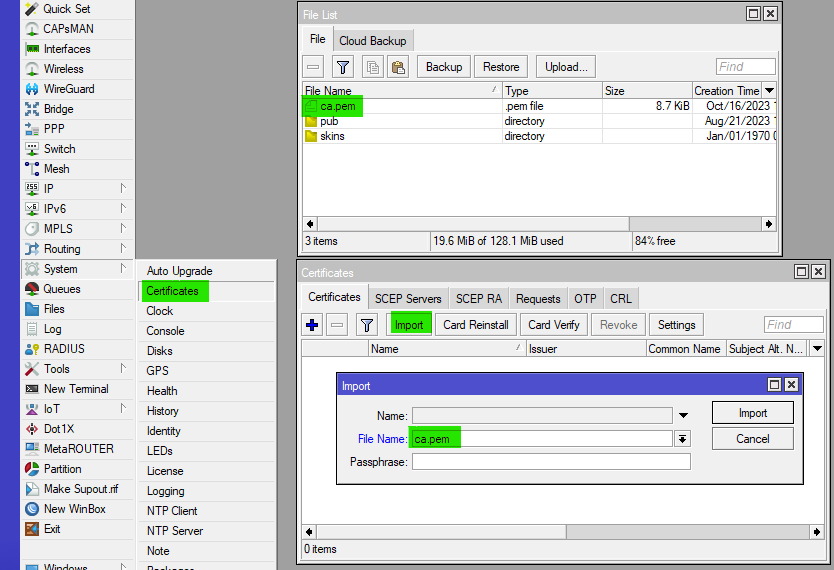
After the certificate file was downloaded, drag and drop it into the RouterOS file menu and import the certificate list:
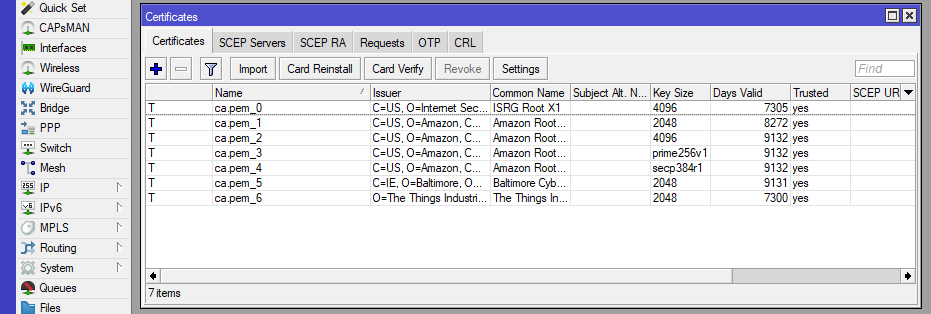
This should make the certificate list trusted:
CUPS protocol RouterOS settings
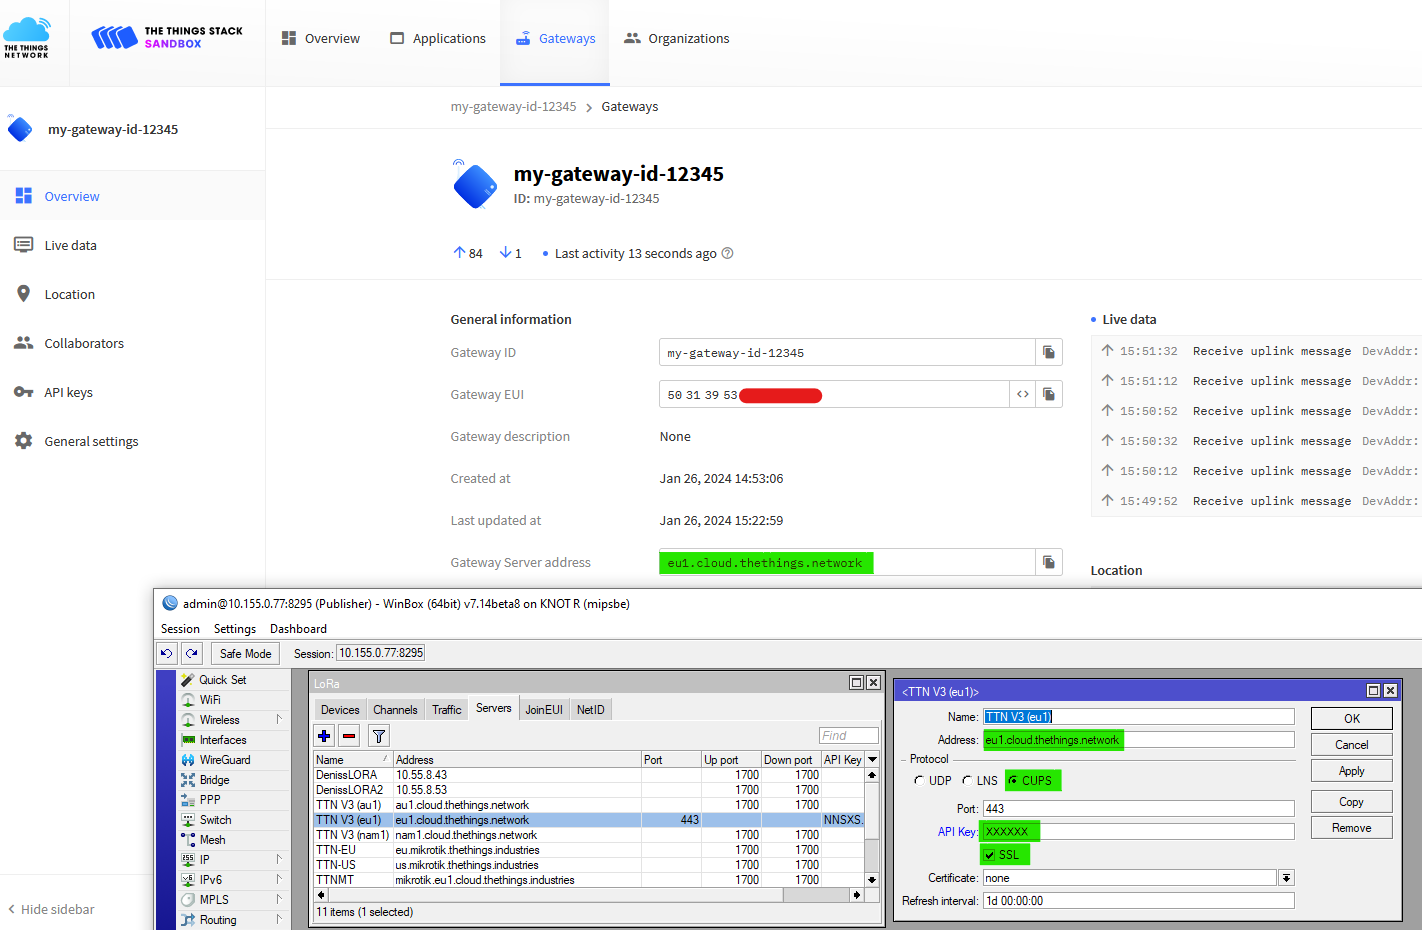
Make sure that the correct TTN server is selected, that the correct port is configured (TTN expects CUPS over 443), that CUPS protocol is chosen, that the CUPS key is input (obtained from the downloaded cups.key file during the gateway registration step) and that the "SSL" checkbox is enabled:
In case you are using default settings, gateway's internal builtin-trust-store should be enabled for the lora service and should already have required Root CA pre-installed. You can skip to the next step.
Optionally, if you have disabled builtin-trust-store and if you want to upload certificates manually, download and import Root Certificates.
After the certificate file was downloaded, drag and drop it into the RouterOS file menu and import the certificate list:
This should make the certificate list trusted:
Gateway registration verification
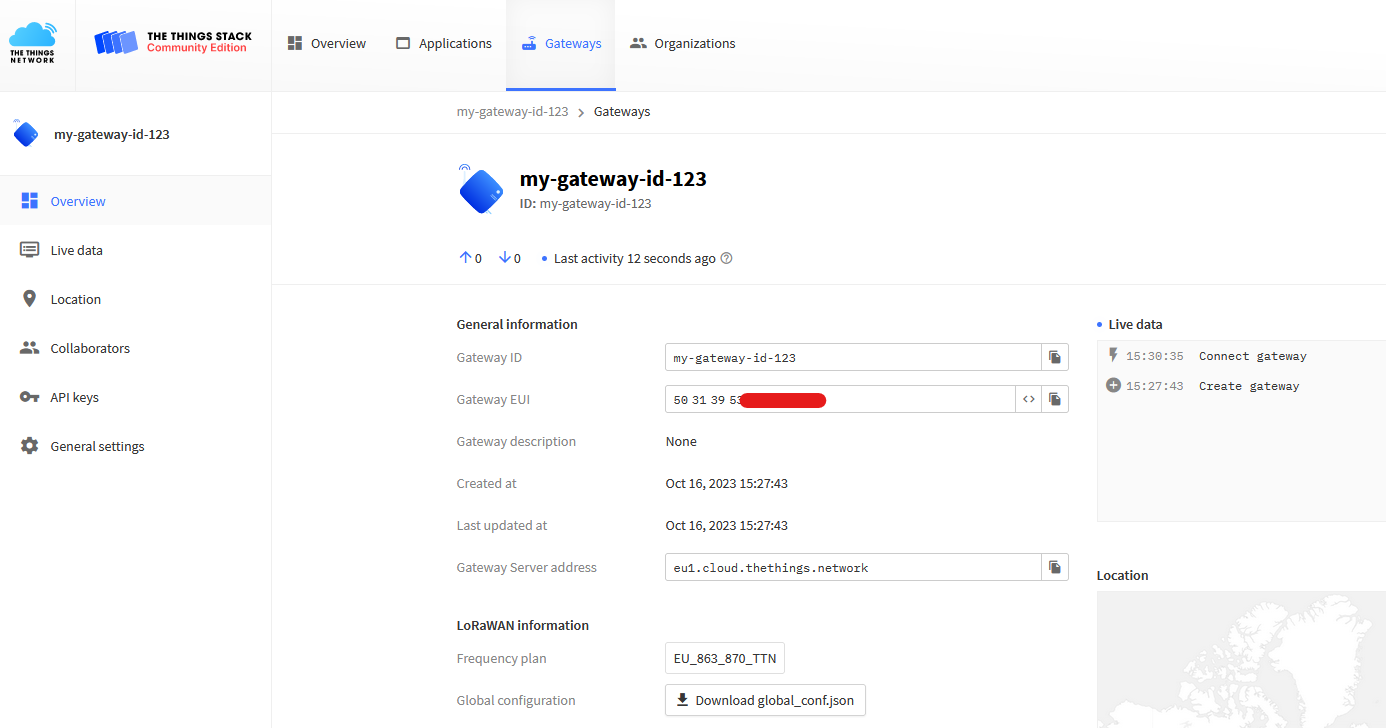
If everything is configured correctly, right after you enable the LoRa interface in RouterOS ("IoT>LoRa>Devices>Enable"):

You should see the gateway connection "Live data" update:
Registering the node
In this section, we will showcase how to add MikroTik's TG-LR tags (TG-LR82 or TG-LR92) to the portal.
The same principles apply to other vendor nodes/sensors/tags.
Create application
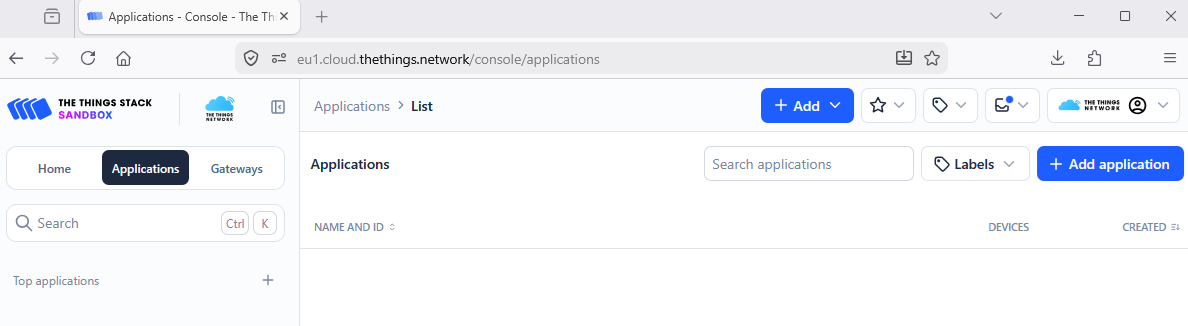
On the TTS portal, navigate to the "Applications" tab and click on "add application":
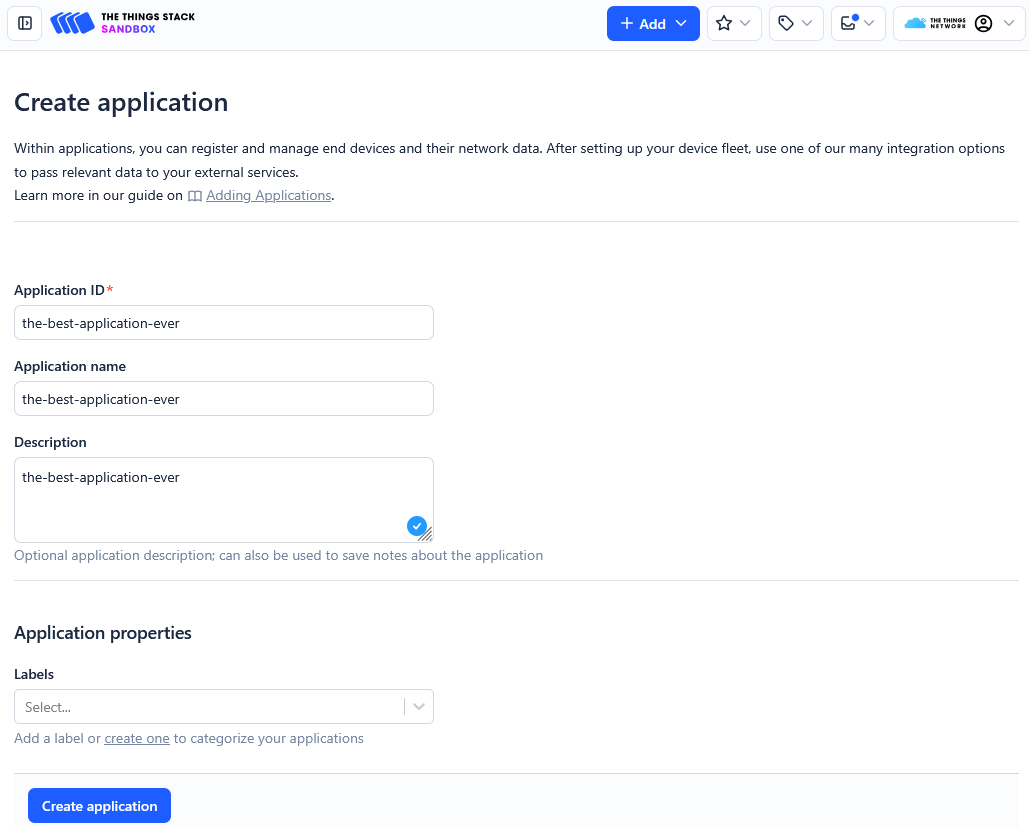
Input the ID you want it to have, name it, add description, and create it ("Create application"):
Register end device
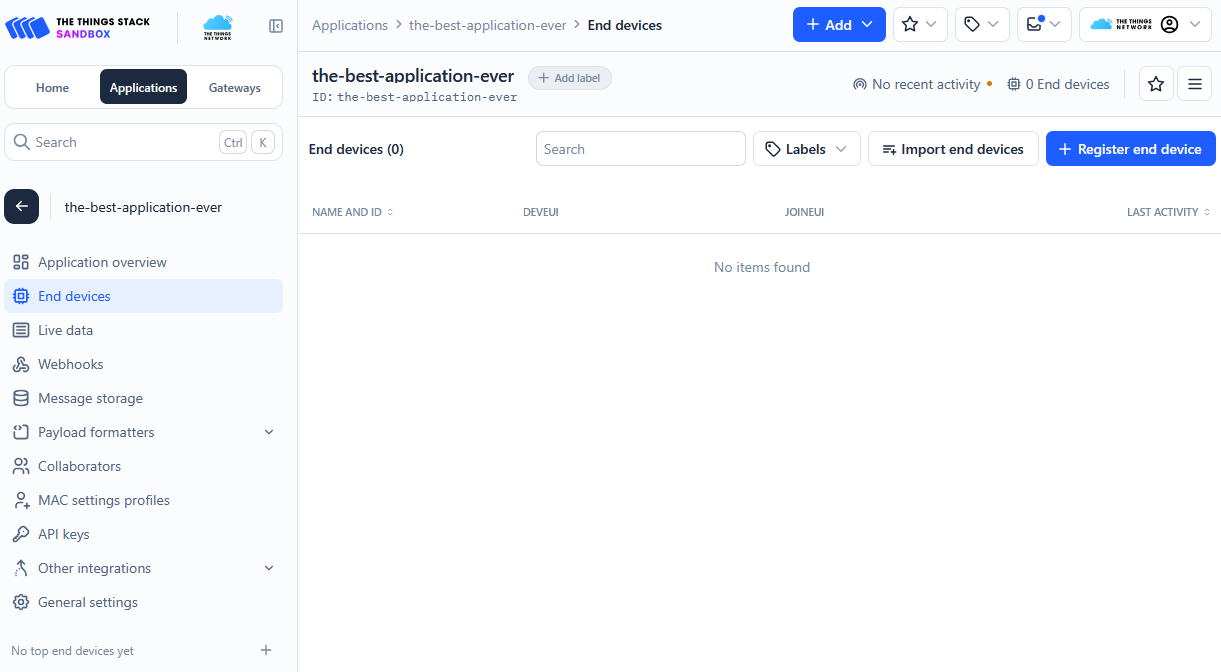
Under the application you've just created, navigate to "End devices" tab and "+ Register end device":
You can "Select the end device in the LoRaWAN Device Repository" (and automate the process) or you can add it manually ("Enter end device specifics manually"):
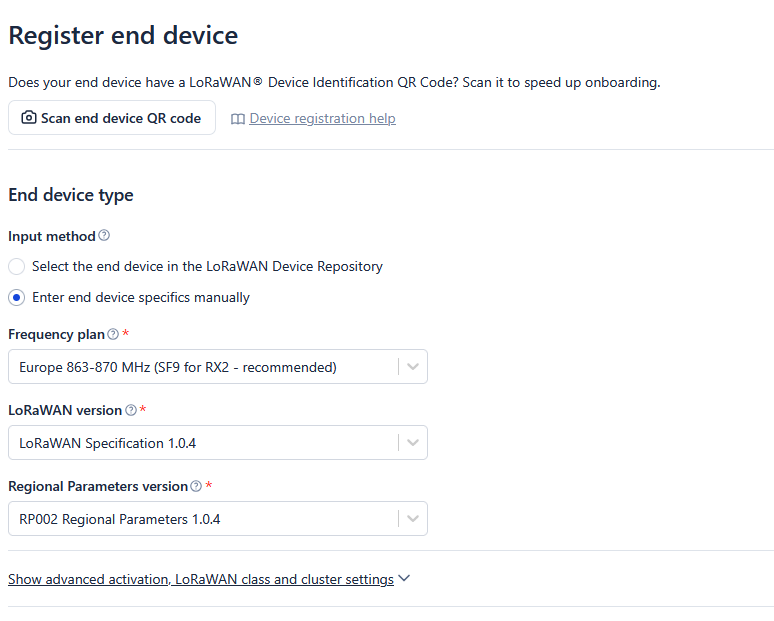
- Input "Frequency plan" (for example, Europe 863-870 MHz (SF9 for RX2 - recommended), depending on which frequency your tag supports);
- "LoRaWAN version" ("LoRaWAN Specification 1.0.4");
- "Regional Parameters version"" ("RP002 Regional Parameters 1.0.4").
Find "JoinEUI", "DevEUI" and "AppKey" printed on the label within the package and continue with provisioning information:
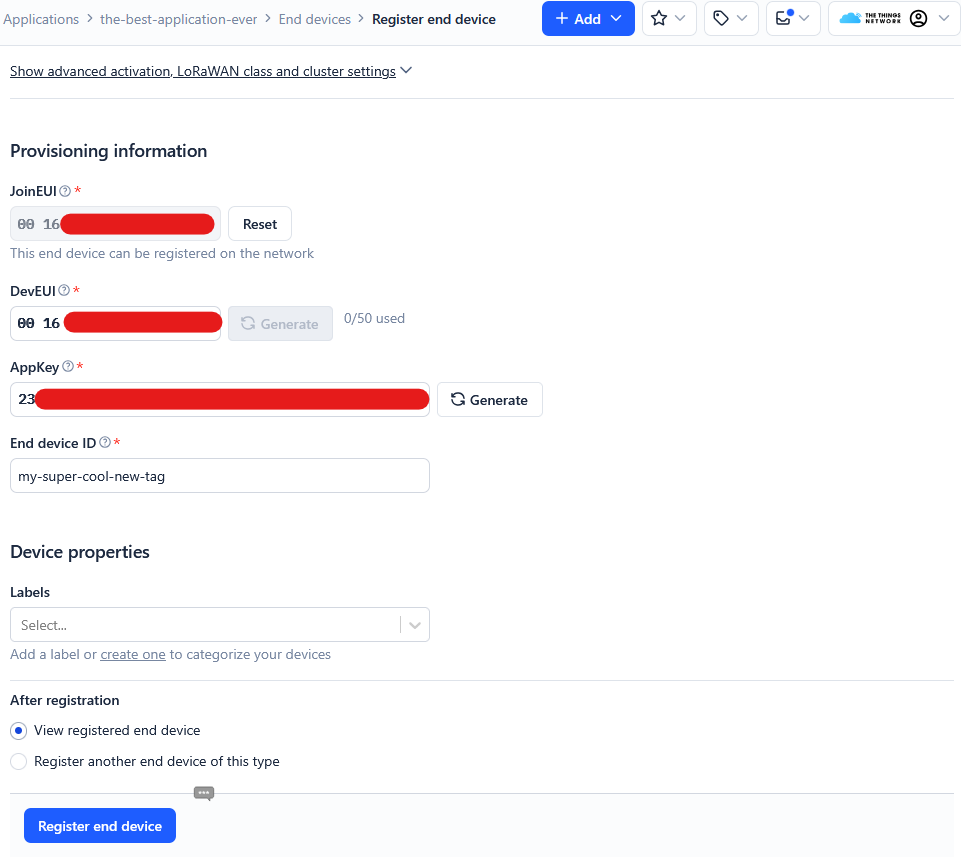
- Input "JoinEUI" from the label, "Confirm" it;
- Input "DevEUI" from the label;
- Input "AppKey" from the label;
- ID/name your tag;
- Click on "Register end device".
Enable decoder
If you skip this step, TTS portal will only display "raw hex" payloads.
In order for the server to display the tag's data in a readable/understandable format, it first needs to be able to "decode" the payloads it receives. You can input decoder script in the "Payload formatters" section under the newly created tag options:
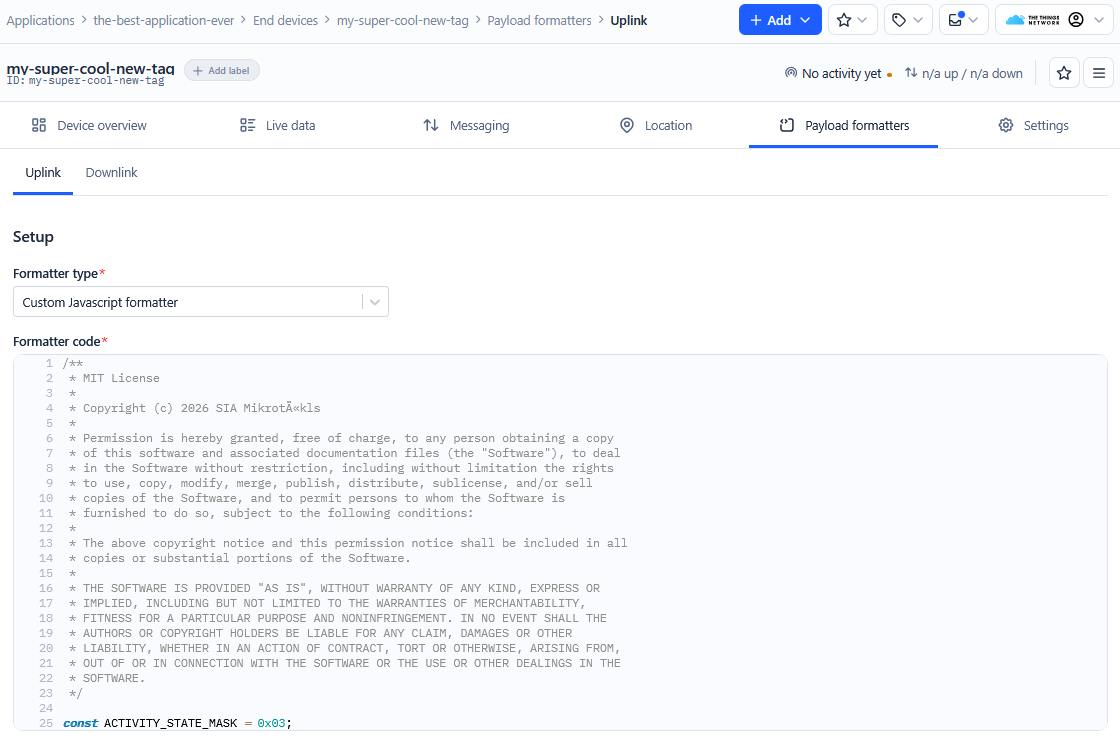
- Select "Custom Javascript formatter";
- Copy/Paste the content of the provided script tg-lrx2-2.0-ul-dec.js into the "Formatter code" field and "Save changes".
Power on the tag
Please check our full guide on the TG-LR options.
From the get-go, the tag will be in the "Shutdown" mode (sleeping).
To activate it, check our Quickstart Guide, and simply hold the magnet against the reed switch for about ~1.5 seconds until you see x2 LED blinks (after which remove the magnet).
Node registration verification
As soon as the node gets powered on, it should start attempting to join the network.
End device will send "Join-request" packet and will expect "Join-accept" in return.
In RouterOS, you can see the exchange in the "IoT>LoRa>Traffic" tab:

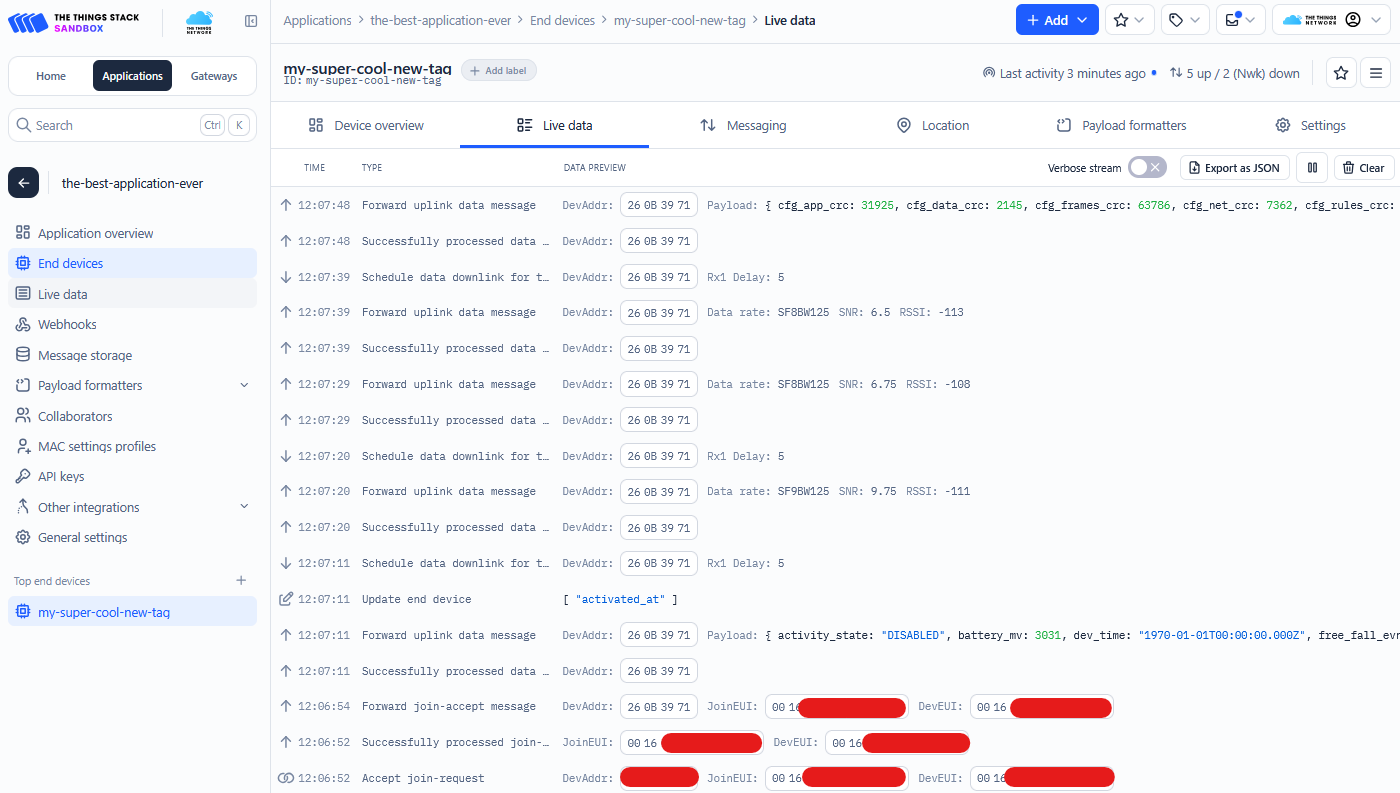
Lastly, you should be able to confirm registration per the TTS logs: